Google Chrome is the favorite browser for most of the users out there. One of the most tempting features of Google Chrome is the autofill feature. Most Chrome users take the advantage of Chrome autofill, with or without knowing the Chrome autofill definition. Autofill on Chrome is the feature, which automatically fills the contents of the certain textboxes, typically address and credit cards. Thus, if you fill up a lot of forms with the same information every time, Chrome autofill settings can make your work simpler by doing things for you. It can hence lift your productivity. The auto filling of Credit card information can also be helpful to purchase things quickly, without the need of pulling out the credit card out of your wallet.
Thus, Chrome autocomplete is a boon for the users of Chrome. In most cases, the autofill entries will be automatically added depending upon what you enter in the forms. But you can even add new entries, or modify existing entries, just in case you need to modify that. Autofill settings can be modified on all the platforms where Chrome is supported. But I will be discussing the way to modify the Chrome autofill settings on Windows and Android. If you are complaining about Chrome autofill not working, you can even find the solutions here, as well.
So without further delay, let’s get started and see how to enable or disable the Google Chrome autocomplete settings.
Change Google Chrome autofill settings on Windows
- Open Google Chrome on your computer. Tap on the 3-dot menu on the top right corner of the screen, and click on ‘Settings’

- Now click on the hamburger menu (the menu with three lines), and expand the ‘Advanced’ menu. Click on ‘Passwords and forms’.

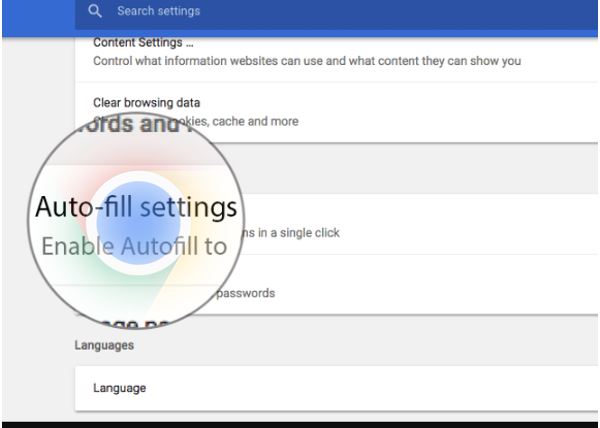
- Now click on the option saying ‘Autofill settings’.

- You can switch the Autofill feature on or off, by toggling the button saying ‘Autofill forms’.

- If you are looking for how to set up autofill on Chrome, you can set up autofill in Chrome from here, or can even change or delete the existing entries for autofill. Just beside an entry, click on the triple-dot menu and click on ‘Edit’ to update the entry with some new information. Once you are done doing the changes that, click on ‘Save’.

- If you want to delete autocomplete chrome entry then click on ‘Remove’ to remove that selected entry.
- You can even add new entries by tapping on ‘Add’. Presently you can add addresses and credit card entries on Google Chrome.
That was all about how to set up or change autofill settings on Chrome on Windows.
It is even possible to change the autofill settings on Chrome from Android. The steps are super simple for changing autofill settings Android, as well.
Change Google Chrome autofill settings on Android
- Just like Windows, open Chrome, tap on the triple-dot menu, and then on ‘Settings’.

- Now in the menu that appears, tap on ‘Autofill and payments’.

- To disable or enable autofill, you can toggle the ‘Auto-fill forms’ button.

- In the next screen, you will have to choose the type of autofill setting which you want to edit, remove or delete. There are two options, viz. Address and Cards.

- I will be choosing ‘Addresses’ for this tutorial. Just tap on that, and then tap on the particular address, which you want to change.

- Once you are done changing, tap on ‘Done’. You can even tap on the bin icon on the top right to delete the autofill entry.

- To add a new entry or address, just tap on ‘Add address’.

Thus, it is super easy to edit, delete or add Google autofill Android. The same is applicable for other platforms, as well.
Are you still facing troubles with the Chrome autofill Android or Windows? Please let me know about it in the comment section down below. I will surely help.
You might also like to see:
- How to use the inbuilt password manager in Google Chrome?
- Change Language in Windows 10 systems
- What are the advantages and disadvantages of credit cards?
- Top 7 but best Chrome extensions everybody should use
- How to turn off push notification requests from various websites on Google Chrome and Mozilla Firefox
Related Posts
How to create QR codes on Google Sheets for URLs or any other text elements
How to set Gemini by Google as the default Android assistant
Google’s new AI Content Moderation Policy for Play Store Apps
Google Meet now offers Full HD streaming for group video meetings
Googlе and Applе Facе Finеs of Ovеr $50.5 Million for App Storе Violations
Google’s new update allows Android users to delete up to 50 emails at once in Gmail with the “Select All” option