Are you thinking to run a virtual machine on another computer’s VirtualBox, remotely? Then here is the solution in the form of client, known as RemoteBox (Open Source VirtualBox Client with Remote Management). Indeed Virtualbox Web GUI phpVirtualBox is there but it has not been updated for a very long time, thus not helpful, anymore.
Well, if you ask me where this VirtualBox client RemoteBox is really going to help? Then I will say on headless servers where you want to up and run VMs. Yes, because on GUI servers you will already have the default user interface for this popular Oracle application but on headless servers (without GUI) it becomes cumbersome to execute multiple VBoxHeadless commands for creating and managing Virtual Machines.
What is Headless mode?
Headless mode is a configuration mode of a system. In this mode, the system lacks a graphical user interface and works with or without display device, keyboard, or mouse support. The Headless mode works especially for server-side programmers. Because headless servers usually get their input from a network or serial port. For example, web services running servers only need a client (such as the browser with the associated display device, keyboard, and the mouse) to get the data input.
In the same way, the software are also available in headless mode, when we use VirtualBox without GUI, it will be known as headless VirtualBox mode that can be managed using tool VBoxHeadles that allows our virtual machine to connect and manage remotely by tools like phpVirtualBox GUI using an IP address.
What is RemoteBox?
RemoteBox is a VirtualBox client that provides an advanced GUI interface for remotely accessing, managing and controlling VirtualBox running virtual machines.
This VirtualBox remote management tool is a cross-platform opensource software that supports Linux, Solaris, Mac OS X, Windows and various modern flavours of BSD. In the same way, it also can manage and provide GUI to any VirtualBox running on different platforms such as Linux, Solaris, Mac OS X, Windows and FreeBSD.
The RemoteBox usage and functions are almost like the native Oracle VirtualBox interface. For example, the way we start virtual machines and directly shut them down on this tool is the same as VirtualBox standard installation and can be executed through RemoteBox remotely. If you need to suspend the operation of the virtual machine or store the state of the virtual machine, there is also room for that.
Moreover, we can set up the BIOS before officially enter the operating system screen, the setting of more advanced options such as paging technology, CPU hot-swap, etc. can also access via RemoteBox GUI interface for VirtualBox. The story doesn’t end here, do you want to connect USB devices to remote server or Desktop running VirtualBox, that is possible too. Just insert the USB or Pen drive into RemoteBox installed OS and connect that to Host OS virtual machine created by VirtualBox.
Key features of RemoteBox VirtualBox GUI management tool:
- Remote Virtual machine configuration.
- Power On, Shutting down, pause and save the state of remote VirtualBox Guest VMs.
- Create a new virtual machine in wizard mode.
- Create, delete, and restore Snapshots.
- Manage media files such as CD/DVD ISO images.
- Installing OS using the local ISO images
- View the virtual machine logs.
- VMs Boot configuration
- Global network configuration.
- Import/export virtual machines, etc.
- And more…
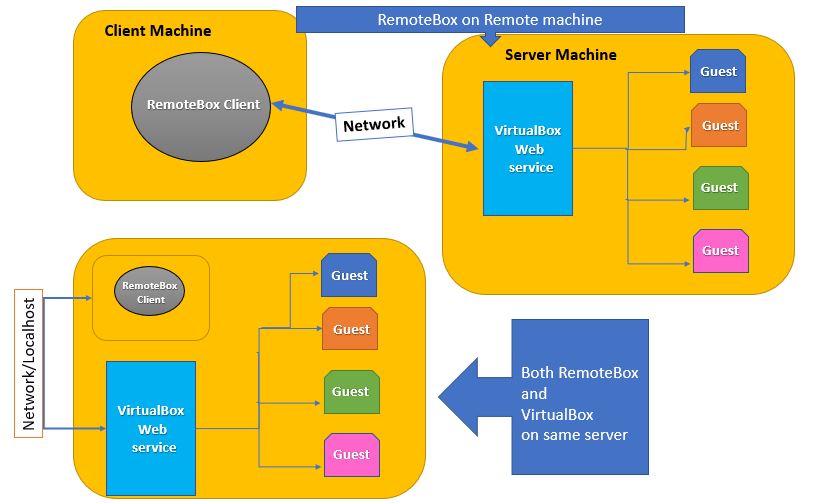
RemoteBox VirtualBox remote management network working Diagram:
Install VirtualBox On Server
The first thing we need on our servers to use the RemoteBox client is the VirtualBox installation. We already have done a couple of articles, where we have shown its installation, here are the links of those tutorials: Ubuntu or Debian, CentOS/RHEL 8, CentOS 7/6/5, Windows 10/8/7 and more VirtualBox articles.
Configure VirtualBox Web Service
Go on your server and first set up the user group:
sudo useradd -m vbox -G vboxusers
sudo passwd vbox
vbox is a user that we have created and added in the VirtualBox user group so that it can access all its services but not other system services and the same user we will use in RemoteBox. We have done this to ensure security.
Create a configuration file for Virtual Web Service :
vi /etc/default/virtualbox
Copy and paste the following line and add their corresponding values.
VBOXWEB_USER=<myuser>
VBOXWEB_TIMEOUT=0
VBOXWEB_HOST=<ip>
Replace <myuser> with your server user that we have created above.
We have are not adding password in this file to again for security reasons, although you can add it, the value for it is- VBOXWEB_PASSWD=password.
Replace the password with the one you have assigned for the Virtualbox user. Furthermore, <ip> value will be replaced by the Ip address of your remote server where you have installed the VirtualBox.
In our case the above line and their values were like this:
VBOXWEB_USER=vbox
VBOXWEB_TIMEOUT=0
VBOXWEB_HOST=192.168.43.74
After the installation of VirtualBox on your respective operating system move to RemoteBox setup.
Once you did above configuration, enable and starts its web services:
systemctl start vboxweb-service
systemctl enable vboxweb-service
Install RemoteBox to remotely access VirtualBox VMs
Installing Dependencies:
To install RemoteBox on CentOS or RHEL or Oracle Linux, first get the dependencies:
yum -y install perl-Gtk2 perl-SOAP-Lite perl-libwww-perl freerdp tigervnc
For Fedora no need to add anything, it comes in default repository.
dnf install RemoteBox freerdp tigervnc
If you are using Ubuntu/Debian/LinuxMint/ElementaryOS kind of Linux Distros then use the below commands to install dependencies.
sudo apt-get install libgtk2-perl libsoap-lite-perl freerdp-x11 tigervnc-viewer
Installing RemoteBox VirtualBox remote management tool
Go to the download page of this remote virtual machine management tool and download its tarball file. From here, the installation and configuration steps will be the same for CentOS or Ubuntu-based OS.
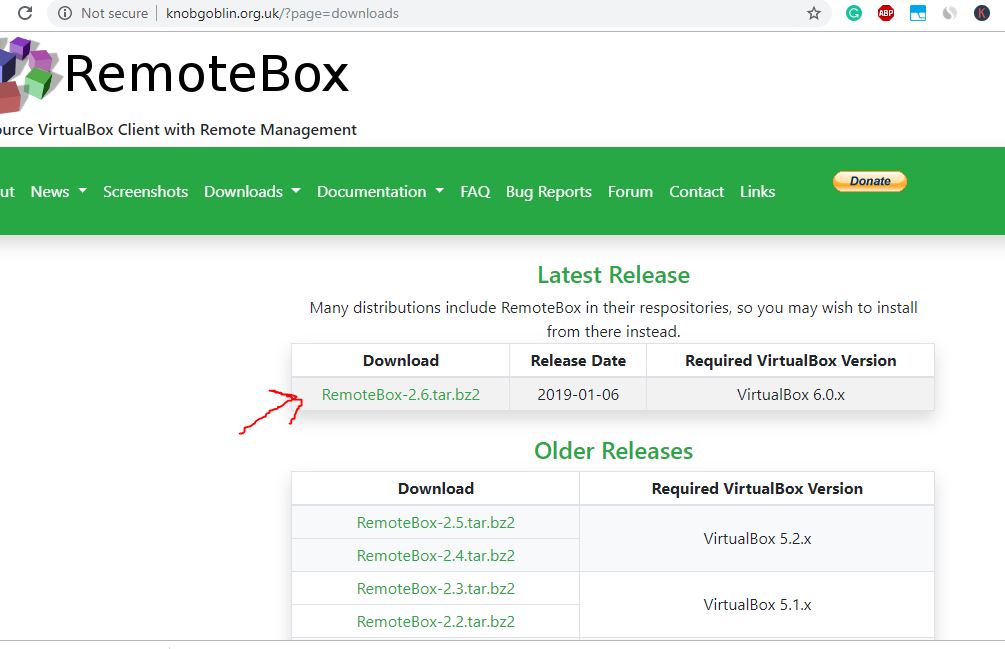
- I am installing the latest version compatible to VirtualBox 6, however, you can get other versions as per your requirements.
- You can either directly download its tarball file from a browser or copy its link and use in Terminal with wget command.
For example:
wget http://knobgoblin.org.uk/downloads/RemoteBox-2.6.tar.bz2
After getting the Tarball file, unpack it:
sudo bunzip2 RemoteBox-2.6.tar.bz2
sudo tar -xf RemoteBox-2.6.tar
cd RemoteBox-2.6
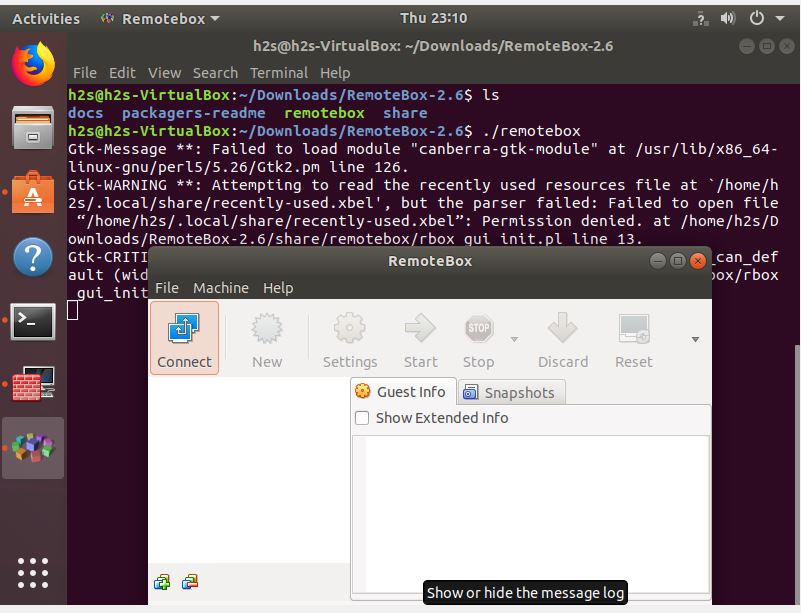
Run it:
sudo ./remoteBox
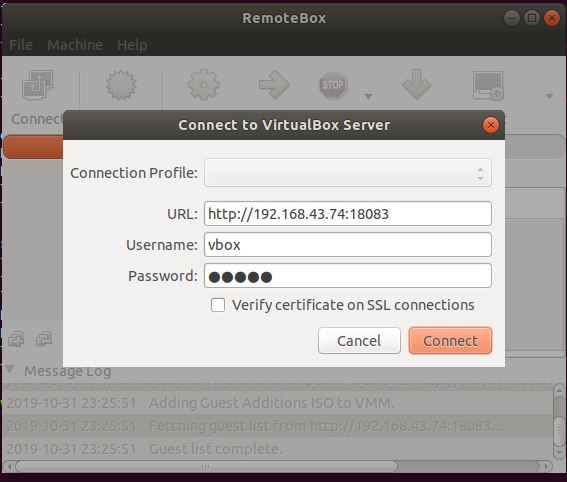
Connect Remote VirtualBox to RemoteBox GUI interfaced Client
- Click on the Connect button.
- Enter the IP address of your Virtualboxservices installed server along with ports number 18083. Example: http://0.0.0.0:18083 and for localhost- http://localhost:18083.
- Give your username and password which we have created above for VBox services and click on the Connect button.
Now you will see a familiar interface, to create a new Virtual Machine on RemoteBox follow the below steps:
- Give some name to VM which you about to create so that it would be easy to remember.
- Select OS family- Linux, Windows, FreeBSD…
- A version of the OS you are about to install
- RAM or Memory allocation using the slide bar.
- Amount Virtual Hardrive storage you want to give your Guest operating system or VM.
- Virtual Disk Format
- Select Dynamically allocated. It expands the image file as per need. Its size increases only as the capacity of the client system when storing data on the virtual hard disk increases. Therefore, the dynamically expanding image file is initially small on the host hard drive and then only increased to the size of the data it is populated.
- Last, click on the Create button.

Installing Operating system
Access CD-ROM or DVD-ROM:
- If you have just created an empty VM, in order to install the guest operating system, you may want to start it via CD-ROM or DVD-ROM.
- To use physical CD or DVD media in order to install a guest operating, click on the Settings button given in the Menu and select Storage option.
- Go to the “Empty Drives” and select it.
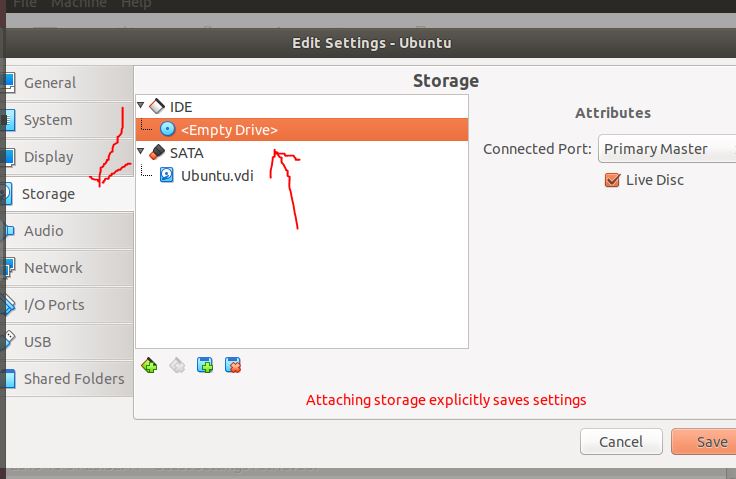
- Now click on the floppy+ icon given at the bottom and select the empty drive of your system or server drive, if it has the DVD/CD drive. Also, don’t forget to select the Live Disc option.
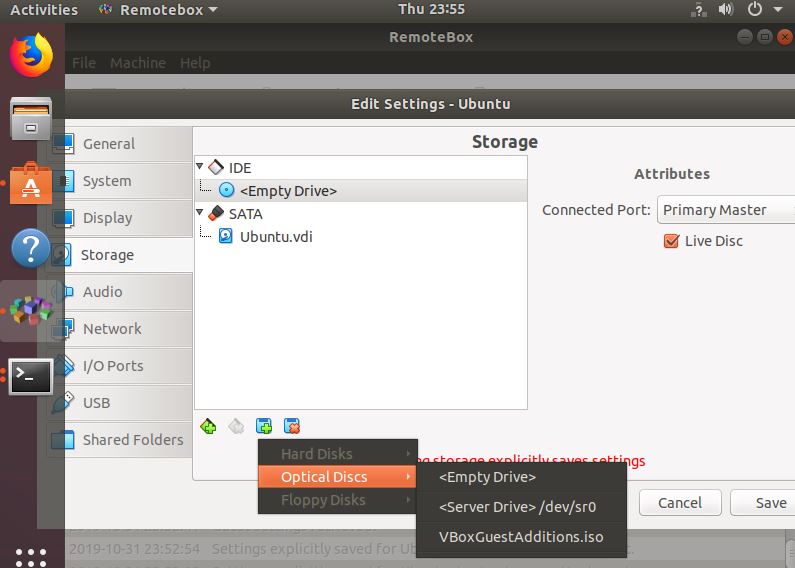
- Afterwards, the physical disc you put in your CD-Rom will be able to access by the Virtual Machine.
How to use ISO image to RemoteBox
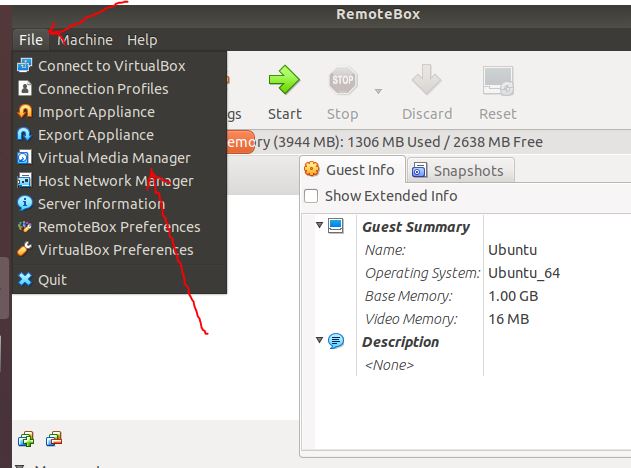
- Most of the time we use ISO image to install VMs Guest OS, thus, to access your downloaded bootable ISO images with this VirtualBox remote Management tool; go to File menu of RemtoeBox and select VirtualBox Media Manager.
- Select Optical Discs Tab and then click on the Add button cum option given in the menu. It will open file explorer, now navigate and select ISO image you have download and resided on your client system. After that press the OK button.
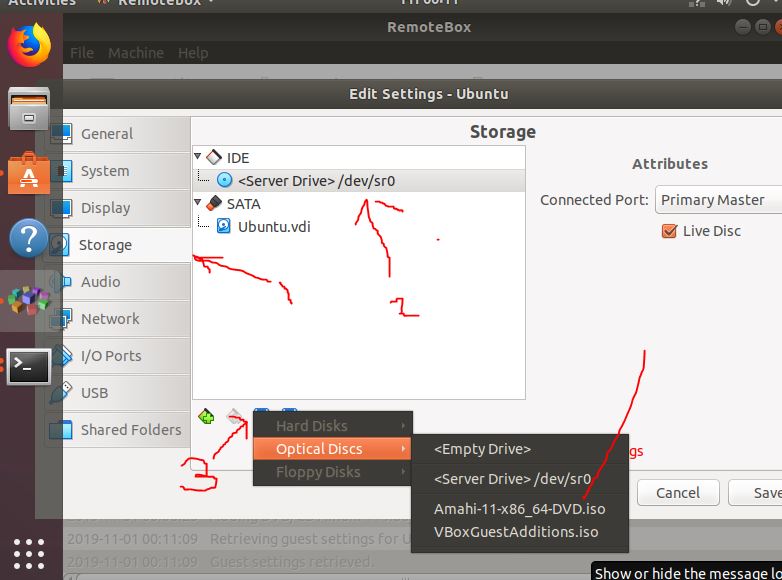
Here we are selecting the Amahi DVD ISO image, for demo.

Now, Again go to Storage->Select EMPTY Drive icon-> Click on the floppy+ icon given at the bottom the Optical Disc and the added ISO file image. Finally, click on the Save button.
After the setting is completed, you can start the virtual machine by pressing the “start” button. Subsequently, Virtual Machine gets started, follow the OS installation wizard to complete it. In this way, we can this Virtualbox remote management tool to remotely create, access and manage Virtual Machines.
Related Posts
How to enable Virtualbox nested VTX/Amd-V on Windows 10/11 or Linux
Windows XP ISO installation on Windows 11 using VirtualBox
Convert VMware Workstation Pro Virtual machine to use in VirtualBox
How to install MX Linux on VirtualBox VM
VirtualBox Vs Vmware Virtualization software Comparison
How to install Windows 95 Virtual machine on VirtualBox