Vmware Player and VirtualBox are popular ways to run virtual machines on Linux however they are Type-2 Virtualizaer which uses OS to communicate kernel. Whereas to get almost native speed, we can use Linux KVM stands for Kernel-based Virtual Machine. The KVM kernel module has been included in Linux since version 2.6.20 of the Linux kernel.
Let’s see the steps to install KVM on Rocky Linux, CentOS, or AlmaLinux 8 and Virt Manager a GUI to manage virtual machines running on it.
You might be want to know the steps to install VirtualBox on Rocky Linux 8 as well.
Requirements-
- A non-root
sudouser access - Virtualization enable in BIOS
Steps to Install KVM on Rocky Linux 8
The steps and commands given here will also work for Almalinux, CentOS 8/7, and REHL Linux distros.
1 .Run system Update
To refresh the system cache and update the existing system packages, open command terminal and run update command-
sudo dnf update
2. Check Virtualization is enabled on the system or not
Most of the modern CPUs come with Virtualization support and the same is also enabled to use in the Motherboard BIOS. Hence to ensure that let’s run a command on the terminal.
cat /proc/cpuinfo | egrep "vmx|svm"
If the Hardware virtualization is enabled then for Intel CPU you will get VMX in the result and for AMD – SVM.

3. Command to install KVM on Rocky Linux
The packages to install the Kernel Virtualization machine on Rocky Linux is available in its official repository thus we don’t need to add any third-party repo to it. Simply run the below command and it will be on your system along with other KVM management tools.
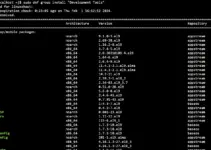
sudo dnf install @virt virt-top libguestfs-tools virt-install
Start and Enable libvirtd Daemon
sudo systemctl enable --now libvirtd

4. Command-line to create a KVM virtual machine
Although we can use a Graphical user interface to easily create virtual machines, we learn that later. Here let’s see the commands that we can use to create VM using our terminal.
Create Virtual Disk-
qemu-img create -f qcow2 /var/lib/libvirt/images/mint.qcow2 30G
Note: In the above command change the bold items that are: mint– a name of Virtual hard disk we want to create and 30G is the space we want to assign to it.
Command to configure Virtual machine and to install Guest OS using ISO file-
 sudo virt-install \
--virt-type kvm \
--name Linuxmint \
--ram 2024 \
--disk /var/lib/libvirt/images/mint.qcow2 \
--network network=default --graphics vnc,listen=0.0.0.0 \
--noautoconsole \
--os-type=linux \
--os-variant=generic \
--cdrom=/home/h2s/Downloads/linuxmint-20.1-cinnamon-64bit.iso
Note– Change the bold values in the above command as per your requirement. For example, here we are installing LinuxMint OS on our Guest VM running on KVM using CLI.
–name– Type the name you want to give your VM
–ram– the amount of Memory want to assign to Guest OS.
–disk– the path of the disk we have created using qemu-img command
–cdrom– Path of ISO file which we want to use to install Guest operating system

To view the GUI interface of VM, you can use VNC Viewer such as TigerVNC.
sudo yum install tigervnc
Check the VNC Display port number for running VM
sudo virsh vncdisplay your-vm-name
Open Installed TigerVNC and type the IP address of your host where KVM is has been installed along with the port.

5. Now some other helpful Vrish commands to manage created Guest VM
To see all the installed VMs
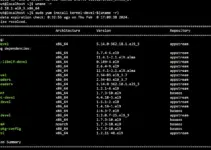
sudo virsh list --all
To Stop running VM
sudo virsh stop VM-name
To Start
sudo virsh start VM-name
To save the current state of a running VM
sudo virsh save vm-name vm-name-save
To restore saved VM
sudo virsh restore vm-name-save
Reboot
sudo virsh reboot vm-name
Suspend/Pause Virtual machine
sudo virsh suspend vm-name
Resume
sudo virsh resume vm-name
Shutdown
sudo virsh shutdown vm-name
Delete
sudo virsh destroy vm-name
To connect Console
sudo virsh console vm-name
Install Virt-Manager on Rocky Linux to Create KVM VMs using GUI
So far, we talked about command interface to operate the virtual machines, however, after installing KVM we can also use a graphical user interface with the help of Virt-Manager.
1. Virt-Manager installation command on Rocky Linux
The packages we need are already in the AppStream repo of Rocky Linux, thus just simply run the below command to get it on your system-
sudo dnf install virt-manager
2. Create Virtual Machines on Rocky Linux
Whatever VMs you have created so far will also show on the Virt-manager to manage them. Using this Graphical user interface we can perform various tasks such as create, delete, view, stop, and more for VMs.
Let’s see the steps to set up a Virtual machine using Virt-manager
1. New Virtual Machine
On Virtual Machine Manager, click “File” in the menu and select “New Virtual Machine“.

2. Choose how you would like to install the operating system.
Most of the time we use ISO images to install the guest operating system. Thus, select “Local install media (ISO image or CDROM)” and click the “Forward” button.

3. Choose ISO file and Operating system type
Hit the Browse button, click on the + icon given for Volumes and select the ISO file. And after that “Select OS type “Generic default”.

4. Choose Memory and CPU Settings
As per your virtual machine’s OS requirements set RAM and CPU.

5. Create a disk image for the virtual machine
Increase or decrease the amount of storage you want to add for a Virtual disk.

5. Name your Virtual machine and finish the installation

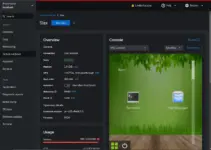
6. Open running KVM to view its GUI or CLI interface
To get the graphical user interface or console view, select VM and then click on the Open button.