Installing Apache on an Amazon Linux 2023 instance running on an EC2 instance or locally in your server environment is quite easy, we need to execute a single command using the DNF package manager. Like RHEL and other RPM-based Linux, Amazon Linux also offers the Apache HTTPD server packages right from its default system repository. Therefore, without wasting any further time let’s see the steps and commands involved in installing the popular Apache HTTP web server on Amazon Linux 2023 to host websites and applications.
Step 1: Access the AL2023 Terminal
Now, if you have installed the AL2023 on the AWS Ec2 instance we can use the SSH either directly from the EC2 Dashboard or with the help of the local CMD/terminal and the Private key. If you are using the local terminal then here is the command to follow, replace key.pem with your actual key file and ec2-user@your-instance-ip with your instance’s user and IP address:
ssh -i /path/to/your-key.pem ec2-user@your-instance-ipStep 2: Update Package list
After having terminal access to your Amazon Linux via SSH, run the system update command first to ensure the system applications are in their latest version and it also refreshes the DNF package list.
sudo dnf update -y
Step 3: Install Apache on Amazon Linux 2023
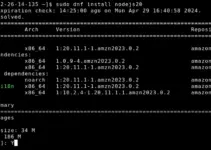
Like any other Linux distro based on RHEL or Fedora, we can also use the DNF package manager on Amazon Linux to install the popular Apache web server, available through the default system repository as an “httpd” package. The given command will install Apache along with other required dependencies on AL2023.
sudo dnf install httpd
Step 4: Start and Enable HTTPD Service
With the completion of the previous step’s command, the Apache web server will be installed in your system. However, the system may not start its service automatically, therefore to do that, use the given command:
sudo systemctl start httpdWe also need to enable Apache, so it can start automatically in case the user reboots the server.
sudo systemctl enable httpdStep 5: Configure the Firewall
To access the website running using the Apache Web server two ports are required, one is 80 (HTTP) and another 443 (HTTPS), and both must be whitelisted in your system or cloud firewall. Therefore, if you have an active firewall we need to open these ports to allow web traffic to our server. Cloud users of AWS need to open the ports in the service provider’s firewall.
For HTTP (80)
sudo firewall-cmd --permanent --add-service=httpFor HTTPS (443)
sudo firewall-cmd --permanent --add-service=httpsReload Firewall to apply changes:
sudo firewall-cmd --reloadStep 7: Verify Apache Installation
The next step after completing the installation process, is to make sure Apache service is actively running without any errors and also it can serve website pages via the browser.
Let’s first check the service status using the command terminal:
sudo systemctl status httpd --no-pager -l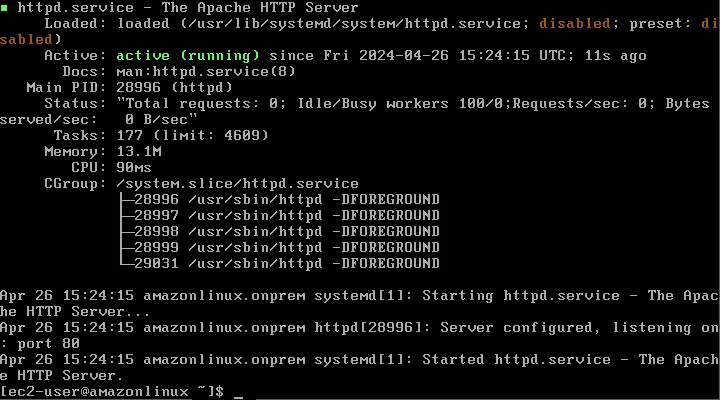
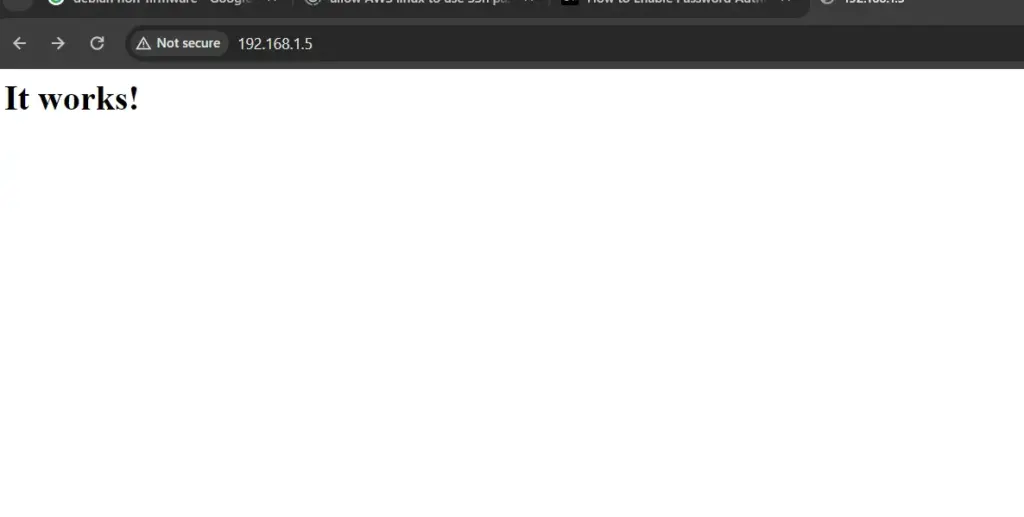
After that, if it is running as shown in the above screenshot, open your system web browser and enter your Amazon Linux 2023 instance’s public IP address (e.g., http://your-instance-ip/). You should see the default Apache test page with a message “It works!”, which confirms that the server is running and accessible.
Step 8: Apache Configuration Files
Apache’s configuration files are in /etc/httpd/conf and /etc/httpd/conf.d/. The main configuration file is at /etc/httpd/conf/httpd.conf. You can edit this file to customize the web server settings and serve the website as per your requirements. However, before making any changes always remember to back up the configuration files.
Step 9: Restart Apache After Configuration Changes
To apply the changes you have made to Apache, every time, you should restart its service to make the changes into effect.
sudo systemctl restart httpdWhereas, in case you need to stop and start the web server, the commands for that are:
sudo systemctl stop httpdsudo systemctl start httpdConclusion
So, this was the quick guide on the commands that we can use to install Apache on Amazon Linux’s latest 2023 version. Once you have Apache, the other required components such as MySQL and PHP can be installed in a similar way as well, here are the guides to follow:
- How To Install MongoDB on Amazon Linux 2023
- Installing MariaDB on Amazon Linux 2023
- Installing MySQL 8 server & client on Amazon Linux 2023
- How to install PHP on Amazon Linux 2023 server