MySQL Database server can easily be installed on Amazon Linux 2023 using the command. It is an open-source relational database management system hence available directly from most of the Linux distro’s official package repositories. It is a widely used Database server developed by Oracle and known for its performance, reliability, and ease of use, making it a great choice for both small and large-scale projects.
Step 1: Update Al2023 Packages
It is important to update the packages of your Amazon Linux 2023 before planning to install some packages. Because running the system update command will not only install the latest available version of packages but also refresh the DNF package manager repo cache. It also allows you to find the latest versions of packages available. Therefore, access your AWS Linux command terminal and run the given command.
sudo dnf updateStep 2: Download MySQL Yum repository
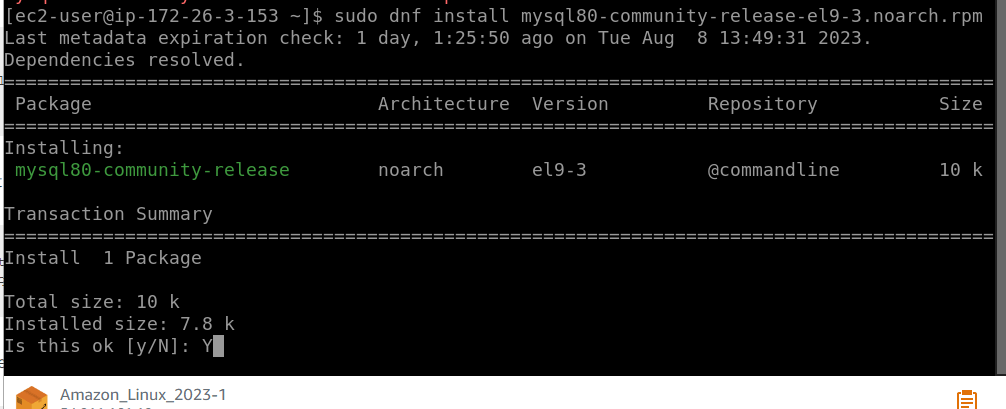
Like many other Linux systems, MySQL is not anymore available to install directly using the default system repository of Amazon Linux 2023 as well, instead, MariaDB is. Therefore, you can prefer MariaDB, however, if you specifically need the MYSQL then first we manually need to download its YUM repository from the Oracle website. To make things easy, here is the command to follow:
wget https://dev.mysql.com/get/mysql80-community-release-el9-3.noarch.rpmIf you don’t have the wget tool then get it using – sudo dnf install wget
Step 3: Install MySQL 8 on Amazon Linux 2023
Once the MySQL Yum repository is added to your Amazon Linxu 2023 successfully then we can install the latest available MySQL community server and client on our system.
First run:
sudo dnf updateAnd after that execute the installation command using the DNF package manager.
sudo dnf install mysql-community-server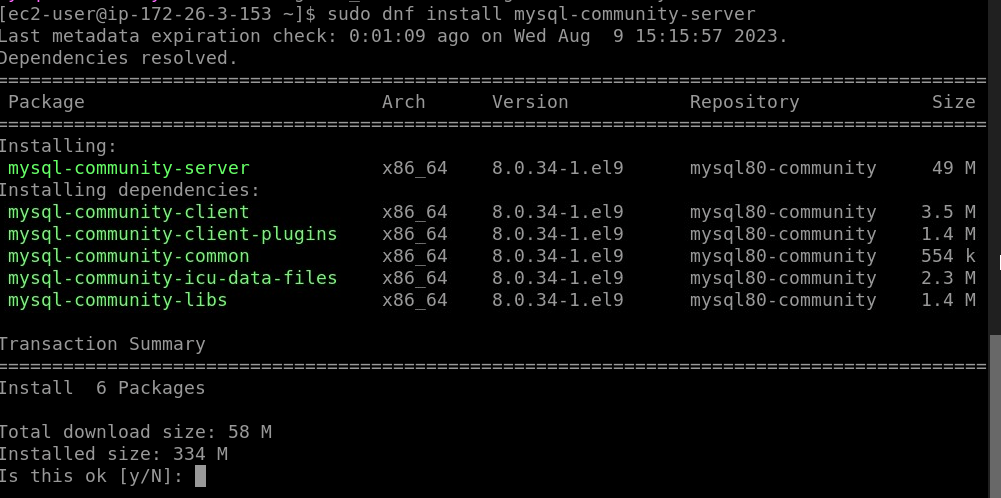
Step 4: Start MySQL Service
After the installation, start the service of MySQL and also enable it to activate automatically with the system boot or crash.
sudo systemctl start mysqldsudo systemctl enable mysqldTo check the service status:
sudo systemctl status mysqld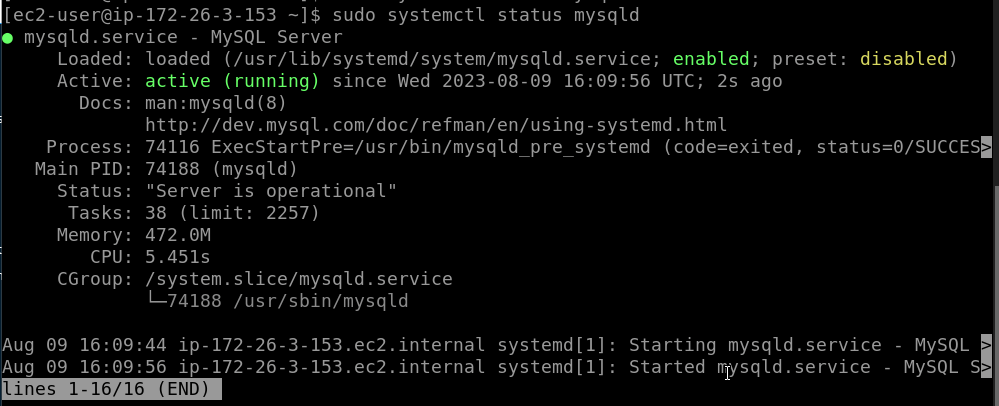
Step 5: Secure MySQL Installation
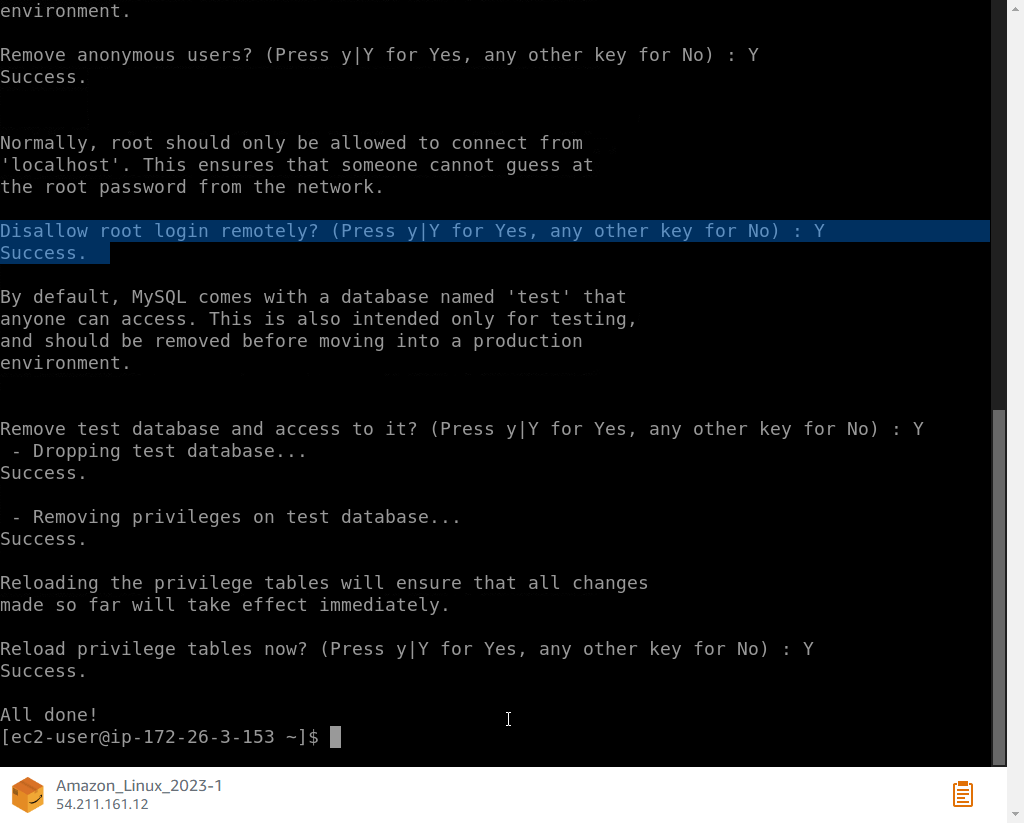
It is not necessary, initially, but if you are planning to use a Database server commercially where public users are going to access the data through it, then it s recommended to secure your MySQL installation by setting a root password, removing anonymous users, disabling remote root login, and more.
However, first find the default password set by MySQL for the root user, using:
sudo grep 'temporary password' /var/log/mysqld.logIn the output, you will see the password, copy that.
After that run the following command and follow the prompts:
sudo mysql_secure_installation -p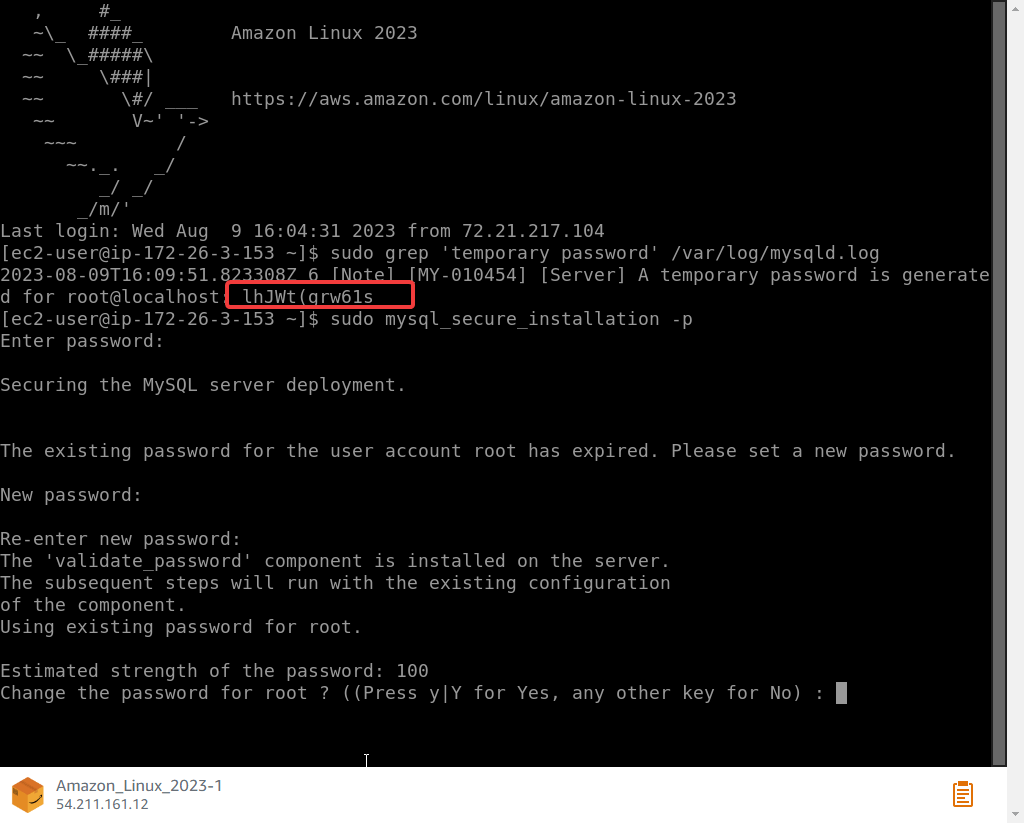
Paste the temporary password you have copied and hit the Enter key.
Set a secure password, after that, the system will ask you to check the strength of the password to validate it, you can press Y or N as per your choice. Following that pursue the wizard further to secure your MySQL Database server instance on Amazon Linux 2023.
Step 6: Access Database CLI
To access the MySQL command-line interface, use the following command:
mysql -u root -pYou’ll be prompted to enter the root password you set during the secure installation step.
Step 7: Create a New MySQL User (Optional)
For security reasons, it’s recommended not to use the root user for everyday tasks. Instead, create a separate user with appropriate privileges. While in the MySQL command-line interface, run the following commands to create a new user and grant them privileges:
CREATE USER 'yourusername'@'localhost' IDENTIFIED BY 'yourpassword';GRANT ALL PRIVILEGES ON *.* TO 'yourusername'@'localhost' WITH GRANT OPTION;FLUSH PRIVILEGES;Whereas, in the future, if you want to change the root user name again, can use the command:
ALTER USER 'root'@'localhost' IDENTIFIED BY 'newpassword!';Replace ‘yourusername‘ with your desired username and ‘yourpassword‘ with your chosen password.
Conclusion
So, this was the way to easily install MySQL on Amazon Linux 2023, if you just start working with this updated version of AWS Linux. Whether you’re building web applications, data-driven systems, or any other software requiring a reliable database, MySQL offers a robust solution with a proven track record.