Virtual Machines in today’s world are the backbone of the server world because they make it possible to utilize highly powered servers efficiently and take every bit of their computing power at work. Well, KVM which stands for Kernel Virtual Machine available for Linux systems to run virtual machines with native speed is quite popular, and one tool that is widely used to manage KVM virtual machines with GUI is “Virt-Manager“. However, what if you don’t want to install any software locally, in that situation, a web-based server control panel solution – Cockpit, will be quite valuable.
What is a Cockpit?
Developed by Red Hat, Cockpit is free & open source and offers an intuitive web-based solution with a robust set of features to manage servers or desktops. The key benefit of Cockpit is it provides a centralized location to manage server storage, networking, virtual machines, and more, but all this using the browser only.
Features:
- Provides a web-based interface to easily manage the server and its packages locally or remotely.
- Cockpit comes with an inbuilt real-time monitoring feature to get data and graphs on the usage of CPU, memory, network traffic, and disk I/O.
- It allows the management of users, setting up of network, and other system configurations.
- Allows to install system and software updates.
- Cockpit offers modules that can be installed to enable various functions such as managing virtual machines, Docker, and Podman.
- Web-baed GUI interface after enabling the Virtualization to create, configure, and monitor virtual machines from the same interface.
- It was developed by RHEL but can be installed and used on popular Linux systems such as Ubuntu, Debian, Fedora, and others…
In this tutorial, we learn how to install and use Cockpit to manage KVM virtual machines.
Installing Cockpit on Linux
The packages to install Cockpit are available through the official repository of the all-popular Linux distros, hence here are the commands to install it on RHEL and Debian-based systems.
For RedHat/CentOS/AlmaLinux/Rocky/Oracle/Fedora and others:
#Installation command:
sudo dnf install cockpit


#Enabling the Cockpit service to run with system boot:
sudo systemctl enable --now cockpit.socket

#Allow the Cockpit to accessible remotely:
sudo firewall-cmd --permanent --zone=public --add-service=cockpit

#Reload the Firewall:
sudo firewall-cmd --reload
For Ubuntu/Debian/Linux Mint and similar Linux distros:
#Update the system:
sudo apt-get update

#Command to install
sudo apt-get install cockpit


#Enable the Cockpit to start with system boot
sudo systemctl enable --now cockpit.socket

#Allow the Cockpit to access remotely:
sudo ufw allow 9090/tcp
Cockpit Virtual Machine module installation
Cockpit will not give any option to manage KVM virtual machines by default, we need to enable that feature by installing its Virtual Machine module, here is the command to get it:
For RHEL, CentOS, and other similar Linux:
sudo dnf install cockpit-machinesFor Ubuntu/Debian:
sudo apt install cockpit-machinesAccessing Cockpit
Once installed, Cockpit can be accessed using any web browser, in the URL box enter the server IP address where you have installed the Cockpit along with the port number 9090
https://your_server_ip:9090Managing KVM Virtual Machines with Cockpit
Well, before creating and managing the KVM running virtual machines, make sure that you have installed it on the Server. If you don’t know how here are the articles to read:
- How to install KVM on Oracle Linux 9?
- How to install KVM on Almalinux 9 or Rocky Linux 9 to create VMs
- How to install QEMU/KVM on Ubuntu 22.04 | 20.04 LTS
However, if you want to verify KVM functionality can use tools like:
virt-host-validateUse Cockpit to create KVM guest VMs
Once you have installed the Cockpit along with its module to manage VMs and have accessed its web interface. Follow the given steps to create Virtual Machines:
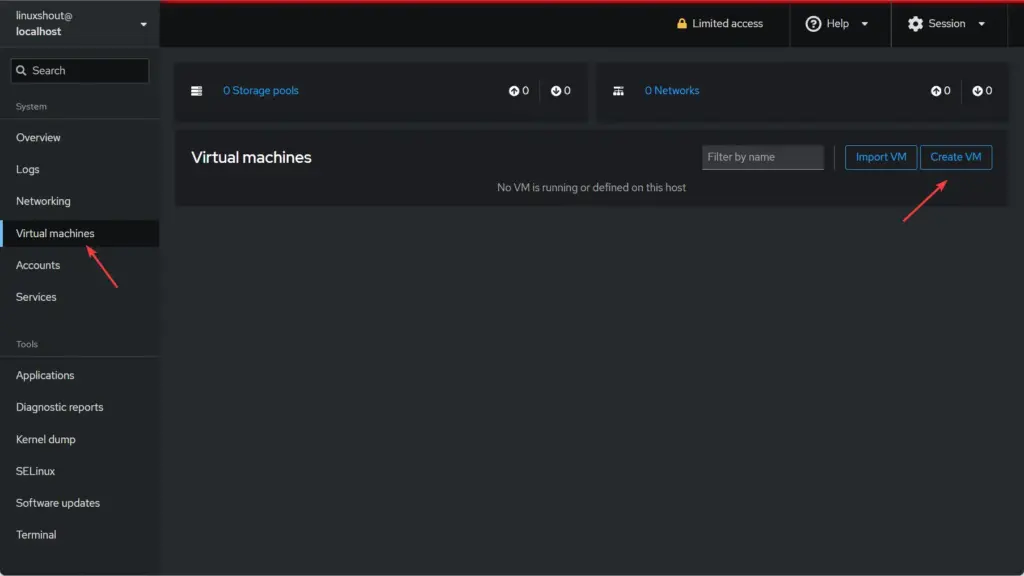
Step 1: As you have the web interface of the cockpit, click on the “Virtual Machine” option on the left side.
Step 2: After that, click on the Create VM button to create a new virtual machine on KVM.
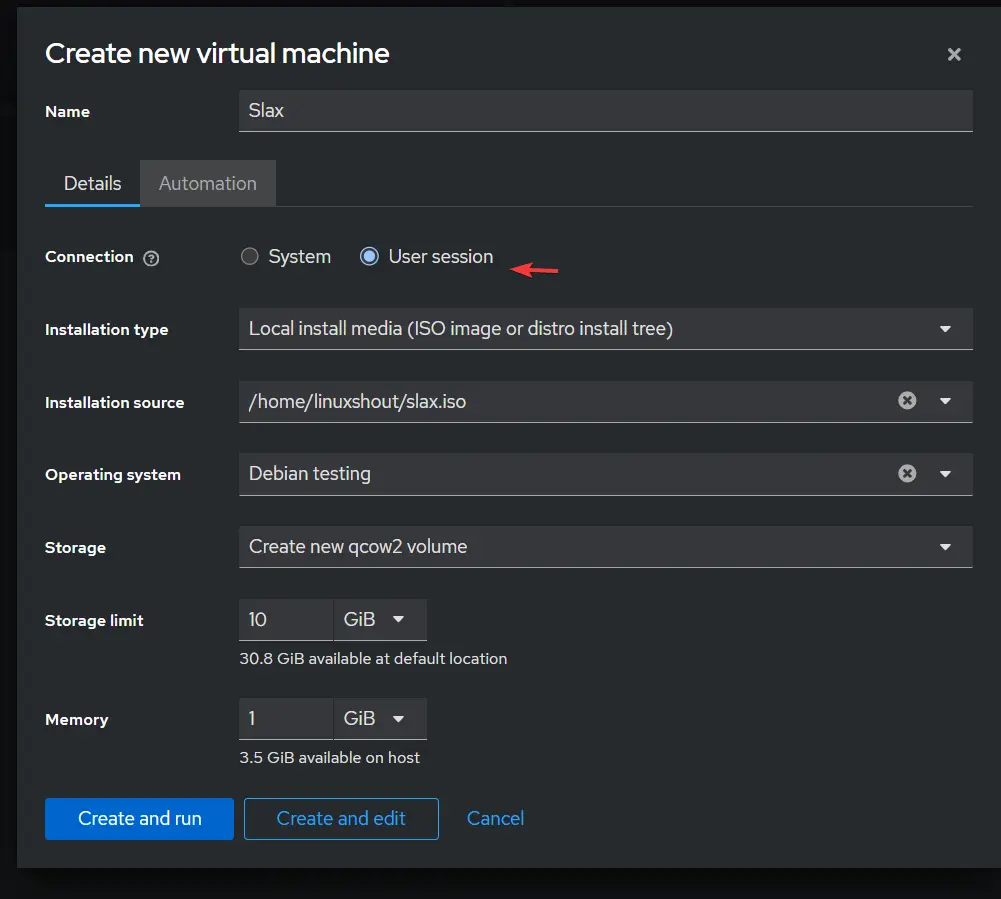
Step 3: Give some name to your virtual machine and select User session.
Step 4: Select the way you want to assign the ISO image of an OS to install. For example, if you want the system to download the ISO OS of popular distros, select the option for that, otherwise you can select the “Local Install Media” option to use an already downloaded ISO file.
Step 5: Set Installation source where the ISO image save, CPU, and Storage space
Step 6: Finally, click on Create and Run.
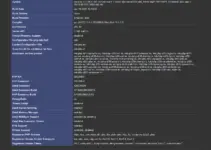
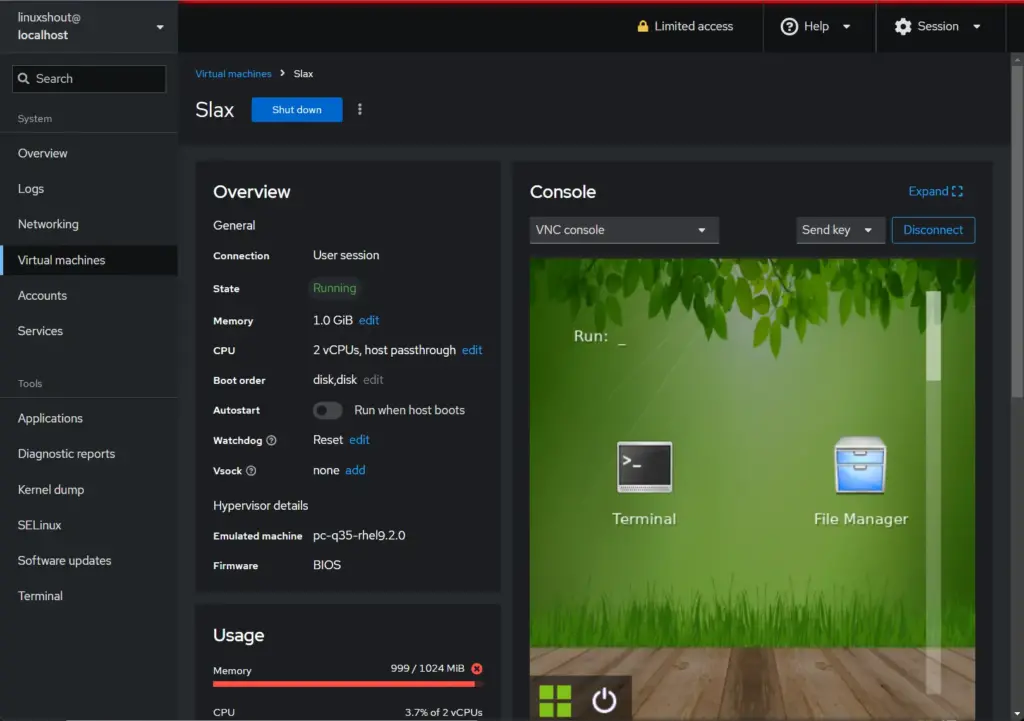
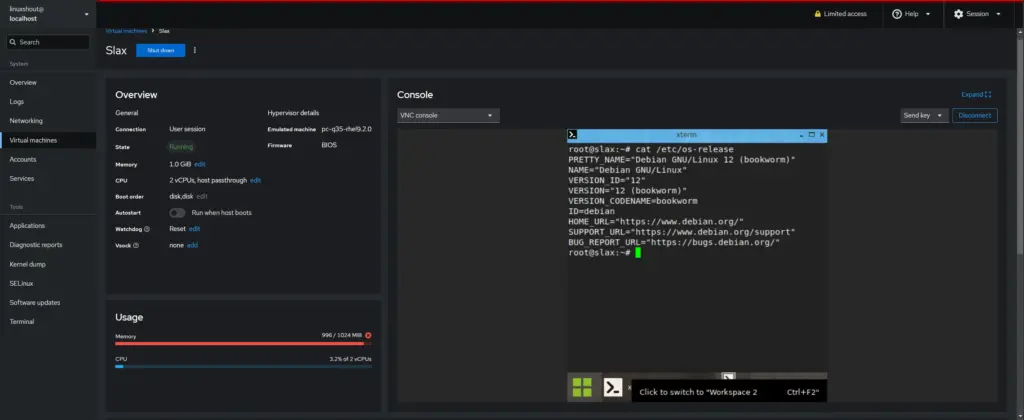
Step 7: Once the Virtual machine is created, click on its name and you will get the Console area to get direct access to the Guest OS interface as well as other things to control the VM settings.
Conclusion:
Although Virt-Manager is a popular application, however, if you are running KVM on the server without a graphical user interface then Cockpit is quite an easy-to-use option and a good alternative. Not only Virtual machines even Cockpit offers direct access to the terminal and other settings which make it your go-to tool for KVM management and unlock new possibilities for your business.
Other Articles:
- How to Install and Configure KVM on Debian 11
- How to install KVM and Virt-Manager on Rocky Linux or AlmaLinux
- What is the difference between OpenVZ and Docker?
- 7 Best Linux Server Distributions for Virtualization