Let’s find out how you can change the user agent on the Google Chrome browser or Chromium, and Mozilla Firefox, which are the most popular web browsers used by most people today.
You can find hundreds of bowsers to surf the internet, no matter which platform you are on, or which operating system you are using. Most browsers are even developed by modifying the source code of some open-source browsers like Chromium. Well, that isn’t our topic of discussion here. The web browsers vary from each other, not just because of the user interface, and the features, but the biggest difference between different browsers lie in the way each of them renders web pages. The rendering engine of different web browsers might result in a different experience of opening the same web page or website.
The option to switch to a different web browser is always the easiest option to get the best experience of viewing a webpage or website, and sometimes, most websites might even urge you to use a particular web browser, in most cases without any valid reason. Switching to a new web browser just to open a single web page or website can disrupt you when you are into something, and in such a situation, changing the user agent can be useful to trick the web server think, that you are using a web browser they want you to use. This will not work in cent percent cases but will work in most situations.
Change browser user agent for Google Chrome and Firefox
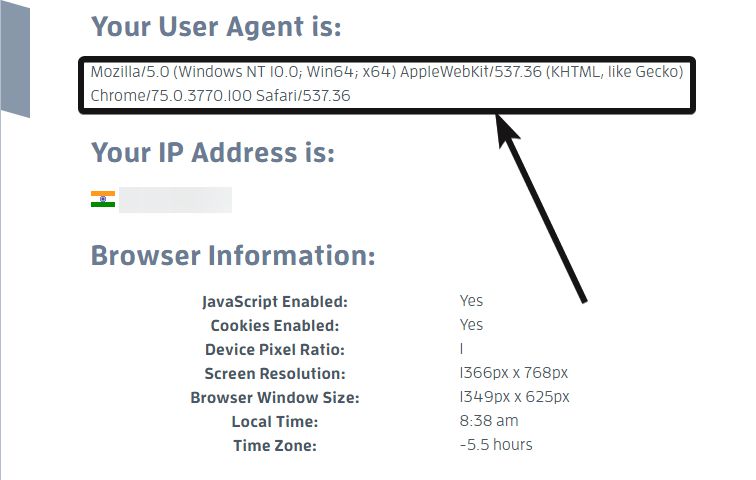
Before starting, it is worth checking out the user agent of your browser. You can see the user agent of your current browser that is visible by the websites you visit with the following link.
Browser User Agent On Google Chrome
On the PC version of Google Chrome, the user agent can be changed temporarily or permanently. With the temporary solution, the changed user agent will be applicable only on the current tab.
The temporary solution to change it.
Just open the website or visit the web page, you want to change the user agent, and hit the F12 button on the keyboard to open the ‘Developer tools’. Alternatively, you can even do it by clicking on the triple-dot menu, choosing ‘More tools’ and then by clicking on ‘Developer tools’.
Once the developer tools open up, click on the triple-dot menu under the ‘Developer tools’, hover to ‘More tools’ and then click on ‘Network conditions’.

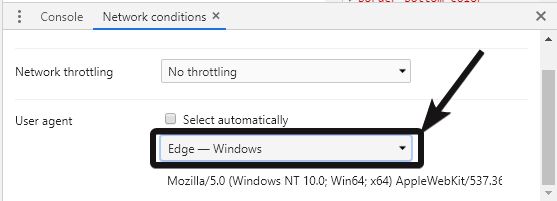
Under the Network conditions tab, unmark ‘Select automatically’ corresponding to ‘User-agent’.

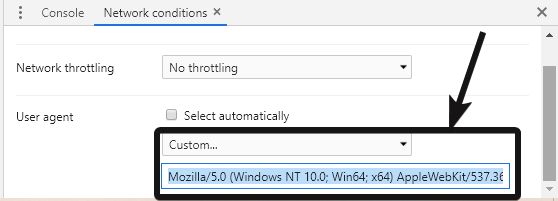
Now choose the appropriate user agent. From the list of agents available. Alternatively, you can even add your own user agent by choosing ‘Custom…’ from the drop-down menu and then by entering the user agent string, which I have discussed at the end of the article.
Now reload the web page without closing the ‘Developers tools’. You can even do that, but I will not recommend you to do that for the best results.
The web page will now load, just like the way, it will load on the browser chosen by you, on your chosen platform or operating system. My chosen user agent here is ‘Mozilla/5.0 (Windows NT 10.0; Win64; x64) AppleWebKit/537.36 (KHTML, like Gecko) Chrome/42.0.2311.135 Safari/537.36 Edge/12.10240’ or Edge on Windows 10.

But this isn’t a permanent solution. You can change the user agent permanently as long as you want on Google Chrome in another way, which should also be known to you. Here is how you can change the user agent on Google Chrome PC across all browser tabs as long as you want.
Permanent changing on Google Chrome PC
Download and install ‘User-Agent Switcher’ on your Google Chrome browser from the Chrome Web Store.
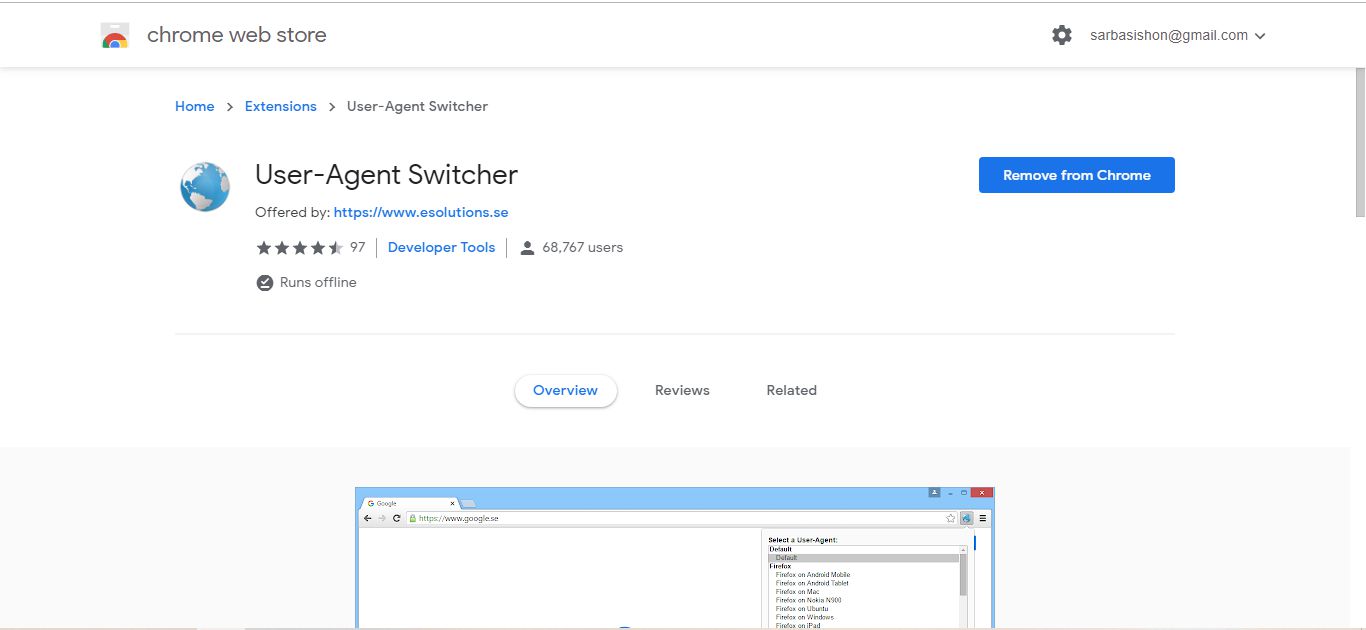
After the download and installation process is complete, click on the ‘User-Agent Switcher’ icon in the address bar area, and choose the user agent that you want to use. The current page will instantly reload with the new user agent in action.
Now just try opening any website, and it should load just the way it will load on the browser chosen by you.
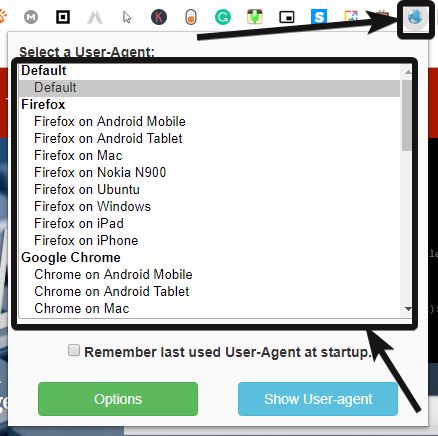
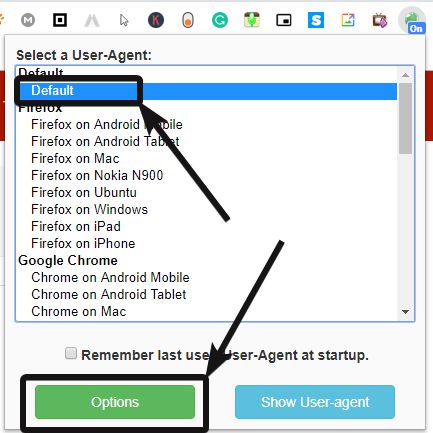
You can return to the default user agent any time by choosing ‘Default’, in the user agent selection app. Besides the entries of user agents within the app, you can add your own user agents by clicking on the ‘User-Agent Switcher’ app, followed by clicking on ‘Options’.
In the new tab that opens up, click on ‘New User-Agent’, and enter the name of the user agent, along with the user-agent ID. Now click on ‘Save’ finally to save the browser user agent, and start using it.

Changing the browser user agent on Mozilla Firefox for PC
Open Mozilla Firefox, and download the ‘User-Agent Switcher’ add-on, developed by Linder.

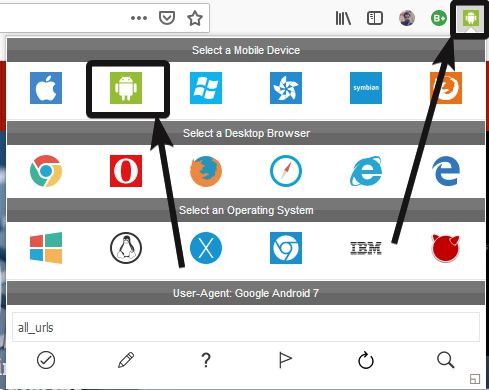
Once the download and installation of the add–on are complete, click on the User-Agent Switcher icon on the top right corner of Firefox and select the mobile device, browser, and the operating system to switch to the specific browser or user agent.
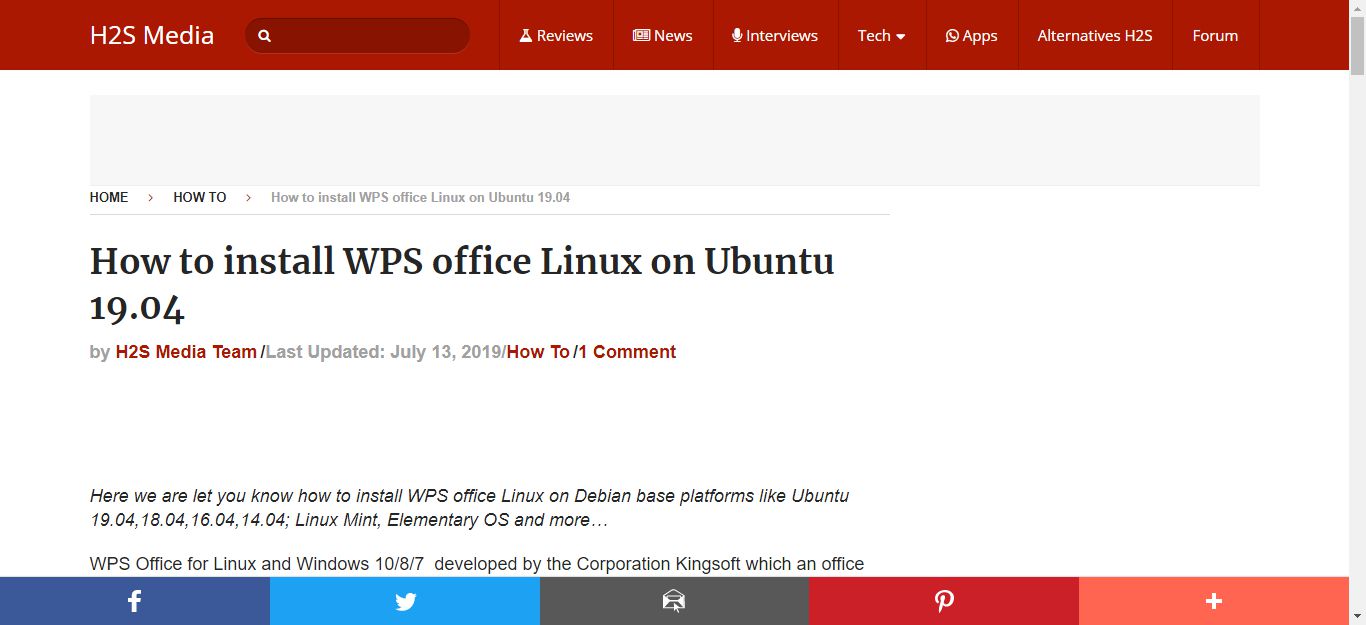
Now try loading a page, and it should load the same way, as it will be on a browser and operating system chosen by you.
To get back to the default user-agent, just click on the icon and then finally click on the tick mark.

You can alternatively copy the user-agent string, or carry out other tasks if you want. You can find a list of user agents here.
Changing the user agent for your web browser can have a number of implications, depending upon the type of work you do on a computer. Unfortunately, changing the user agent on Android web browsers requires root access, which isn’t worth the hassle just for changing the user agent of the browser, unless you need to carry out some other tasks with a rooted Android device.
So that was it. Do you have any question in mind about the tutorial? Feel free to give your views in the comment section down below.
Other Tutorials:
Related Posts
How to Reopen Closed Windows or Tabs in Firefox
How to Use the Split screen Feature in Edge Browser
Google to display only interest-based ads using a privacy sandbox
Bottom-Placed Address Bar: Chrome’s New Option for iOS Users
Google Chrome’s Web Browser Gets Several Security Enhancements
10 Best ChatGPT Chrome Extensions to Maximize Productivity