Sentora, an open-source web hosting control panel alternative to popular Cpanel/WHM built specifically to work on a variety of Linux distributions such as Ubuntu, CentOS, and more…
Cloud or VPS (virtual private hosting) servers are more popular nowadays because of the ability they provide a user to fully & easily manage the installation and hosting of various kinds of software or projects at a convenient price. However, the thing to be noted that these VPS or cloud servers, for example, Google Cloud, AWS, DigitalOcean, etc. only provides a bare server with options to install different Linux distributions with root permissions. Now it’s upon you what you want to do further on that.
Apart from developing some applications, if you are not a developer and want to host your website or blog on Cloud hosting like Droplet of DigitalOcean then definitely you miss one thing i.e popular Cpanel. Albeit you can install the Cpanel/WHM on the DigitalOcean too but for that, you have to give a license fee to Cpanel creators which are $20/month. However, Cpanel has its own benefits because of commercial support and regular security updates. But you can also choose some open-source CPanel alternatives like Sentora. Although the Sentora is an open-source control panel, premium support is available too. The benefit of Sentora is you don’t have to pay for the software or updates.
So, let’s see step by step guide to know how to install Sentora on Ubuntu or CentOS over the DigitalOcean Droplet cloud hosting.
Sentora requirements:
RightNow, Sentora supports CentOS 6, CentOS 7, Ubuntu 12.04, and Ubuntu 14.04. These are the officially approved Linux operating system where Sentora can work smoothly. Other Linux derivation can also be used base on the above given Linux distros but the Snetora developer team will not be going to provide any kind of support to the unsupported OS.
Also, we tried to install the Sentora on Ubuntu 16.04 and 18 but we got an error: Sorry, this os is not supported by Sentora.
The process mentioned here is the same for installing the Sentora on CentOS 6, CentOS 7, Ubuntu 12.04, and Ubuntu 14.04; including the commands…
One more thing that needs to be noted before installing the Sentora; make sure none of these already been installed on your server.
- Any other Web or server management software should be installed prior to Sentora.
- None of the web services such as Nginx, MySQL, Apache, PHP, FTP Server, Mail Server, etc. should be on the server before installing Sentora.
- Ports those needed by the Santora to perform different operations
- 20 & 21 : FTP
- 25 (TCP) : SMTP
- 53 (TCP & UDP) : DNS
- 80 (TCP & UDP) : HTTP
- 110: POP3
- 143: IMAP
- If you want to use SSL then 443 for HTTPS and 3306 for MySQL
- 22 for SSH
Steps to Install Sentora on Ubuntu and Centos
Access Droplet Ubuntu or Centos server
Go to the DigitalOcean Droplet Ubuntu or Centos server. The steps given below are also applicable for the local installation in order to test the Sentora before going public.
Command to run:
- For both CentOS and Ubuntu, the following commands are work to install the Sentora Web Control Panel.
- First of all login to your server as a root user:
sudo -i
- Make sure that you are on your home directory, in case not then type the below command:
cd
- Run the command to download the Sentora installer
wget sentora.org/install
- If you get a certificate error from GitHub; try one of the two lines below:
wget --no-check-certificate sentora.org/install
wget http://sentora.org/install
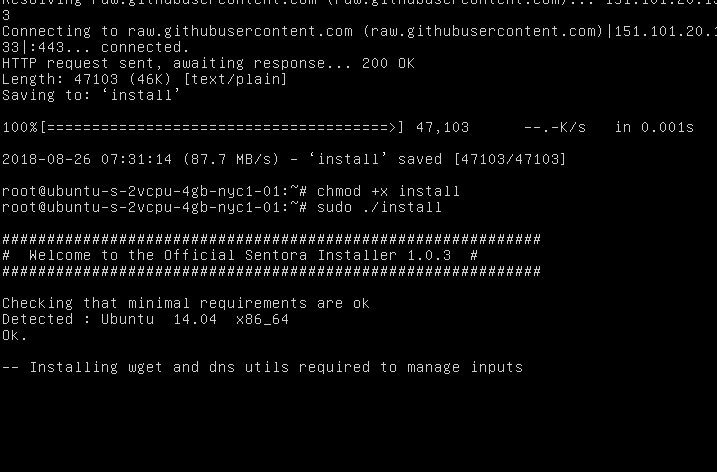
- Make the installer executable:
chmod +x install
- Run the installer:
sudo ./install
- First of all login to your server as a root user:
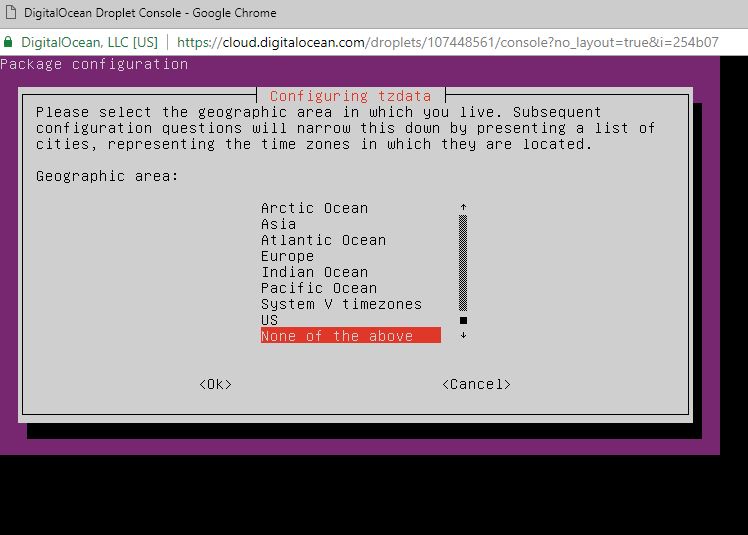
- After the Sentora downloaded and installed, you will get an installation configuration screen to further configure for the web interface.
- First, it asks you to configure the Geographic area to select the time zone.
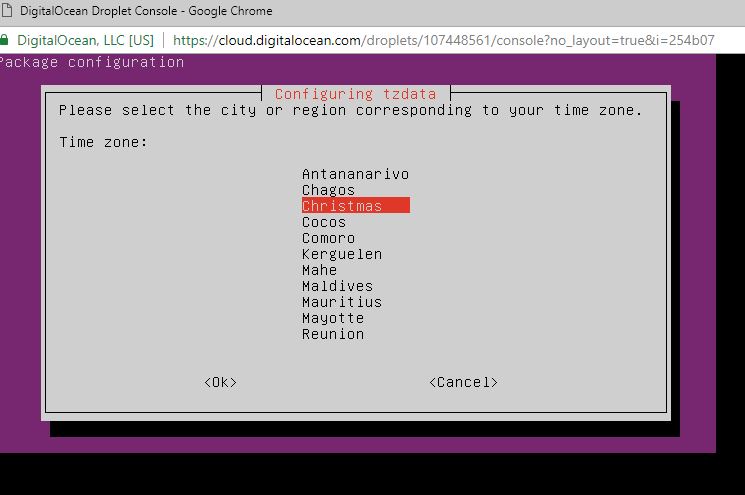
- Finally, select the time zone for your Sentora Control Panel.
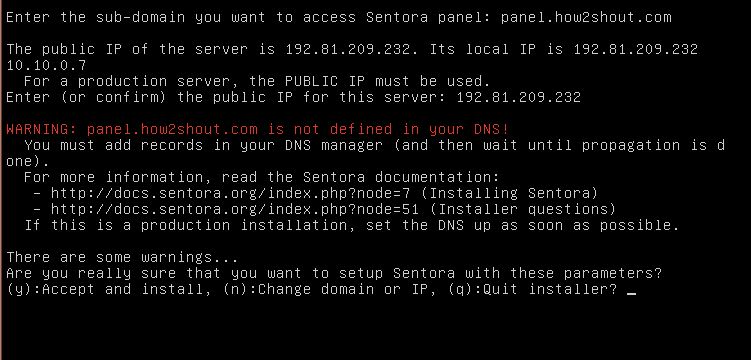
- If you already have assigned the domain to the DigitalOcean then you can create a subdomain and assigned to the Sentora web control panel right from this step. Otherwise just mentioned panel.yourdomian.com or whatever you want and later assigned it to your DNS. For example, you can see that in the below image I got the warning that panel.how2shout.com is not defined in the DNS panel but nothing about to worry that can be set later. From now onwards just type the ‘y‘ and press the Enter button to move the installation further.
- The installer now setup Apache, PHP, MySQL, and other web services that you need in a Web control panel. Once everything is set up, it will show the Sentora admin account password including MySQL username and password details. In case you want to access the password details later then you will get it from /root/passwords.txt file.
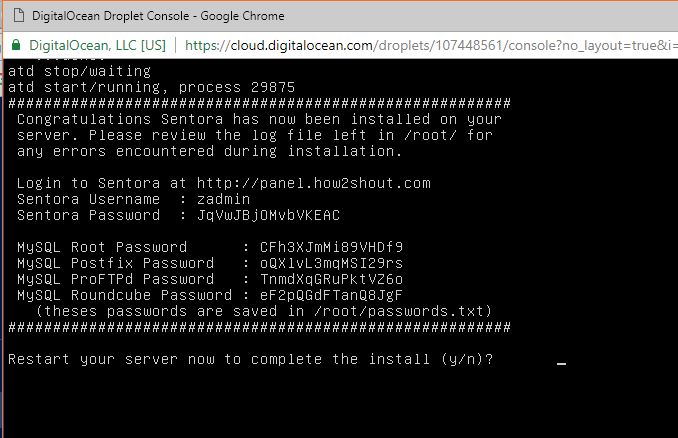
- Now type ‘Y’ and press enter to restart the server for completing the Sentora installation.
How to access the Sentora web control panel GUI interface?
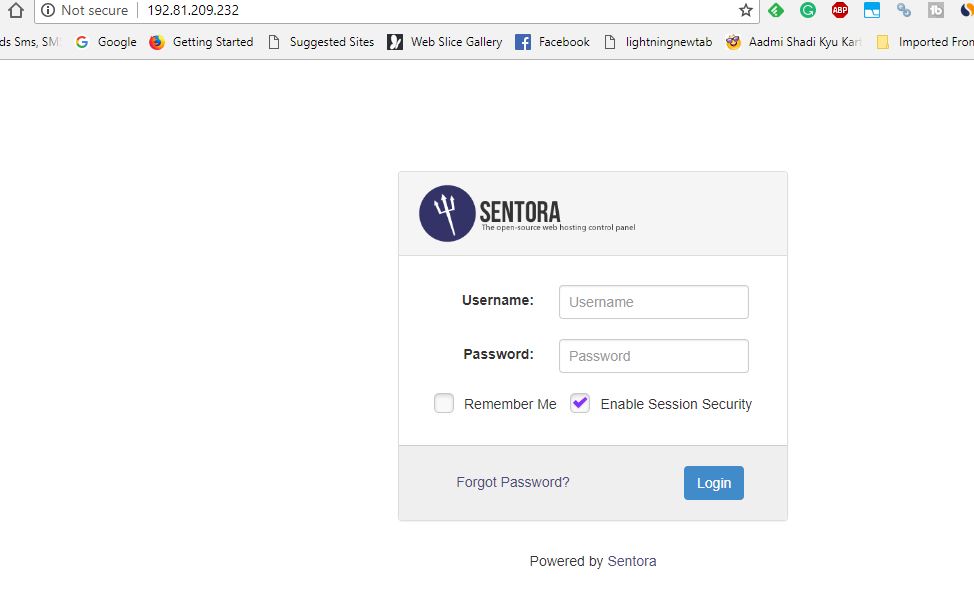
To access the web interface of the Sentrora Control Panel, go to the browser and use the public IP you got on DigitalOcean for your server. Or just configure the subdomain value and propagate the DNS to access the Sentora using the fully qualified sub-domain web address. If you are testing it locally then use your server’s local IP address.
Enter your Sentora Admin login details to access the control panel.
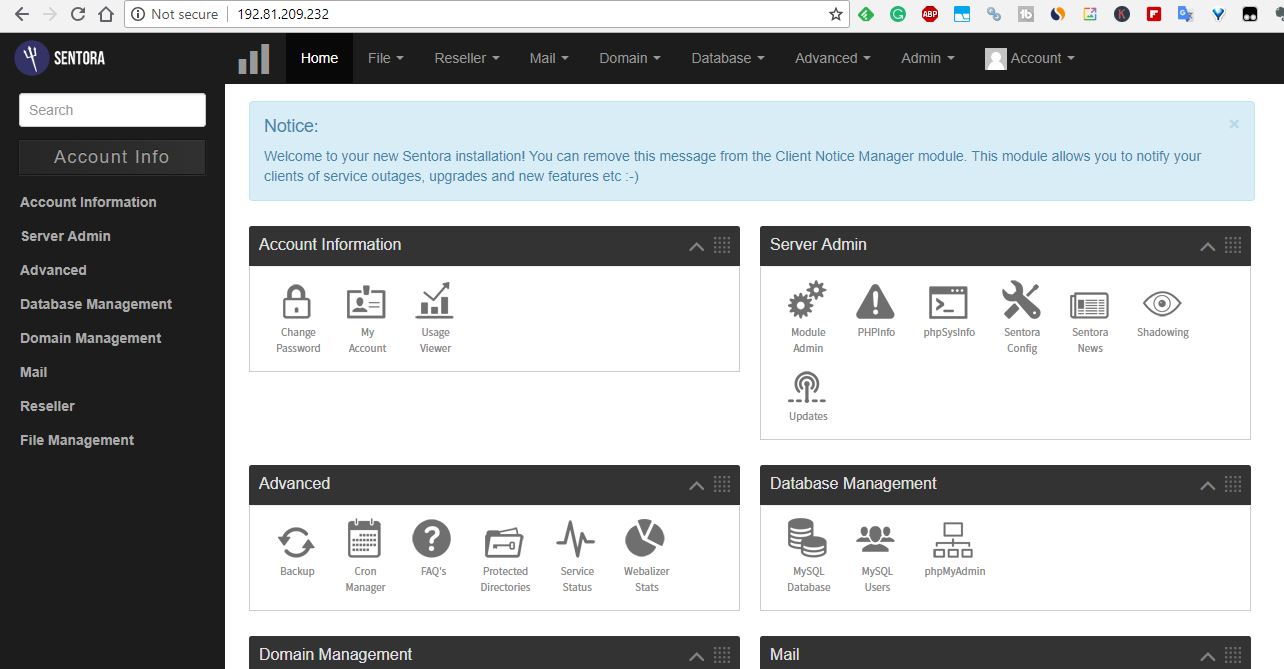
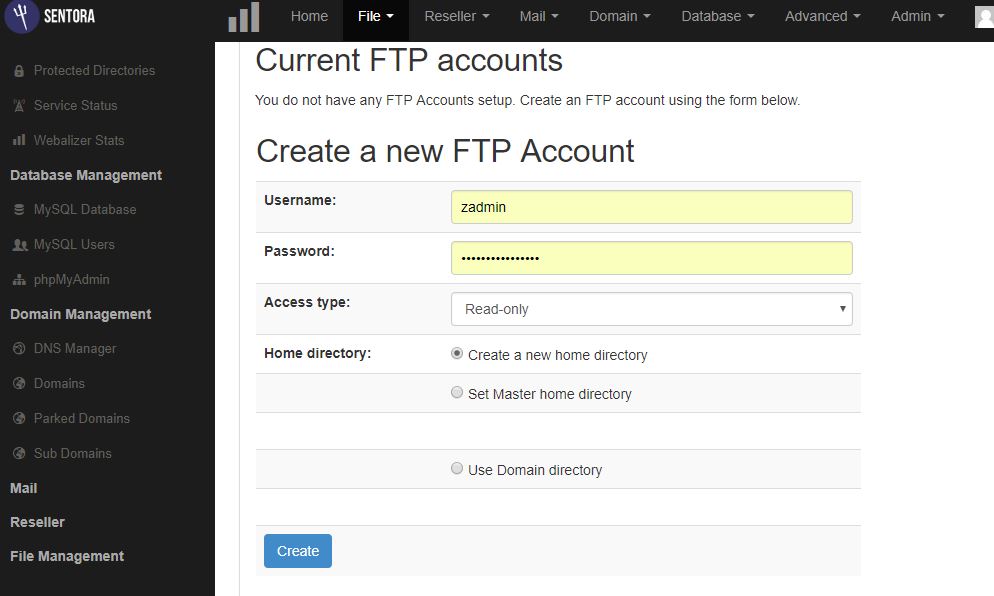
Once you Login successfully you can use the Sentora open-source control panel to manage the website, database, and all.
Sentora Screenshots


In this way, you can install your own open-source web control panel Sentora to manage the website and other projects through it on Digitalocean or locally for testing. In case you stuck somewhere then feel free to tell us your problem in the comment section and will answer it as soon as possible…
Other Articles:
- How to find WiFi password from Command Line
- How to find out the user who is using your Wi-Fi network
- How to install XAMPP on Windows and Linux to use Marina DB, Perl, and PHP on a localhost
- How to create, change & remove Password in Windows 7
- Synology DiskStation DS218j NAS Box Review
Related Posts
How to install Winget package manager in Windows 2022 Server
How to View Listening Ports Using Netstat
How to Install Pygame Zero on Windows 11
Single Command to install Android studio on Windows 11 or 10
How to Install DoXygen in Windows 11 or 10
Google Rolls Out Android 14 Beta 4.1 to Fix Bugs for the Pixel Fold and Tablet