Most of the Internet websites are nowadays powered by the open source CMS WordPress. It is quite user-friendly and easy install content management system with thousands of free themes and plugin databases. It is a PHP based CMS meant for Linux systems but can be installed on Windows servers too. Here in this tutorial, we will show you both how to install WordPress using Softaculous and manually in CPanel on Godaddy. However, the process is the same for the other hosting like Hostgator, Bluehost and more…
How to install WordPress manually in Cpanel- Godaddy
1. Download the WordPress
To install the WordPress manually on CPanel, first, you need to download the WordPress Package files from the official website. Download the WordPress CMS files– Click Here.
After downloading it, move to the next step.
2. Upload the WordPress Package to Hosting
Step 1. Log in to your Web hosting and access the Cpanel.
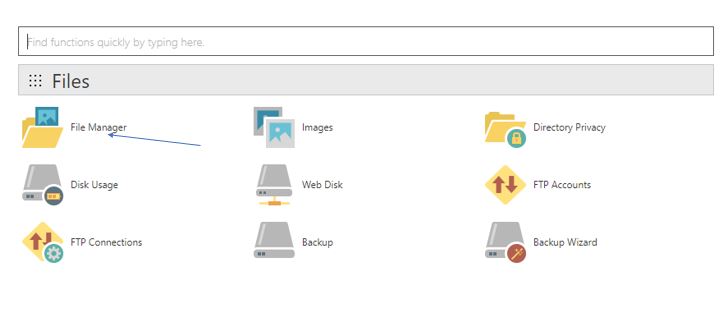
Step 2. Once you successfully able to access your hosting Cpanel. Click on the File Manager given under the Files section. Please see the screenshot.
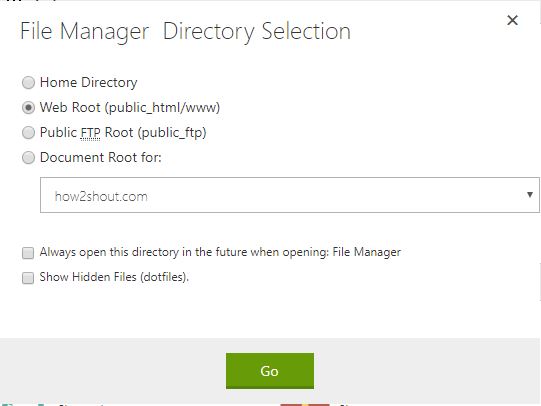
Step 3: Select the Web Root and the domain where you want to install the WordPress using the Cpanel. Like we have domain Ho2shout.com. However, if you have only one domain registration on your hosting then it will by default shows that; in case of multiple domains associated with your hosting then you need to choose which one you want to use.
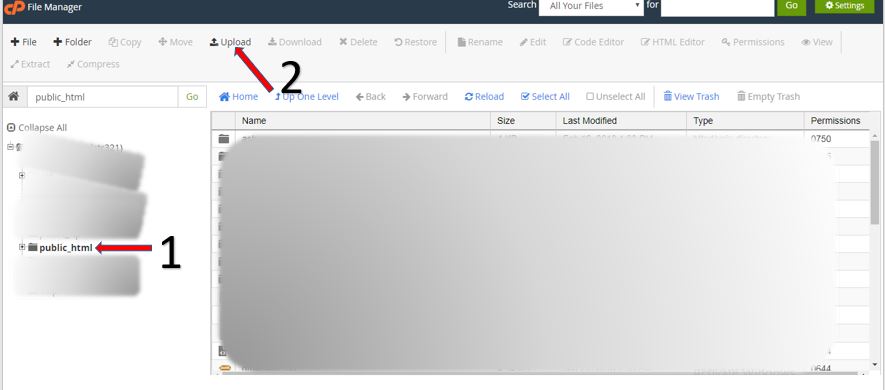
Step 4: Now its time to upload the WordPress files we have downloaded above. Click on the Public_html from the left side panel and then select the Upload option from the top menu. We are using the Godaddy hosting Cpanel for this tutorial and the location of these options might be different on other hosting services.
Step 5: After clicking on the Upload option. A new window will open in order to upload the files. Click on the Upload button and select the Zip folder of downloaded WordPress.

3. Extract the Uploaded WordPress Folder
Step 1: After uploading the WordPress folder. Click on the folder and then the Extract option that given on the top menu of Cpanel.
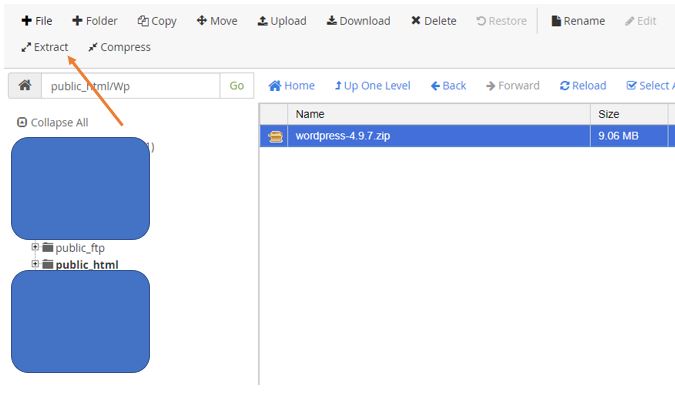
Step 2: Click on the Extract files button.

Step 3: Now you will see a folder named WordPress. Click on that to open it.

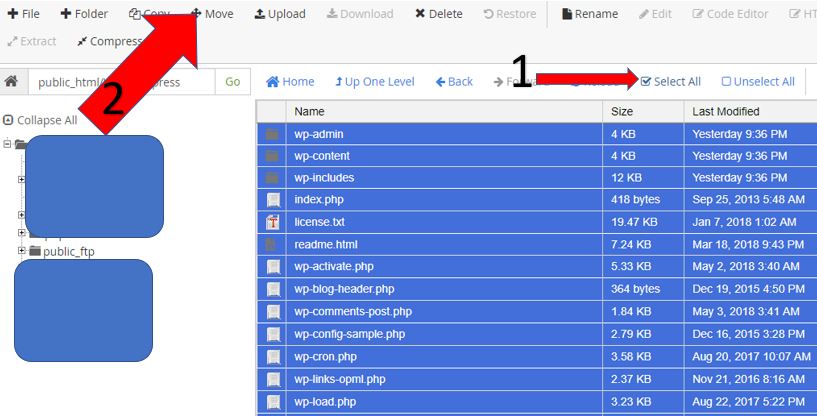
Step 4: In this step, we are going to move the WordPress files to our main web root directory that is Public_html. For that first click on the Select All option to select all files of WordPress folder and then click on the Move option given on the top menu of CPanel.
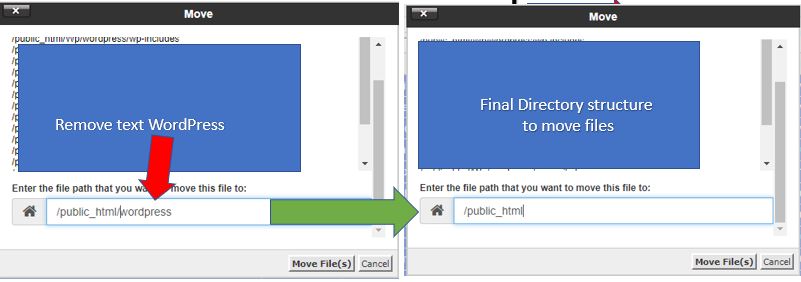
Step 5: When you click on the Move option a windows will pop-up with directory structure to move all the files. Please change the /public_html/wordpress to /public_html as shown in the below screenshot.
4. Create MySQL Database
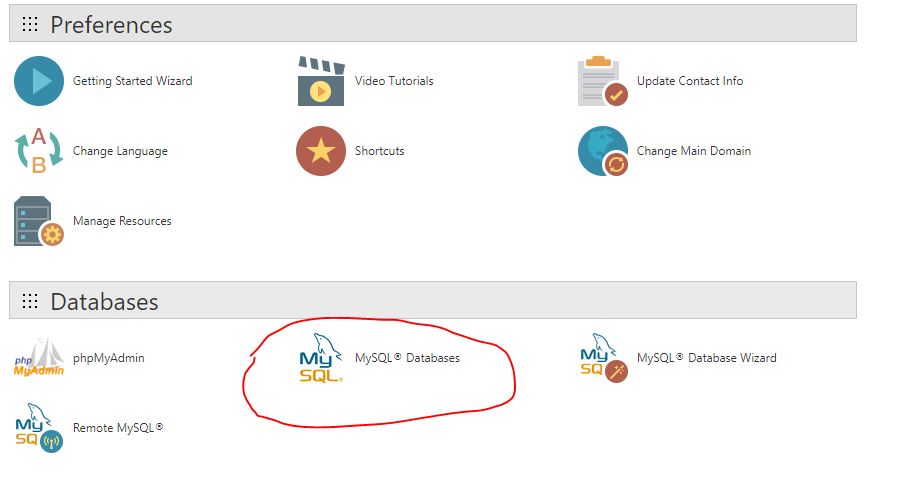
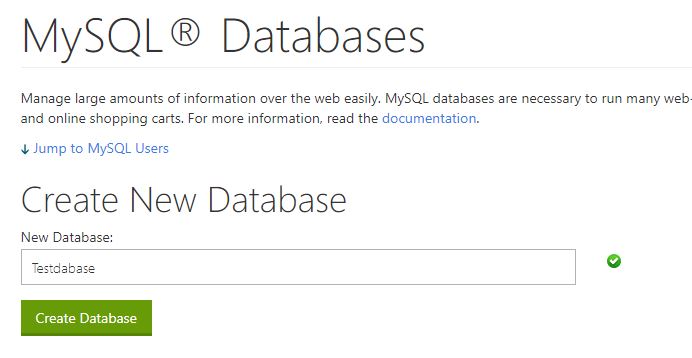
Step 1: After moving the WordPress files to a public directory, now, its time to set up a MySQL database plus user for your new WordPress CMS. From the CPanel select the MySQL Databases given under the Databases section.
Step 2: Type some unique name in the column given for New Database and click on the Create Database button.
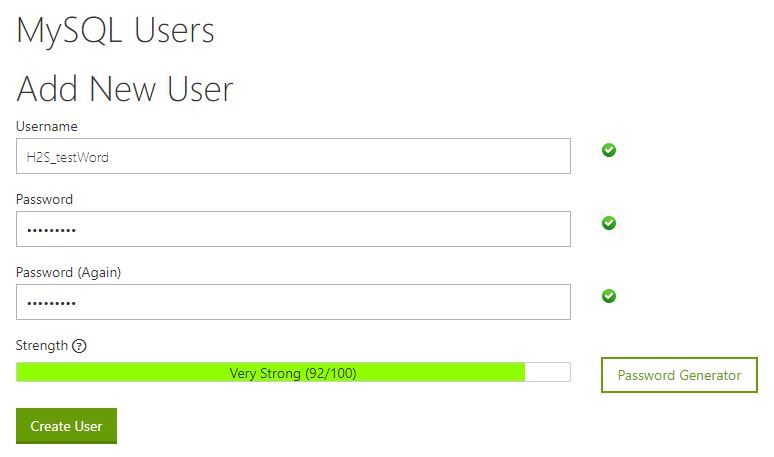
5. Create MySQL database User
Step 1: Scroll down after creating the New database and you will find the section to create New MySQL users. Enter the username which you want for your WordPress and type the strong password of your choice. And then click on the Create User button.
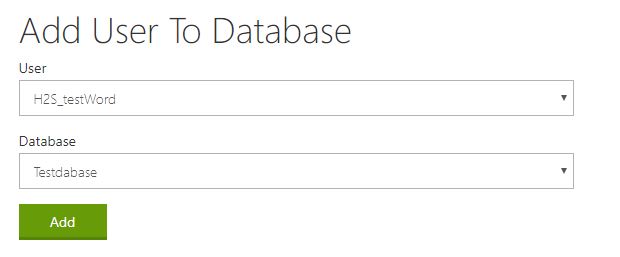
6. Assign the MySQL Database to MySQL user
Step 1: Scroll down little further and you will find the Add User to Database section from where under the USER drop-down box select the newly created MySQL database user while from Database drop-down box select newly created MySQL database. And then click on the ADD button. For reference see the screenshot.
Step 2: As soon as you click on the Add button a new window will open asking you to give privileges to the MySQL user for MySQL database. First, check the ALL privileges box and then click the Make Changes button.

7. Setup WordPress
Open the browser and type http://yourdomain.com/wp-admin. Replace the yourdomain with the actual domain of your, for example, we are setting it up for how2shout.com then the URL would be http://how2shout.com/wp-admin.
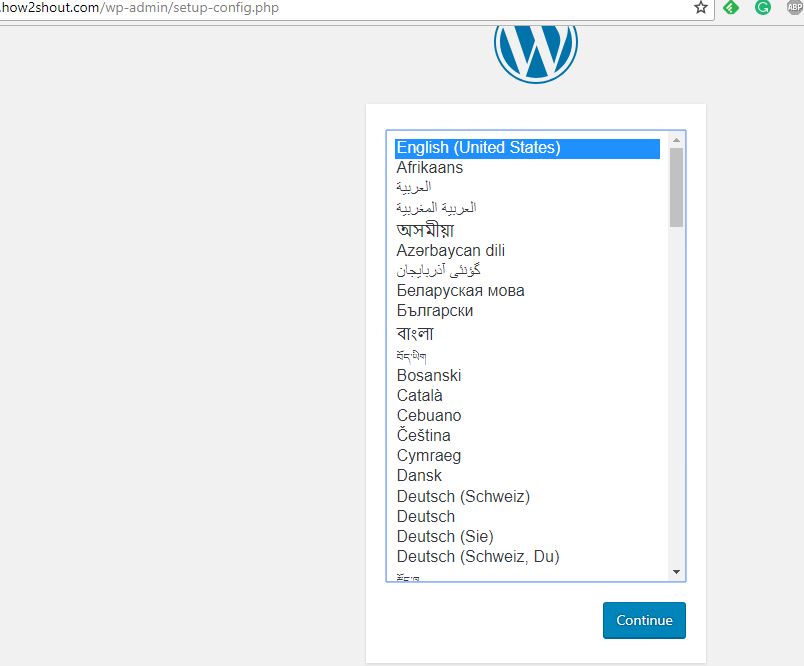
8. Select the WordPress Language
Select the language in which you want your WordPress should work. It is not a language of Website, it is for the backend or Dashboard of WordPress.
After selecting the Language click on Continue button and then Let’s Go button.
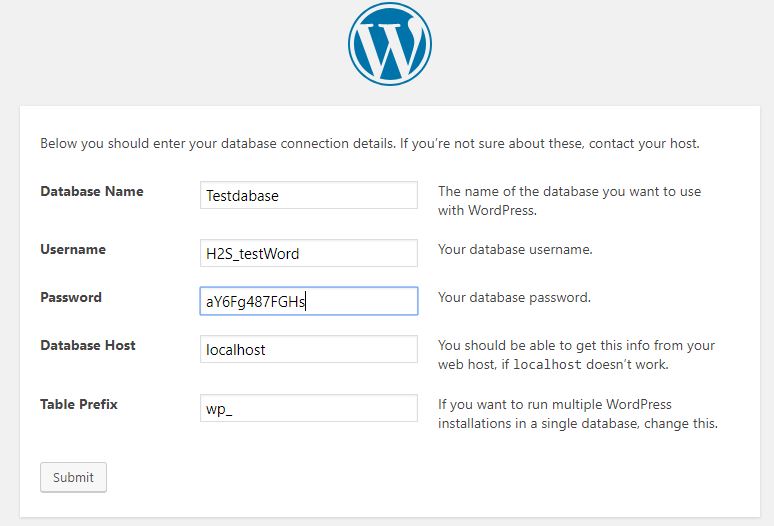
9. Fill the WordPress Database and Username Details.
Now the important step:
Step 1: Enter the details of the MySQL database and Username and password that you assigned for the MySQL database user. Leave the Database Host the default localhost and Table Prefix is wp_ as it is.
Step 2: Click on Submit.
Step 3: After Submitting the above information click on the Run Installation button.
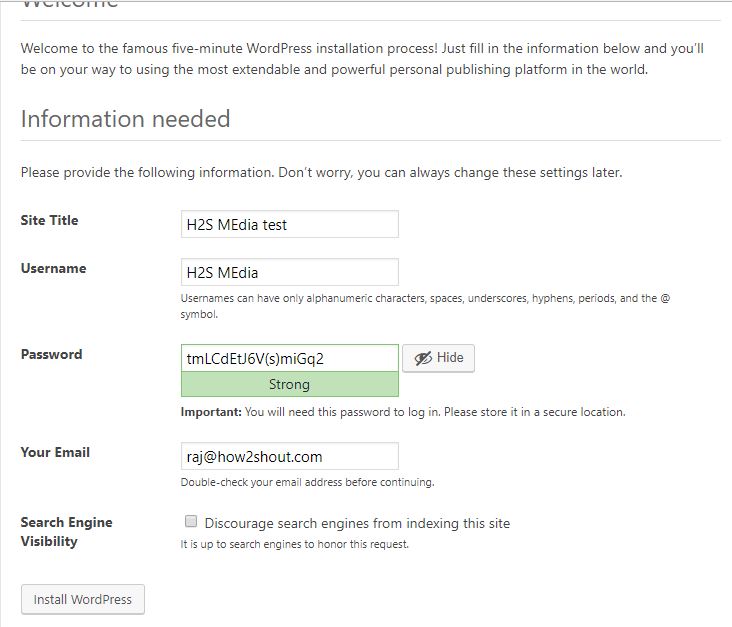
10. Fill the information and run WordPress installation process
If everything was performed correctly by you, WordPress installation window will appear with a form that you need fill to create an Admin user for your WordPress CMS.
Give a Title to your website, Username, Password and email ID. And the Click on the Install WordPress button.
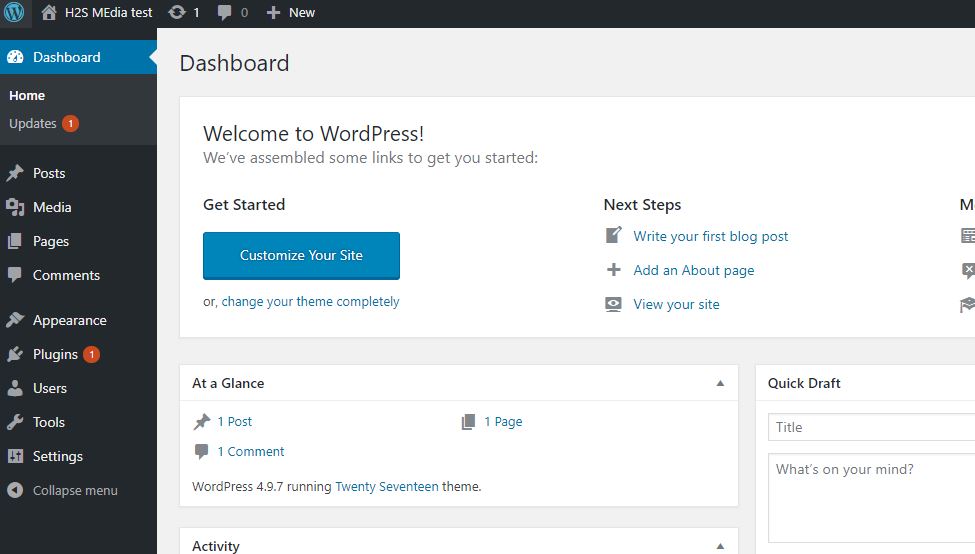
11. Log In WordPress
Now click on the Login button and enter the WordPress Username and Password you set in the above step.
Finally, you will your Website backend which based on WordPress CMS.
How to install WordPress from Cpanel softaculous
If you think the above steps are difficult for you and you don’t want to install the WordPress manually then there is another method that can install the WordPress in just a few clicks… Not only Godaddy but all hosting providers’ Cpanel has the automatic WordPress installation option from the Softaculous.
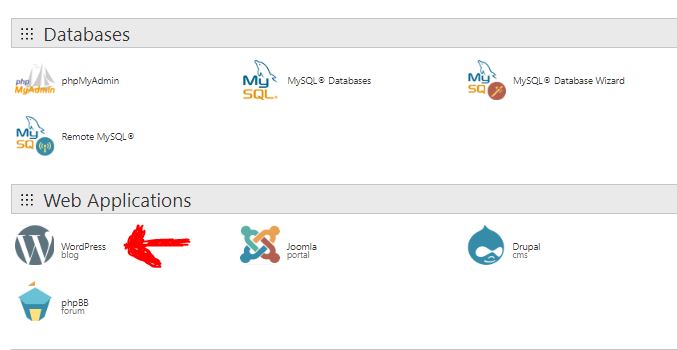
1. Open the hosting Cpanel
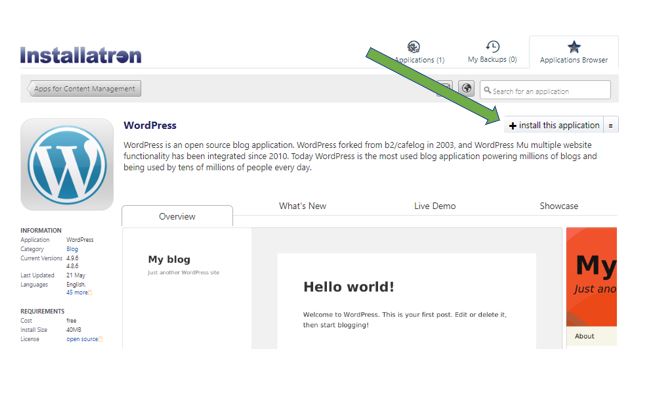
2. Find out a section called Web Application or Top Application or Scripts.
3. Select the WordPress to install.
5. Select the Domain from the drop-down box where you want to install the WordPress.
Please deleted the directory option. For example — If you see the screenshot under the Directory(Optional) blog is mentioned. If you don’t delete it then your Wordpress website URL will be http://yourdomain.com/blog.
So, if you want to install the WordPress on your main domain then blank the Directory(optional) option.

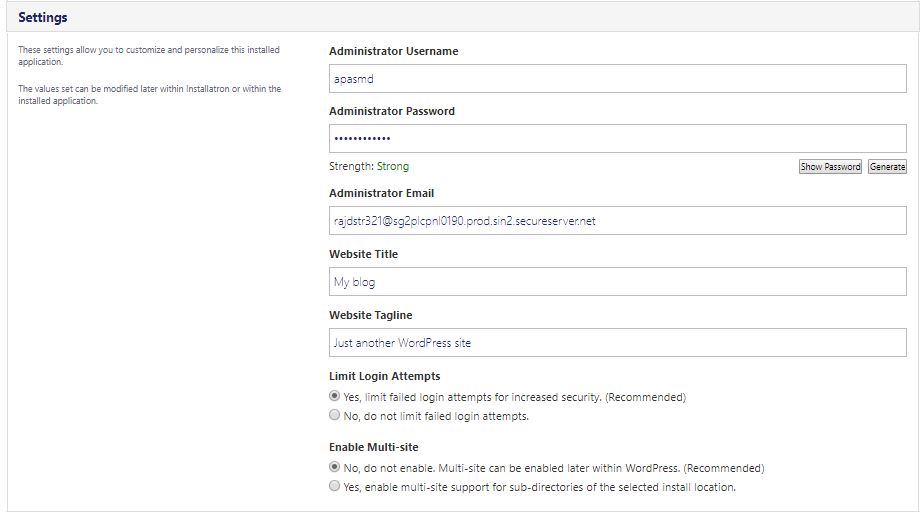
6. Username and Password for WordPress
By Default, the Software will enter a strong username and Password for your new WordPress. So, please note down both in order to login WordPress backend after setting it up.
However, you can fill in the details manually by yourself to remember them easily.
If you get any problem during the WordPress installation on Cpanel manually or Softaculous over Godaddy, Hostgator, Bluehost or on any other hosting service even cloud, please free to let us know we will help you… By the way, the Comment section is there!!
You might also like to see:
- How To install Second WordPress in a Subdirectory for creating Multisite
- Backup WordPress database without phpMyAdmin: Using CPanel
- How to Migrate a Blog From WordPress.com to WordPress.org for FREE
- Instant WordPress: One click Quick install of WordPress locally on Windows
- How to Install WordPress on Windows Computer Using WAM
- Step By Step Guide To Clone WordPress Website Manually
Related Posts
How To install Second WordPress in a Subdirectory for creating Multisite
Top 10 Free Open Source Blogging Platforms or CMS in 2023
How to transfer a Blogger (Blogspot) site from one account to another
4 Best tools to install WordPress Local on Windows without Xampp
Instant WordPress: One click install of WordPress locally on Windows
Top 10 Ways To Protect WordPress Login From Unauthorized Access