Kali Linux is the one of popular Linux distribution based on Ubuntu. It mainly used to explore penetration testing. If you want to learn ethical hacking it is one of the great tools.
The Windows 10 users can install Kali Linux natively using Windows Subsystem for Linux feature. It doesn’t need any kind of Virtualization software like VMware or VirtualBox.
However, due to some limitations people usually prefer VirtualBox or Vmware Workstation player to install Kali Linux on Windows / Linux. That’s why, here, we will show, how to install Kali Linux on Vmware workstation 12 /13/14/15 or latest version player available for Windows as well as for Ubuntu-based operating systems.
Step by step guide to install Kali Linux on Vmware Workstation player for Windows & Linux
- First of all, go to kali.org.
- Download Kali Linux ISO image out of different flavours such as Mate, KDE, XFCE (32bit or 64bit version).
- Install VMWare Workstation player on your Windows or Linux OS.
- Run the VMware and click on Create a new Virtual Machine option.
- Choose the downloaded Kali ISO file image as installation media.
- Select the type of Guest operating system as Linux and click on the Next button.
- Give some name to your Kali Linux Virtual Machine and move to next step.
- Assign the amount of Virtual hard disk you want to assign to your machine. 20 Gb recommended.
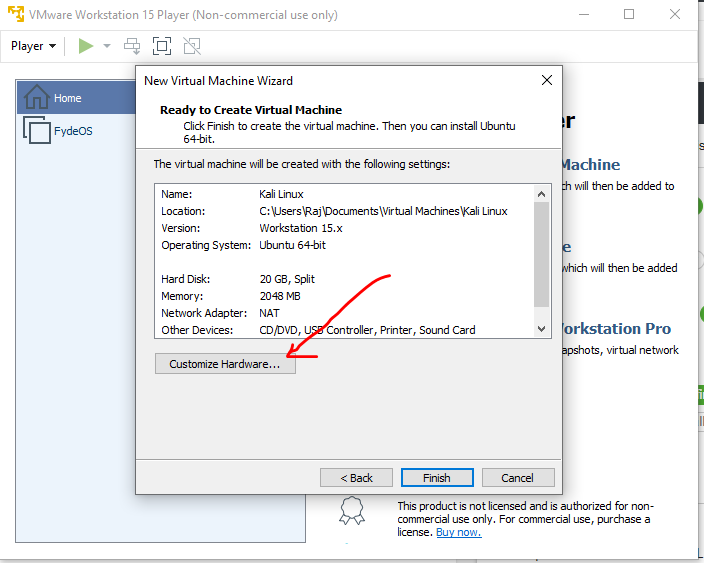
- Click on Customize hardware.
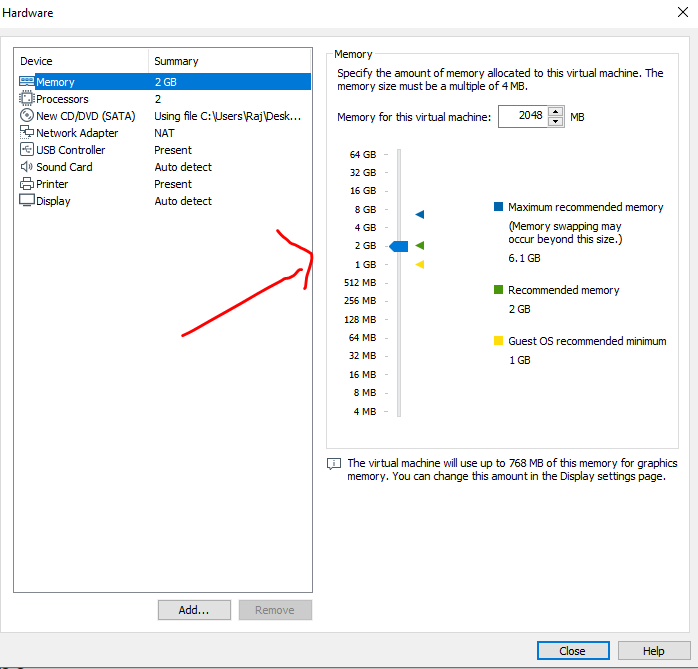
- The default amount of RAM given to Kali Linux in VMware player will be 2GB. You can increase it, for better performance. Otherwise just click on Close button.
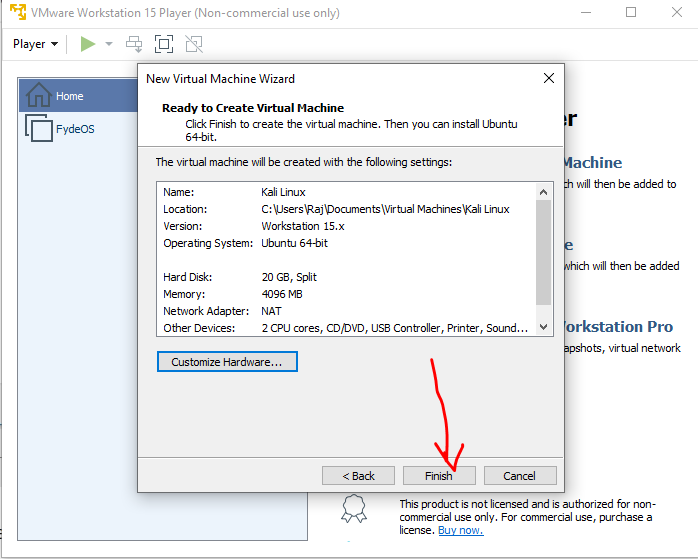
- Now by clicking the Finish button, your Kali Linux will be ready to install.
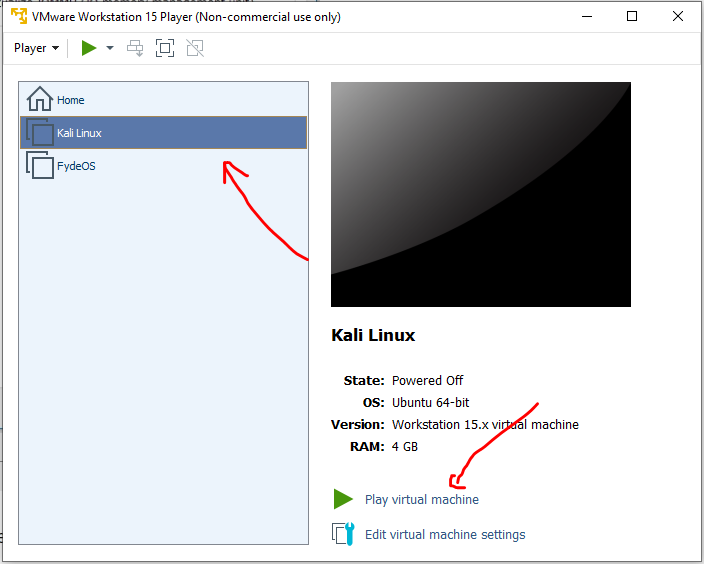
- Now just select it from the left side VMware Pan and click on Play virtual machine option.
Useful Article: Install Kali Linux on VirtualBox on Windows, Linux, Mac, or other platforms
Above tutorial with a screenshot to know how to run Kali Linux in VMware player
Step 1: Download Kali Linux ISO image for VMware workstation player
Open the Kali Linux official website here is the link: https://www.kali.org/downloads/. Download any of 32-bit or 64-bit version along with the Linux desktop environment you like. It is available in Mate, KDE, XFCE, E17, and Lxde. Furthermore, the Kali Linux is also available in the pre-installed VM (virtual machine) image for VMware and VirtualBox.

Step 2: Now Download and install the VMware Player for Windows and Linux.
It is free to use for personal purposes. Although the Windows installation of VMware is pretty much straight forward like any other software, the Linux users can see this tutorial: How to install Vmware workstation Player on Ubuntu Linux
To download the Vmware Workstation Player for Windows here is the link.
Step 3: Create a New Virtual Machine for Kali Linux
Run the VMware player and click on the Create a New Virtual Machine option given on the right side of the software.

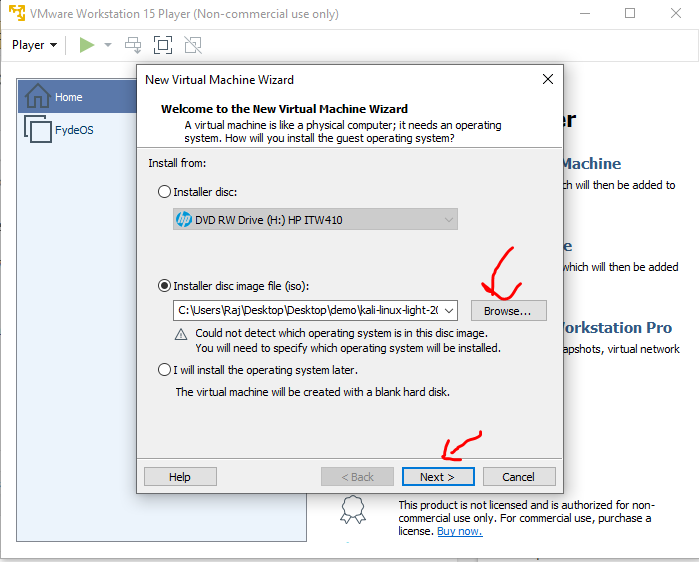
Step 4: Select Kali Linux ISO file image
Now its time push the above downloaded Kali Linux ISO image. Select the Installed disc image file (ISO) option and click on the Browse button. The file explorer will open, now find and select the ISO image of Kali.
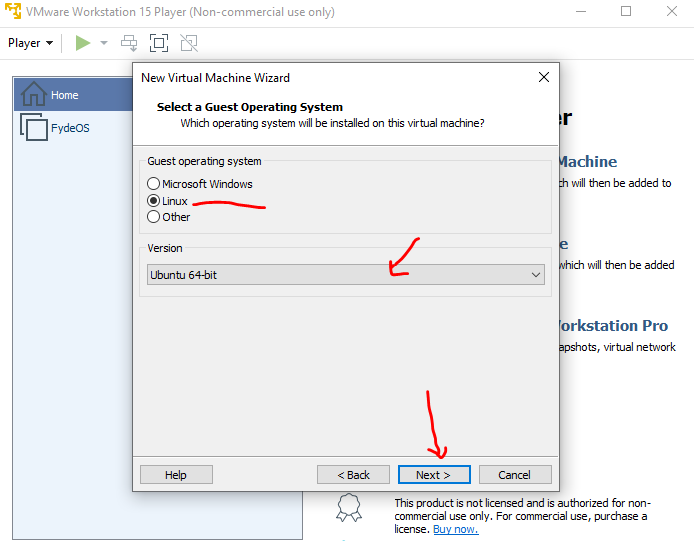
Step 5: Select the Guest Operating System
Now the Vmware will need to know what kind of guest operating system you are about to install on it. As the Kali is Linux based, we will select the Linux option and from version select the ubuntu 64 or 32 bit (depends upon the downloaded iso image).
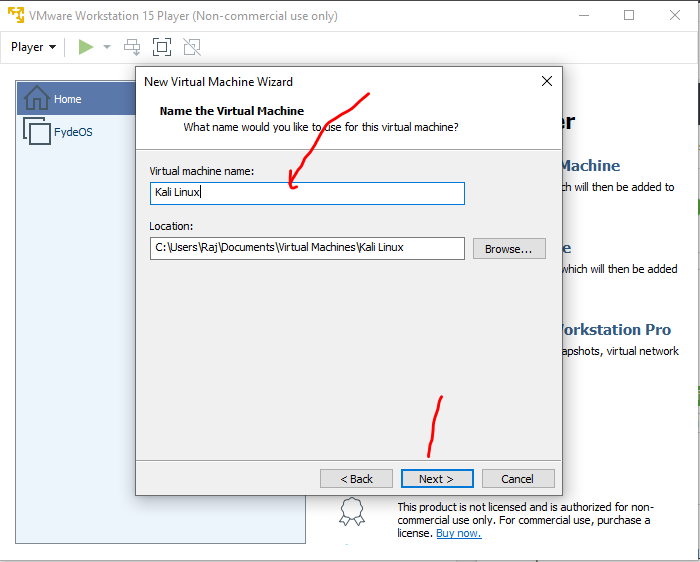
Step 6: Name the Virtual Machine
To identify the installed operating system on Vmware in future; we should give some name to it. We are giving it a Kali Linux but you can give whatever you want.
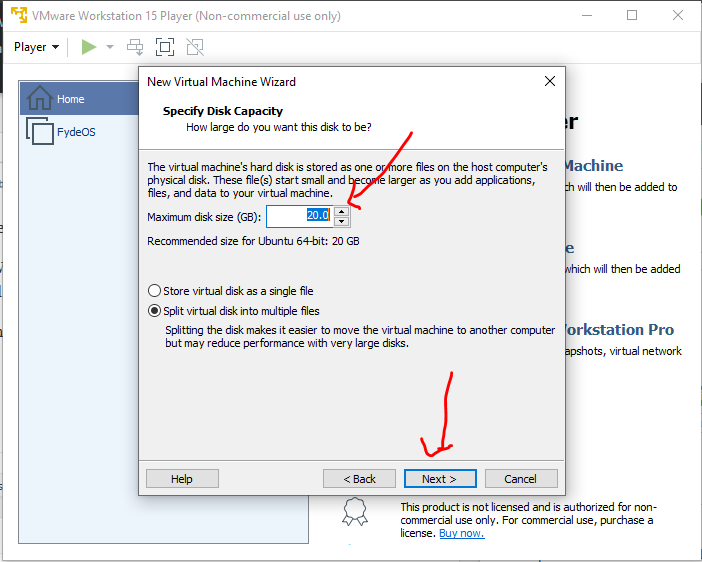
Step 7: Virtual Hard disk for Kali virtual Machine
To install the operating system on Vmware we need to assign virtual disk space. The 20Gb is recommended, however, you can give more, solely depends on your requirement.
Step 8: Customize Hardware
If you want to increase the RAM, CPU and other hardware settings of the Vmware for KALI; select the Customize hardware option.
Step 9: Hardware assignment
On the left side, all the hardware options can be found for Virtual machine. By default, the RAM would be 2GB but if your host system has a good amount of RAM then you can increase the numbers in Vmware for smooth operations. In the same way, the CPU cores for the Kali virtual machine can be increased from here.
Step 10: After customizing the hardware just click on the close button.
Step 11: Play the Virtual Machine
After performing all the above steps you will find a Kali Linux VM on the left side of your VMware. Select that and then click on the “Play Virtual Machine” option.
Step 12: Setup Kali Linux on Vmware using Graphical install
Once you power on the Kali VM, the boot menu will appear. Use the arrows keys and select the Graphical install option. Then press enter button for the guided installation of the Kali Linux OS on VMWare.

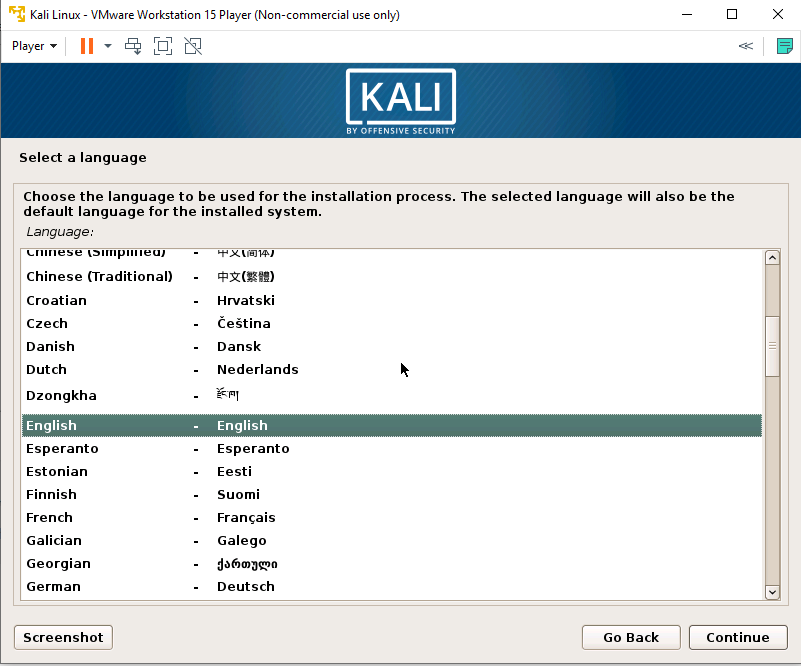
Step 13: Select the Language
By default, the language of the Kali distro is English but one can change that while the installation. Select the one language you comfortable with and click on continue.
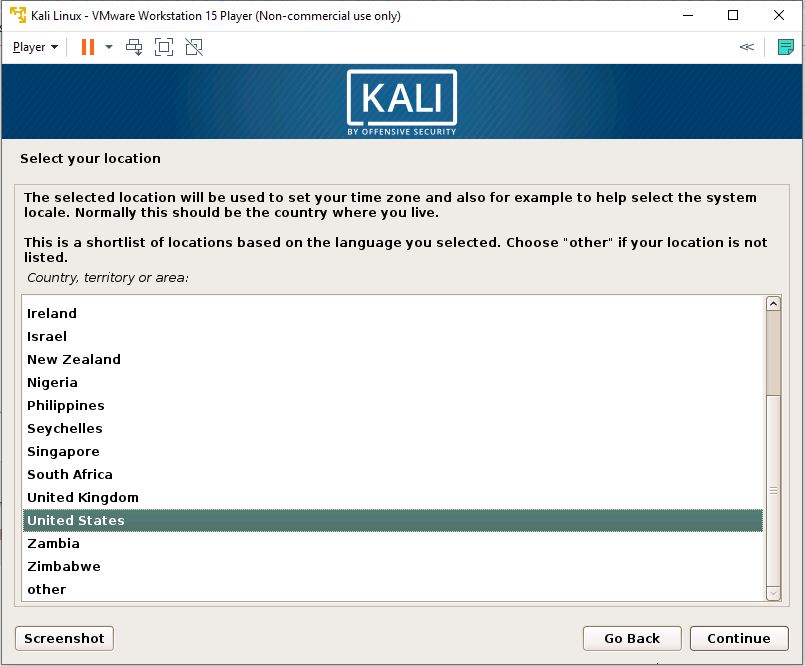
Step 14: Select your location
To configure further settings such as time zone, select the country where you are living and click on the continue button.
Step 15: Configure Keyboard
If you are using some different language keyboard other than English then select that. Otherwise, American English and continue with that.

Step 16: Configure the Network
To identify the Vmware Kali Linux on the network, we need to give it some name i.e hostname. If you are using the system in your home network then you can give anything. Like we have given it H2smedia.

Step 17: Configure network
We are setting up the Kali Linux for personal usage, so no need to add anything for Domain name. Leave it blank and continue.

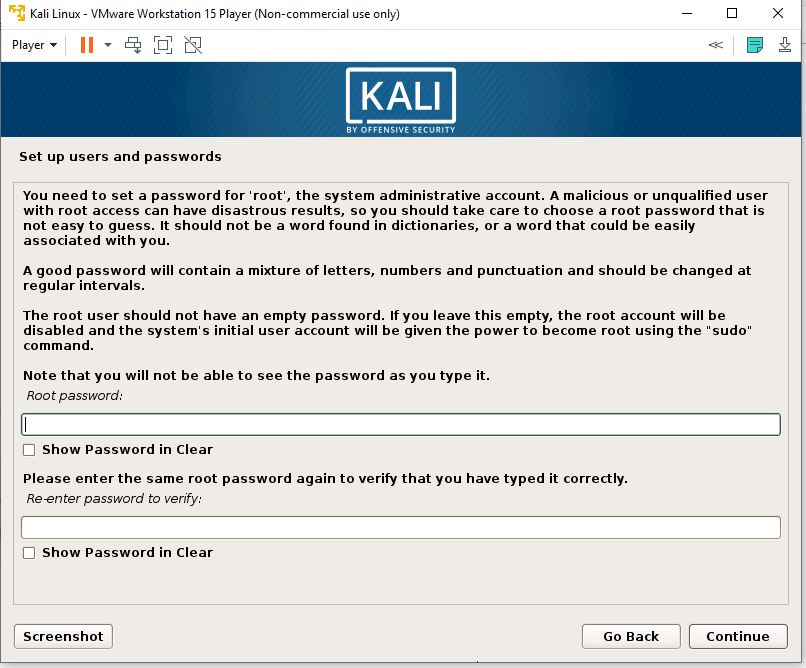
Step 18: Root password for Kali
This is an important step. Here the Graphical installer will ask you to enter a password for the root user of the system. Enter the password which you want to set, two times and continue.
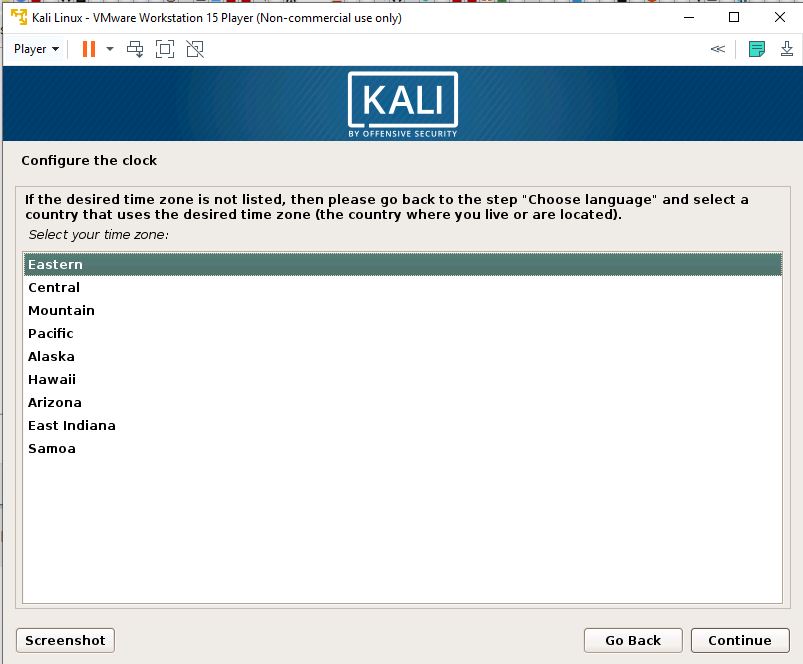
Step 19: Time Zone
To configure the clock of the Kali Linux select the time zone of your country. However, the installer will automatically select it on your previous location selection. So, just leave this as it is and move forward.
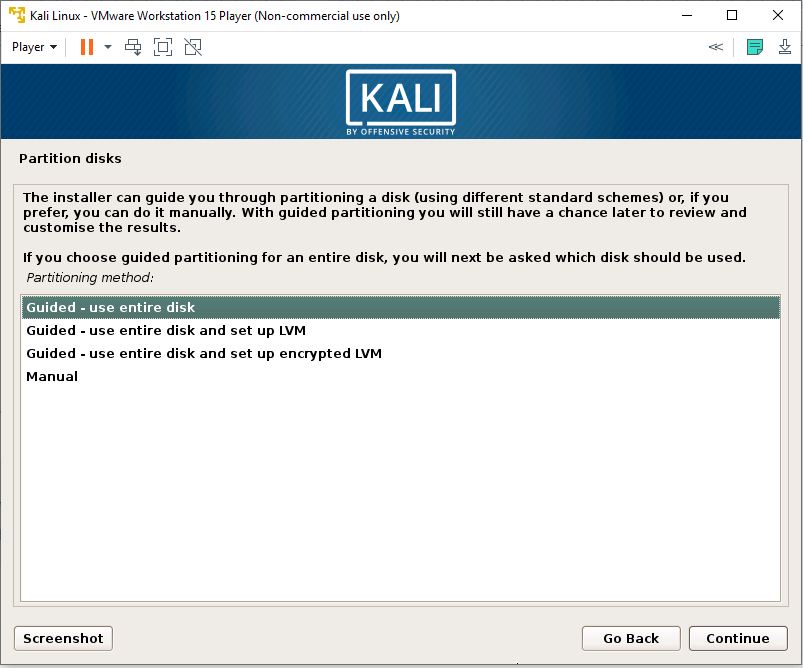
Step 20: Disk Partition
Performing partition on VMware for Kali Distro will not be much difficult. When it asks for it select the Guided – Use entire disk.
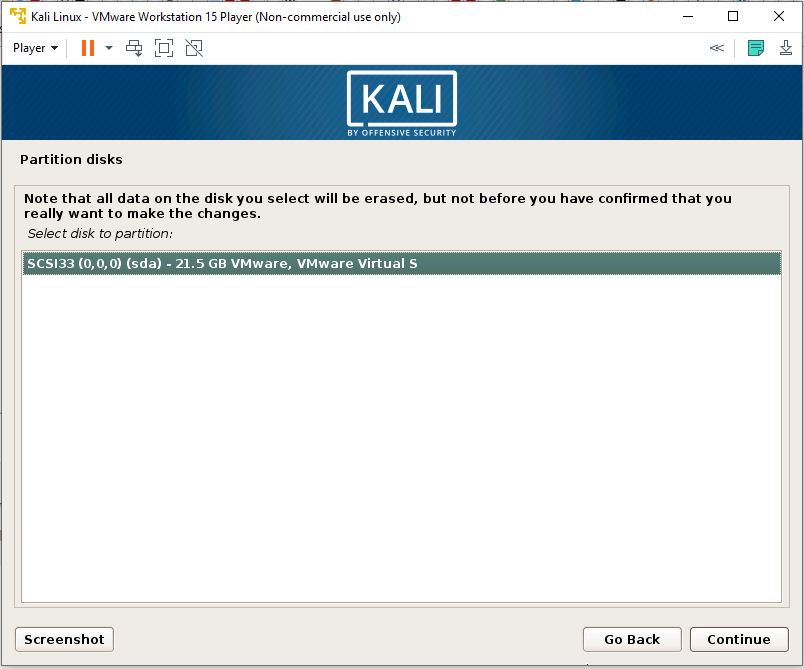
Step 21: Select the Disk
Select the disk partition and move to the next step.
Step 22: All files in one partition
After the above step, it will ask you for selecting the partition scheme, use the All files in one partition option.

Step 23: Apply the partition
Opt for YES option and the installer will format and start installing the Kali on Vmware.

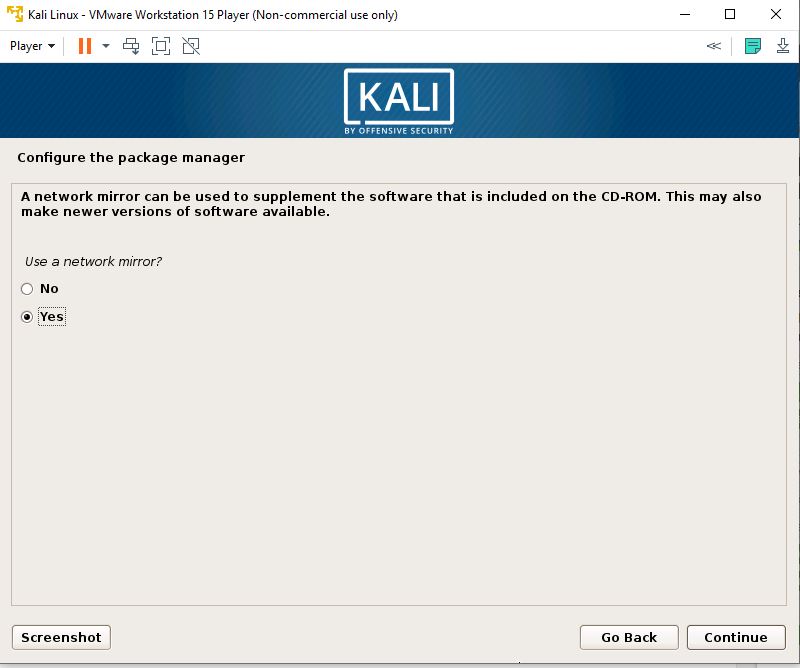
Step 24: Configure the package manager
To get the update for newer versions of Kali Linux installed software, select the network mirror option to YES.
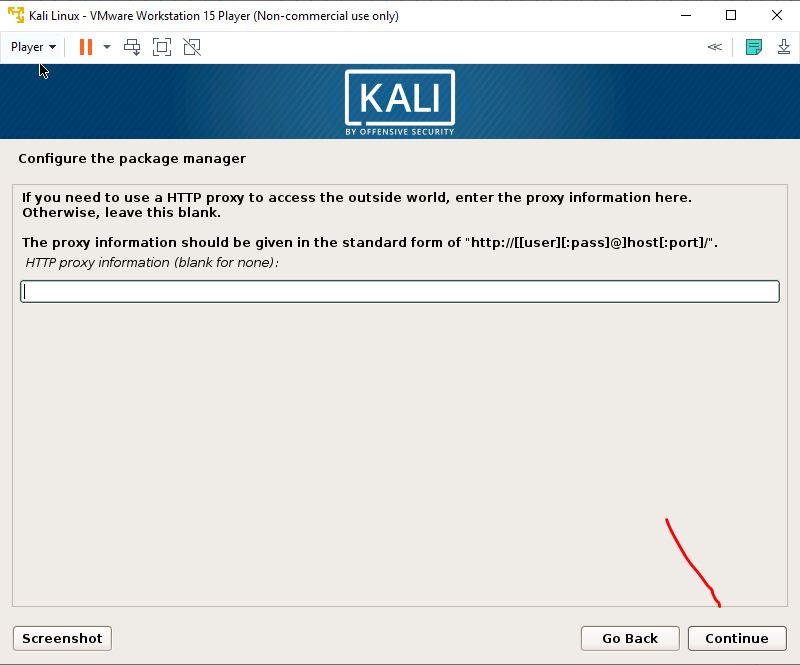
For the HTTP package leave it blank and click on continue button.
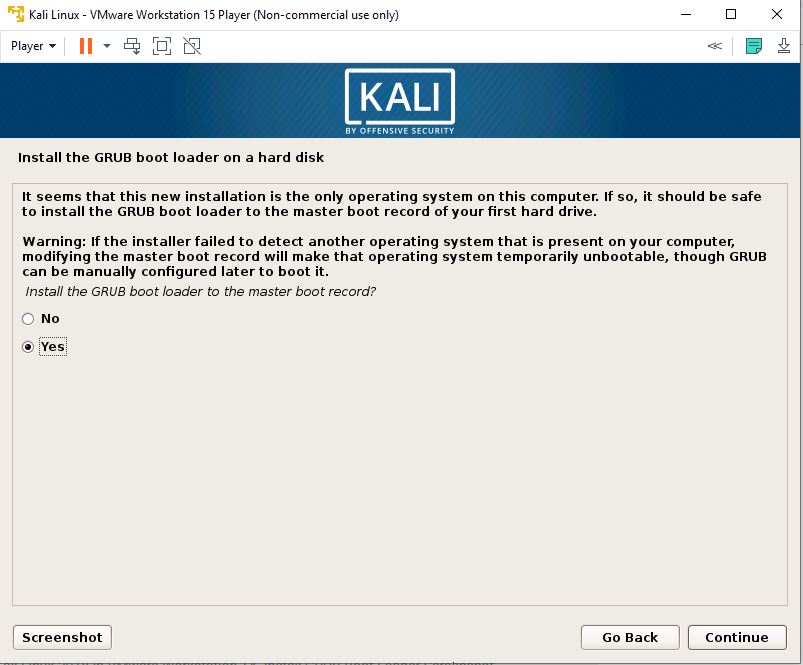
Step 25: Install the Grub boot loader on a hard disk
It is a very important step because if you accidentally select the No then the operating system will become unbootable. So, mark the YES option and move to the next step.
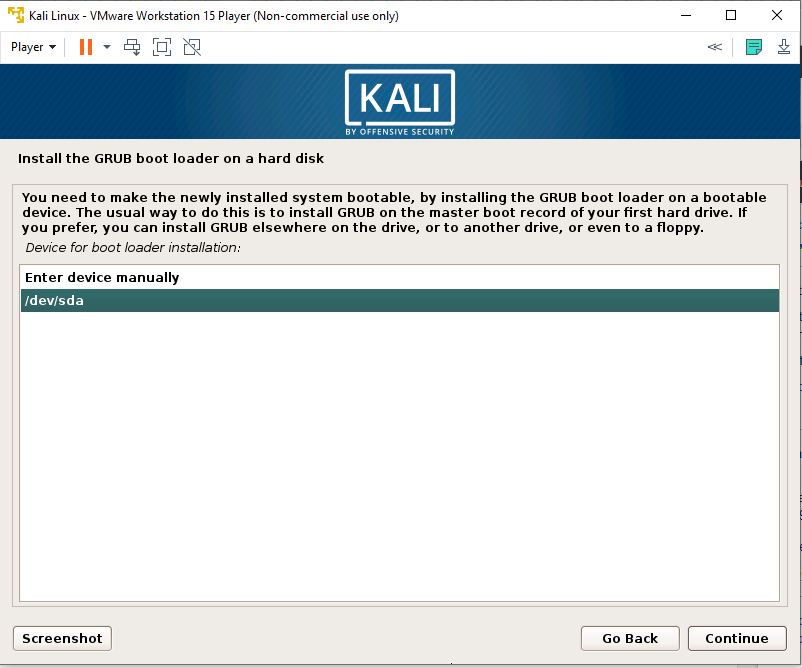
Step 26: Device for boot loader installation
Select the disk where you want to install the grub boot loader. As we have only a single drive, so it will show there select that and move on.
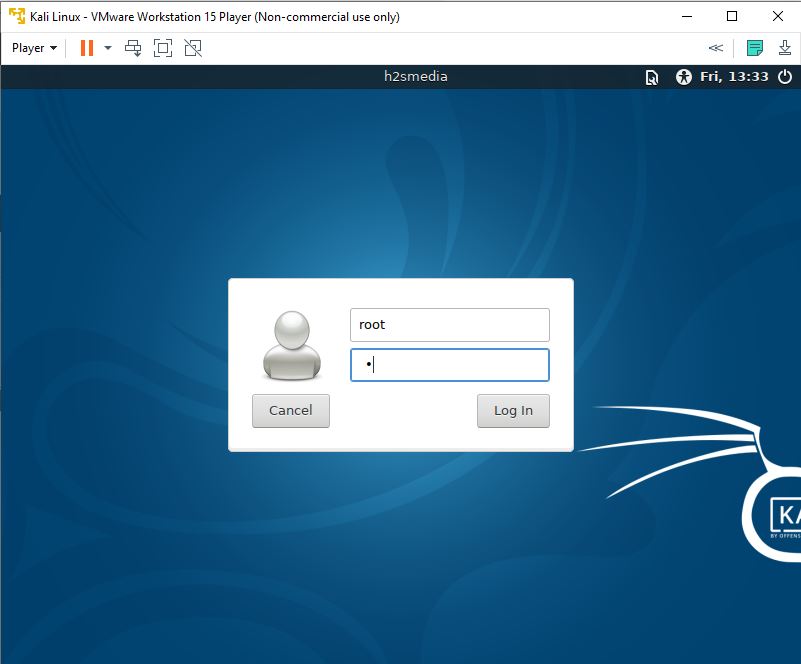
Step 27: Login to Kali Linux
Now use the root password you created above to log in your freshly installed Kali OS on Vmware.

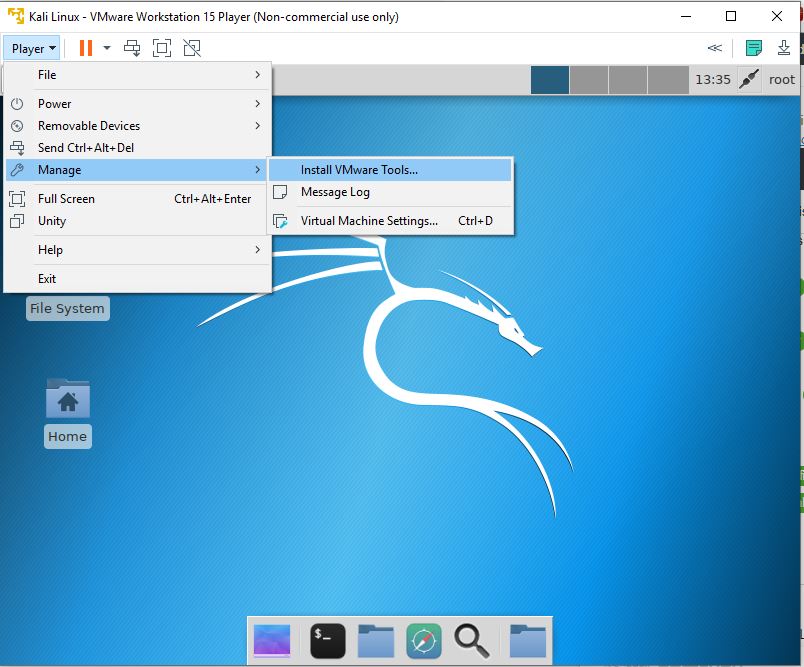
Step 28: How to install Vmware tools on Kali
Click on the Player option given in the VMware menu and then Manage; after that select the Install VMware Tools.
Step 29: Download and Install
Click on the Download button to download and install the Vmware Tools for Linux.
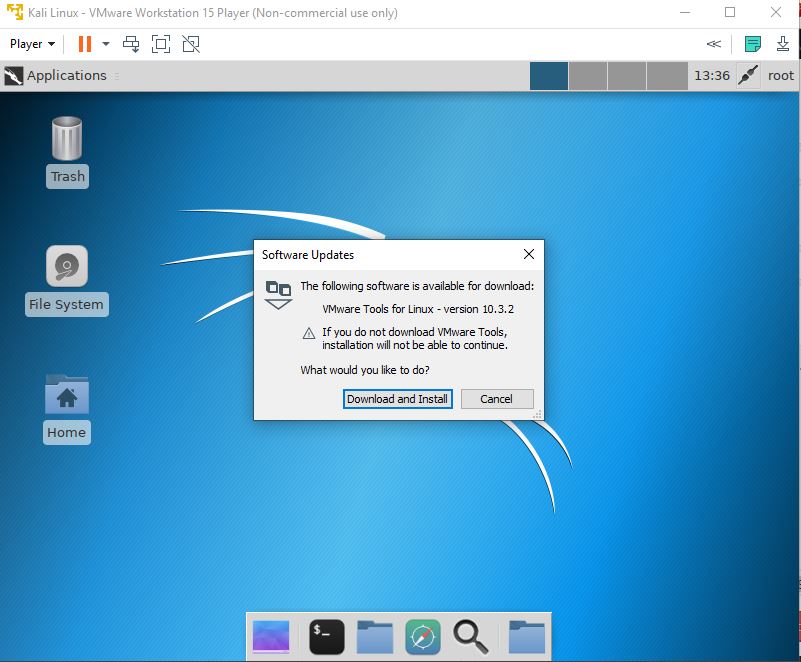
In this way, we can install and set up the Kali Linux operating system on Vmware Workstation Player.
Other Useful Resources:
- How to download & install Cloudready Chromium OS on VirtualMachine
- Puppy Linux Tahr 6.0.5 review: Tahrpup 6.0.5 Features and Advantages
- Install Stacer on Ubuntu via command terminal: Ubuntu activity monitor & cleaner
- How to create a Windows Virtual machine on Linux (Ubuntu)
- Best Free Virtualbox Alternative for Linux
- How to Install Ubuntu on Windows 10 using Virtualbox Virtual Machine
- 6 Best Linux Penetration Testing Distributions for Ethical hacking
Related Posts
How to enable Virtualbox nested VTX/Amd-V on Windows 10/11 or Linux
How to Install Sandbox in Windows 11 or 10 Home Editions
How to install Redhat Podman on Windows 10 or 11 via CMD
Install Docker Desktop on Windows 11 or 10 via PowerShell
How to Install Minikube on Windows 11 or 10 using CMD or PowerShell
High to Low-end Android Emulators to Try on Mac and PCs in 2023