Don’t worry, the process to add motion to your still photos is nothing but a piece of cake on Android devices using Pixaloop.
We all love capturing photos of some special moments and preserve them forever. Photos don’t need any definition. But photos can sometimes feel boring, maybe because they don’t have the ability to move. Well, there are videos for that. But recording videos isn’t as convenient as capturing photos back to back, and delete the unnecessary ones later on. With a number of photos, you can make a collage, GIF, memes, and a lot of other things, where your creativity is the limit. But what about adding some motion to the still photos and make them look even more interesting! Yes, that is possible.
On Android, you can seamlessly add motion to your existing still photos and make them look more interesting. Sky’s the limit when you have the ability to add motion to your existing still photos. From making the rainwater move to add life to the clouds in the sky, and make the reflection moving, on clear water, you can accomplish almost anything and everything with the ability to add motion to your photos.
So without any further delay, let’s get started with the tutorial of making your still photos move on Android.
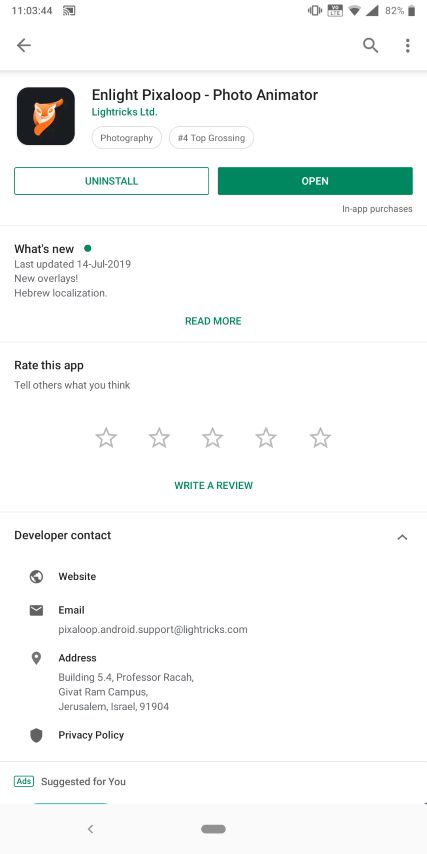
Step 1: Download the Enlight Pixaloop app from the Google Play Store. It is a free app but comes with some in-app purchases.
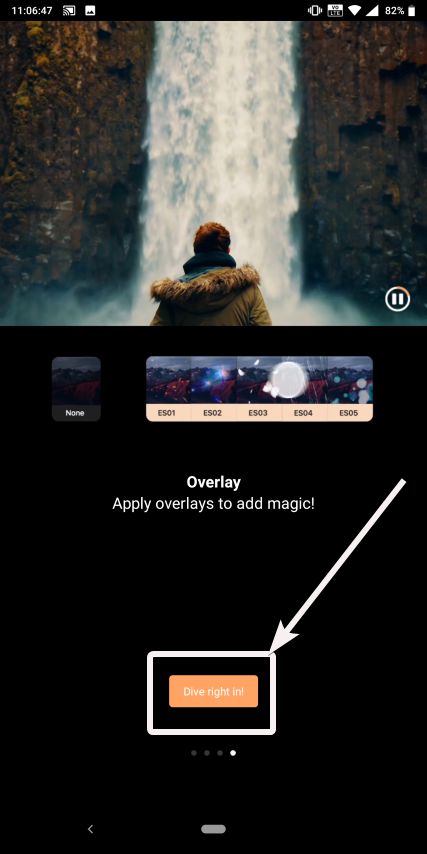
Step 2: After the download and installation of Pixaloop are complete, open it, and just go through the basic walkthrough if you want. Else keep swiping left, unless you get the ‘Drive right in!’ button.
Step 3: You will get an offer to upgrade to Pixaloop Pro now. If you don’t want to upgrade to pro and continue with the free version, just tap on the small close button.

Step 4: Now a sample project will be shown to you. Just tap on the back button, and tap on ‘New Project’ to add motion to your existing still photos.

Step 5: Pixaloop will ask for permission to access your storage. Just allow it, and choose the photo, where you want to add motion. All the photos on your local storage will be displayed by default, however, you can choose a photo from a different local folder, by tapping on the drop-down menu beside ‘All Photos’, followed by choosing the appropriate folder.

Step 6: Once you open the photo, you can now add animation or motion to the still photo.
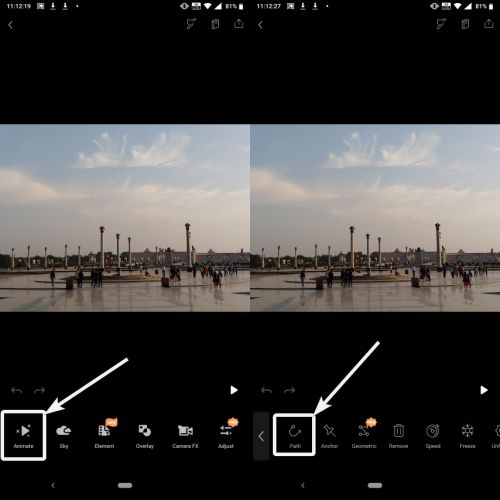
In the chosen photo, I will add motion to the clouds in the sky, and make it look like the clouds are moving in a direction, as it happens in nature. Just tap on ‘Animate’ to start adding animation, and then on ‘Path’ to add motion in a particular direction.
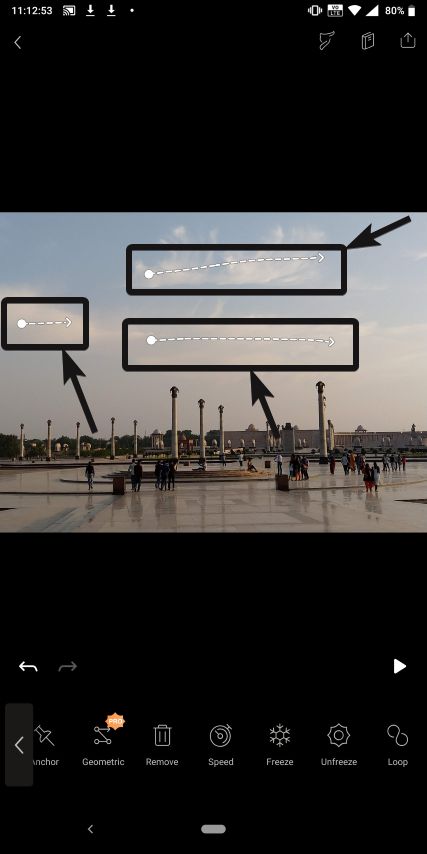
Step 7: Now just draw arrows in the direction of motion. Start drawing the arrows from the source to the destination of movement.
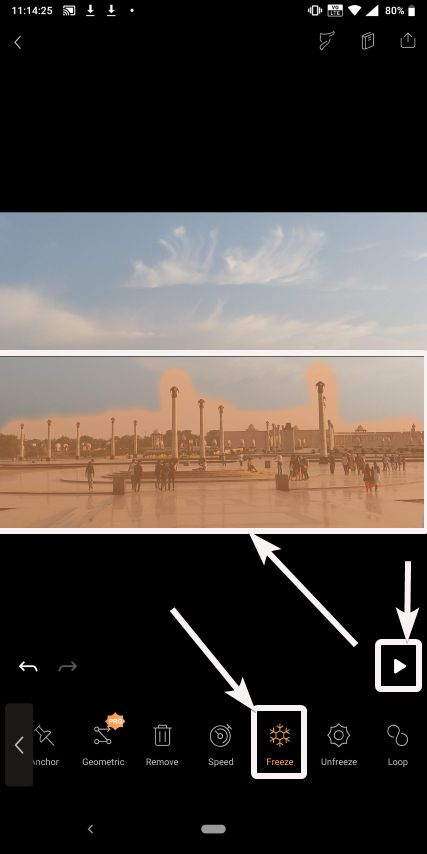
Step 8: Now tap on ‘Freeze’ to freeze the areas that are not supposed to move. Just swipe above the areas now to stop them from moving in the direction of arrows, as shown in the screenshot below. Once you are done, tap on the play button.
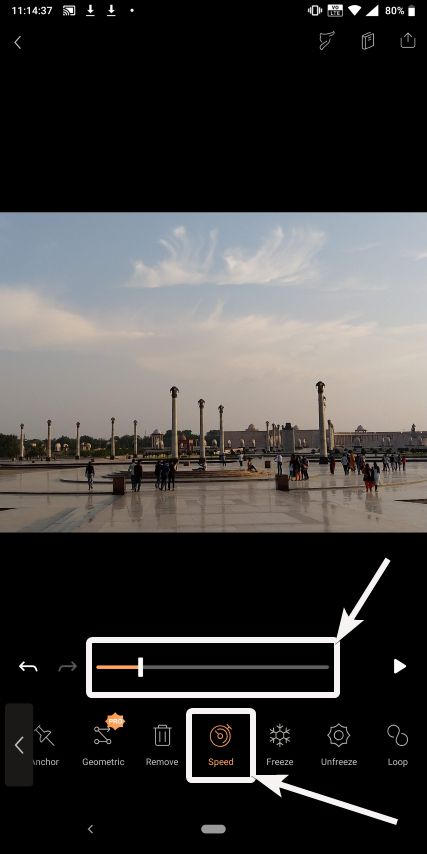
Step 9: If you aren’t satisfied with the preview of the animation, you can adjust the speed of it using the slider, add additional elements, modify the sky, add overlays, and perform a number of other tasks to create the perfect animation. Just replay the animation once again to check whether it the animation you are looking for.
Step 10: Here is how you can modify the sky in your existing photo. The sky will automatically be modified once you choose it.

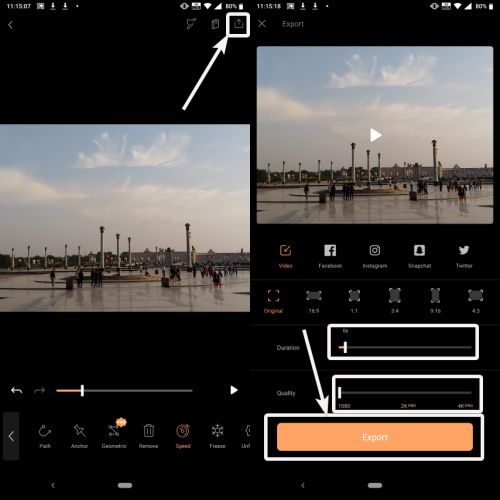
Step 11: After applying all the effects, it is the time to export the animation to a video file. Just tap on the export icon on the top right corner of the app, and choose the export options, before you finally click on the ‘Export’ button.
Depending upon whether you want to post it to some social network, or you just want to store it on your mobile, you can choose the appropriate resolution and aspect ratio, duration, and quality. With the free version of Pixaloop, exporting of the video is limited only to 1080p resolution.
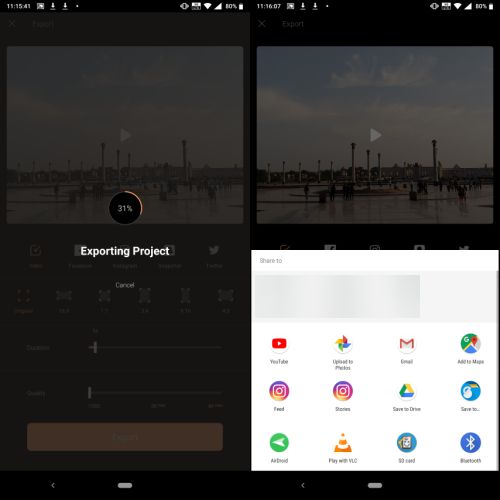
Once the exporting is complete, you can share it directly.
Pixaloop is a free app, but some features are only available in the paid or pro version of the app. Unless you are a professional or is madly in love with Pixaloop, the free version can perfectly cater to all your needs, if you are just using it for some social media hype or just for some entertainment.
Pixaloop is great, but it consumes a lot of resources and requires a lot of processing power, which though, isn’t a deal-breaker. There isn’t an option to export the videos to GIF, as well. But hopefully, such a feature will be added in the coming updates. It all depends upon the developers of the Pixaloop. Pixaloop is not the only app of its category on the Play Store. You can even go for the other apps that offer the same set of functionalities.
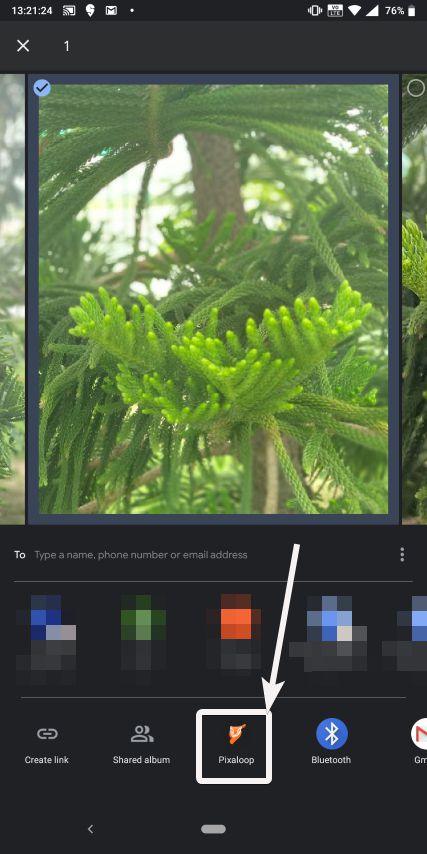
If you want to animate any photo that you come across, on the web, or want to animate photos that are backed up on Google Photos, just tap on the ‘Share’ Button, and tap on ‘Pixaloop’ to import the photo to Pixaloop and start editing.
So that was all about Pixaloop. Do you have any question in mind about Pixaloop, or the complete tutorial? Feel free to comment on the same down below.
Other resources:
Related Posts
How to Download Firefox for Android Without Google Play
How to set Gemini by Google as the default Android assistant
12 Best Free Substitutes for Adobe Photoshop in 2024
What is stopping smartphone gaming from becoming the next big thing? The problems, and the possible solutions
How to turn off call recording announcements on Android Google Dialer
Top 8 Best Free Kitchen Design Software Options in 2024