Cockpit is a nifty software for CLI Linux server systems to control them remotely or locally using the web-based graphical interface, even desktop Linux servers can use it. Whereas, its module – “Cockpit-Podman” enables the users to use the interface of Cockpit to create and manage Containers. For those who don’t know about Podman, it is like Docker but with a daemonless container engine, developed by RedHat, for creating, running, and managing OCI Containers on your Linux System. Also, Podman, by default, doesn’t require root permission to run containers, hence, it is more secure as compared to Docker.
In this tutorial, we will check out the steps and commands required to set up the Cockpit-Podman module on Linux systems such as RHEL, AlmaLinux, Debian, Ubuntu, etc.
What do we require to perform this tutorial?
- A Linux running system is required, it can be RHEL, RockyLinux, CentOS, Fedora, Ubuntu, Debian, Linux Mint, or any other…
- Terminal and User with sudo access to run commands
- Active internet connection to download the necessary packages.
Step 1: Install Cockpit
You may already have Cokcpit, however, if you still haven’t installed it on your Linux then before getting the Podman module you have to configure it. Hence, on your Linux distro’s terminal, run the given command to get the required packages:
For RHEL/CentOS/Fedora/Almalinux/Rocky Linux:
sudo dnf install cockpitFor Ubuntu/Debian/Linux Mint and other similar system:
sudo apt install cockpitStep 2: Enable and Start the Cockpit
After having the Cockpit on your Linux, start and enable its service, if you have not already. This allows the system to run Cockpit automatically with a system boot or in case of a service crash.
sudo systemctl enable --now cockpit.socketNext, let’s check the Cockpit service’s status to ensure it is active without any errors.
sudo systemctl status cockpitYou would like to learn how we can – copy files from a Docker Container to the Host System: A Step-by-Step Guide
Step 3: Install Podman
Before installing the “Podman module” for Cockpit and integrating its services, install the Podman on your Linux system.
For RHEL/CentOS/Fedora/Almalinux/RockyLinux:
sudo dnf install podmanFor Ubuntu, Debian, or other similar Linux:
Like RHEL, podman is also available to download and install using the default repository on Ubuntu or Debian as well, hence use the APT and get the required package.
sudo apt install podmanStep 4: Install Cockpit-Podman Module
Once we have both Podman and Cockpit on our Linux system, the next step is to install a Module that will integrate the feature in Cockpit to use Podamn for managing the containers.
The packages to install the module are also available through the default repository of Linux installed on your system.
For RHEL/CentOS/Fedora/Almalinux/RockyLinux
sudo dnf install cockpit-podmanFor Ubuntu or Debian
sudo apt install cockpit-podmamAs we are done with the setting up of podman’s module, we will have the container management feature on the web-based GUI of Cockpit
Step 5: Access Cockpit in a Web Browser
The cockpit is now running and accessible on port 9090 of your server. Open your web browser and point it to your server’s IP address or domain along with port 9090 as shown below:
https://your-Server-IP:9090
or
https://your-domain:9090Note: If you have an active firewall on Ubuntu then don’t forget to open port 9090 using the command “sudo ufw allow 9090/tcp“, whereas the Cloud server users need to do it in the service provider’s firewall.
On your browser, due to SSL if you get a “Your connection is not private” warning then click on the Advanced and then select “Proceed to x.x.x.x (unsafe)“.
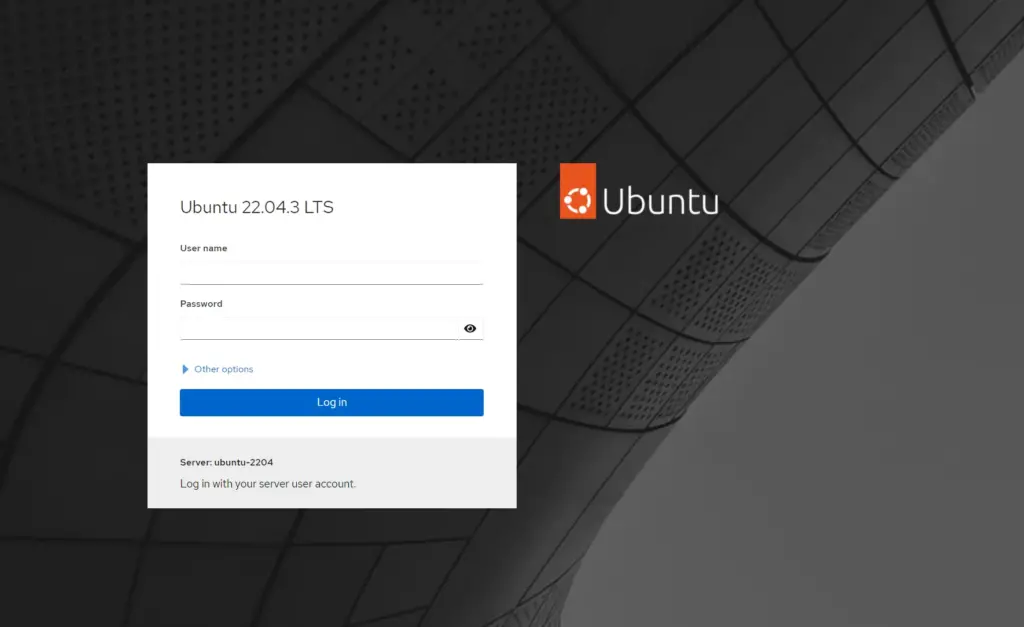
You’ll see the Cockpit login screen. Log in with your system user credentials.
Step 6: Manage Containers with Cockpit-Podman
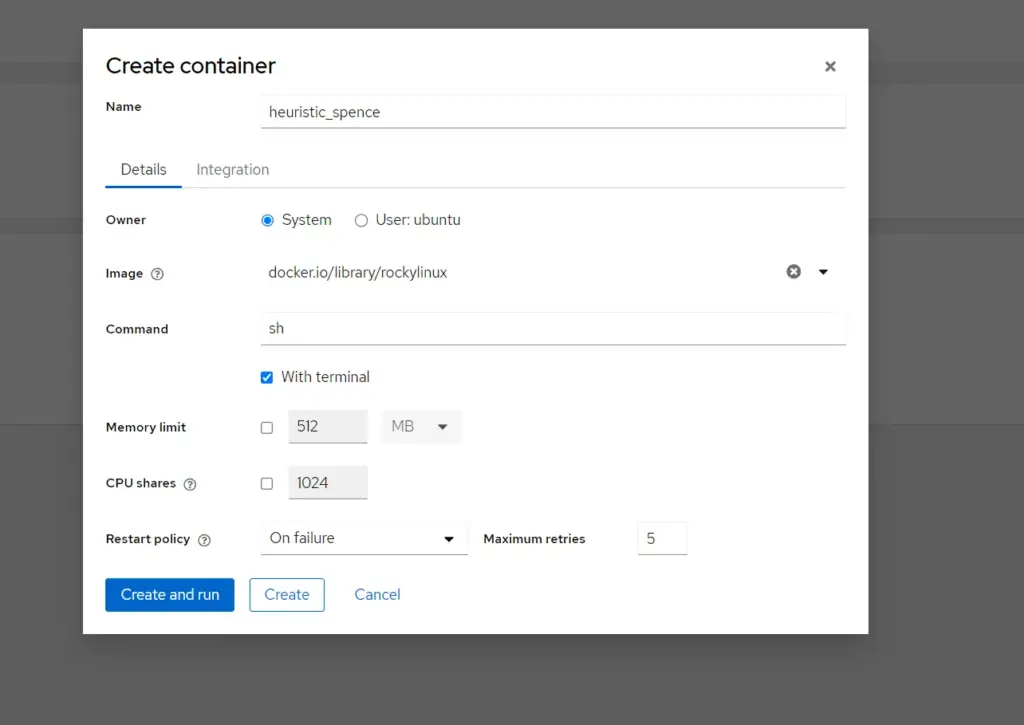
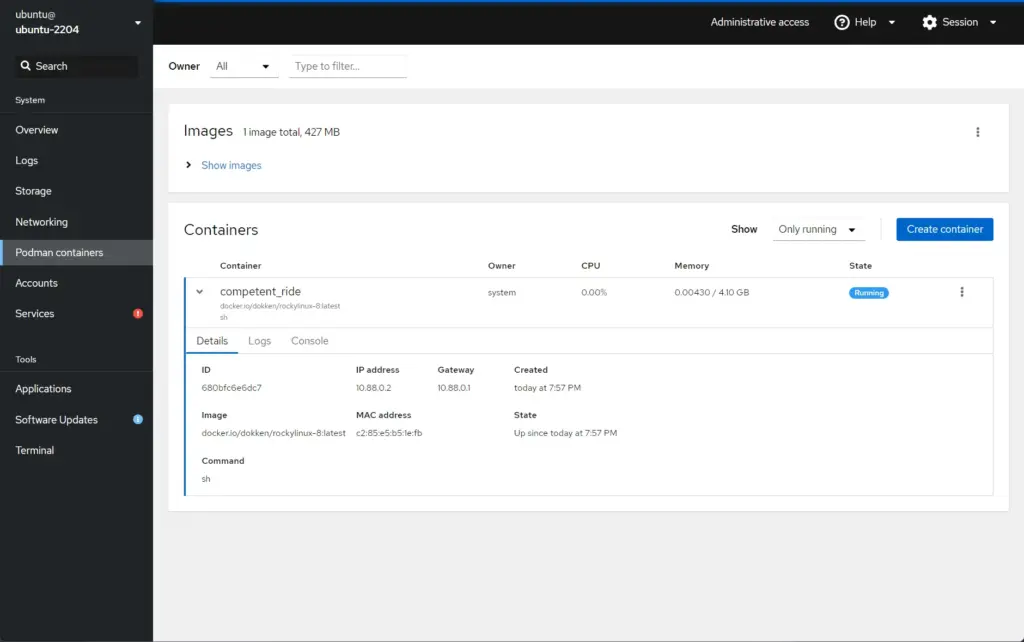
Once logged in, on the web interface of Cockpit Dashboard, from the left side panel click on the “Podman Containers”. From here you can create or manage the existing containers available on your Linux system. However, to create containers from the Cockpit interface, click on the “Create Container” button, and then in the “Image” section type the name of the application you want to pull. After that, if necessary set the memory limits and other settings or just click on the “create and run” button.
Once the Container is created you will see the status on your Cockpit Dashboard.
Conclusion:
Cockpit makes it easy for administrators to manage the command line Linux server effectively. Even we can add multiple servers running with Cockpit from our current Cockpit Dashboard to manage all of them centrally. Whereas when combined with Cockpit-Podman, it ofcourse gives a GUI to manage the containers as well.
Other Articles:
- What is the difference between OpenVZ and Docker?
- How to install Ubuntu on Windows 11 or 10 with a Single command?
- 7 Best Linux Server Distributions for Virtualization
- How to install Podman on Ubuntu 20.04 WSL2
- How to install Podman in Debian 12 or 11 Linux
- How to install Podman on Rocky Linux 8 / AlmaLinux to run Containers