In this article, we learn how to install and configure NextCloud on Almalinux 9 or Rocky Linux 9 for setting up your cloud.
What Is NextCloud?
Well, those yet don’t know NextCloud is a fork of popular OwnCloud but become more popular than that. It is also a free and open-source personal cloud solution with Enterprise solutions as well. The key benefit of using such open source software suite is it lets users store their data securely in the cloud but on a server owned by them physically or virtually. Hence, from the privacy point of view, it is an excellent alternative to proprietary cloud solutions like Dropbox or Google Drive because users have full control over their data.
How Does NextCloud Work?
NextCloud provides two main features: storage synchronization between users and server-side encryption of file contents which ensure the privacy of user data. For syncing, NextCloud also provides client applications that you can easily install on your respective desktop operating systems.
The file synchronization keeps syncing all the changes made by a user on a desktop and will replicate the same on the server as well as on all other devices with access to the same folder. Whereas, server-side encryption offers security, which means that only a user’s personalized key can decrypt his/her files stored using Nextcloud — no one else (not even admins) can read the encrypted contents without the correct key being provided by the user themselves.
Advantages of Using NextCloud
The main advantage of using Nextcloud is security — if you store your files with service providers like Google Drive or Dropbox, you don’t have control over who has access to them or when they are accessed.
With Nextcloud however, you always know who currently has access to what files and when they were last accessed (even if they only viewed the list of file names).
Additionally, since all information is stored on your private server (ie not on any company infrastructure), you never have to worry about having to purchase additional storage space when your monthly quota is exceeded again — something you would typically have to do if storing with a traditional provider like Google Drive or Dropbox, etc.
Lastly, since NextCloud is open source software, it allows individuals or organizations to customize its functionality much more easily than other cloud storage platforms which generally provide far fewer options for customization than an open source solution would allow for example (e.g., setting custom access rules, etc).
In this guide, we show step-by-step commands for installing Nextcloud on Almalinux Linux 9 | Rocky Linux 9.
Requirements
To follow this tutorial we need the following things, in which Apache, PHP, and MySQL will be installed by us in this guide but the rest of the requirements your server must be possessed.
• Almalinux or Rocky Linux 9
• Apache, PHP 8.0, 8.1, 8.2
• MySQL 8.0+ or MariaDB 10.2/10.3/10.4/10.5
• Access to a Non-root sudo user at least
• 512MB of RAM
Step 1: Run the DNF update command
To ensure we won’t face any problems while installing the NextCloud on Almalinux or Rocky Linux 9, let’s run the system update command once. This will install all the latest security and package updates available for our Linux server OS.
sudo dnf updateAlso, install:
sudo dnf install wget nano unzipStep 2: Disable SELinux in AlmaLinux 8
Once the update is completed, also put SELinux in permissive mode, which means disabling it temporarily until the next reboot. This will make sure there will be no unwanted restrictions in installing NextCloud.
sudo setenforce 0
sudo sed -i 's/^SELINUX=.*/SELINUX=permissive/g' /etc/selinux/config
To check the status:
sestatus
Step 3: Install Apache, MySQL, and PHP
As NextCloud on the server side is a PHP-based web application, therefore, we need to create a web server environment on our Linux. The common applications for that are Apache, MySQL for Databases, and PHP. So, follow the given command to install them.
1. Setup Apache Web server (httpd)
Apache is the most common and readily available web server from the default repository of any Linux distro including AlmaLinux and Rocky Linux. Therefore, on your command terminal simply run the following commands:
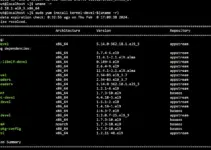
sudo dnf install httpdStart and enable Apache services
sudo systemctl enable --now httpdTo check the status:
systemctl status httpd --no-pager -lAlso, open HTTP and HTTPS ports on your system, so that we can access the NextCloud page later:
sudo firewall-cmd --permanent --add-service={http,https}Reload the Firewall
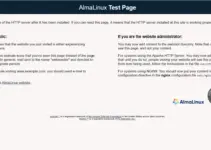
sudo firewall-cmd --reloadTo confirm further, we can check the default Apache web page. For that open browser on your local system that can access your server IP address or domain.
Example:
http://server-ip-addressYou will see something like below:

2. Install MySQL Server on Alma or Rocky
We can use either MariaDB or MySQL Database server on Almalinux 9 or Rocky Linux to store the data that will be generated by NextCloud later. Here we are installing MySQL 8.0 which is available to download from the default repository of both these RPM-based Linux distros.
sudo dnf install mysql mysql-serverStart the Server:
sudo systemctl enable --now mysqldFor the service status:
systemctl status mysqld --no-page -l3. Create a Database for NextCloud
Let’s also create a Database to use with NextCloud on a MySQL server, here are the SQL commands to follow:
sudo mysqlLogin:
mysql -u root -pCreate database User:
CREATE USER 'youruser'@'localhost' IDENTIFIED BY "yourpassword";Create DB:
CREATE DATABASE yourdb;Give all rights of created DB to use:
GRANT ALL PRIVILEGES ON yourdb.* TO 'youruser'@'localhost';FLUSH PRIVILEGES;exit;Note: Replace yourdb with the database name you want to give, whereas the youruser with the username and yourpassword with the password you want to assign.
4. Download PHP 8.1
The default version of PHP available through the system repository of AlmaLinux or Rocky is PHP 8.0, however here we will go for PHP 8.1. So, add the third-party Remni repository manually to get the latest versions of PHP language.
sudo dnf install epel-releasesudo dnf -y install http://rpms.remirepo.net/enterprise/remi-release-9.rpmsudo dnf updatesudo dnf module reset phpsudo dnf module enable php:remi-8.1
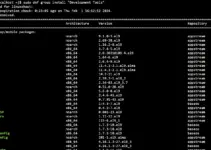
Install PHP and its extensions required for NextCloud:
Now, run the given command in your terminal to not only install the PHP but its extensions as well.
sudo dnf install php php-{cli,mysqlnd,zip,devel,gd,mcrypt,mbstring,curl,xml,pear,bcmath,json,pdo,pecl-apcu,pecl-apcu-devel,ldap}
Don’t forget to enable and start the PHP-FPM service required by NextCloud.
sudo systemctl enable --now php-fpm.serviceIncrease PHP Memory Limit:
sudo sed -i "s/memory_limit = .*/memory_limit = 512M /" /etc/php.iniRestart Apache Server:
sudo systemctl restart httpdStep 4: Download Nextcloud Server
So far, we have created the web server environment along with other requirements by NextCloud. Now, let’s download its installation files available in the archived format of this cloud software from its official website. We can use the given command to quickly have it without visiting its download page.
wget https://download.nextcloud.com/server/releases/latest.zipStep 5: Install NextCloud in Alma or Rocky Linux 9
After downloading the Nextcloud installation files, unzip the file using the given command.
unzip latest.zipMove the extracted file to /var/www/html/ directory
sudo mv nextcloud/ /var/www/html/Create a data folder to store uploaded data in Nextcloud
sudo mkdir /var/www/html/nextcloud/dataNow, give the Nextcloud folder’s permission to the Apache user:
sudo chown apache:apache -R /var/www/html/nextcloudStep 6. Create an Apache VirtualHost file for NextCloud
Let’s create an Apache configuration file for NextCloud on Almalinux or Rocky, to serve the file in case you are using the domain name or multiple websites that are running on the same server.
sudo nano /etc/httpd/conf.d/nextcloud.confPaste the following lines:
Note: Don’t forget to replace cloud.example.com with the domain name you want to use. If you don’t have any then leave it as it is.
<VirtualHost *:80>

ServerName cloud.example.com
ServerAdmin [email protected]

DocumentRoot /var/www/html/nextcloud

<directory /var/www/html/nextcloud>
Require all granted
AllowOverride All
Options FollowSymLinks MultiViews
SetEnv HOME /var/www/html/nextcloud
SetEnv HTTP_HOME /var/www/html/nextcloud
</directory>

</VirtualHost>
Restart the Apache web server and set SELinux policies:
sudo semanage fcontext -a -t httpd_sys_rw_content_t "/var/www/html(/.*)?"sudo sudo restorecon -Rv /var/www/htmlsudo systemctl restart httpdStep 7. Access NextCloud Web Interface
Once all the above steps are completed you are ready to access the web interface for setting up NextCloud further on your Rocky or AlmaLinux 9 system.
Open your browser that can access the domain or IP address of the server where you have installed NextCloud. After that point to the Ip or domain:
http://your-server-ip-address
or
http://your-domain.com
Create Admin user and enter Database Details
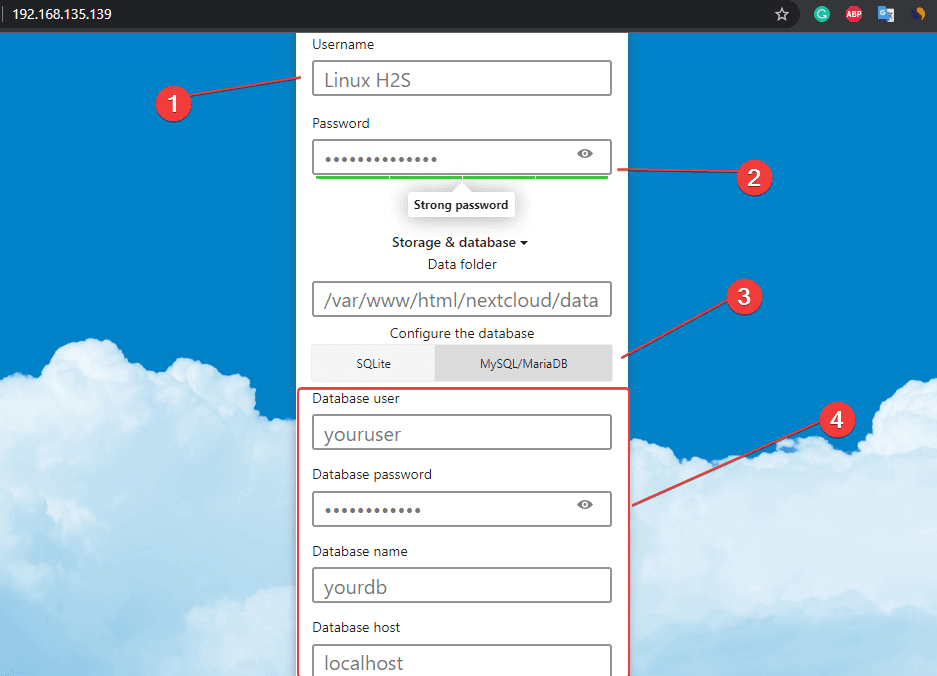
The first page will ask you to create an Admin user and after that select MySQL/MariaDB as Database. There enter the details of the Database you have created.
After that click on the INSTALL button.
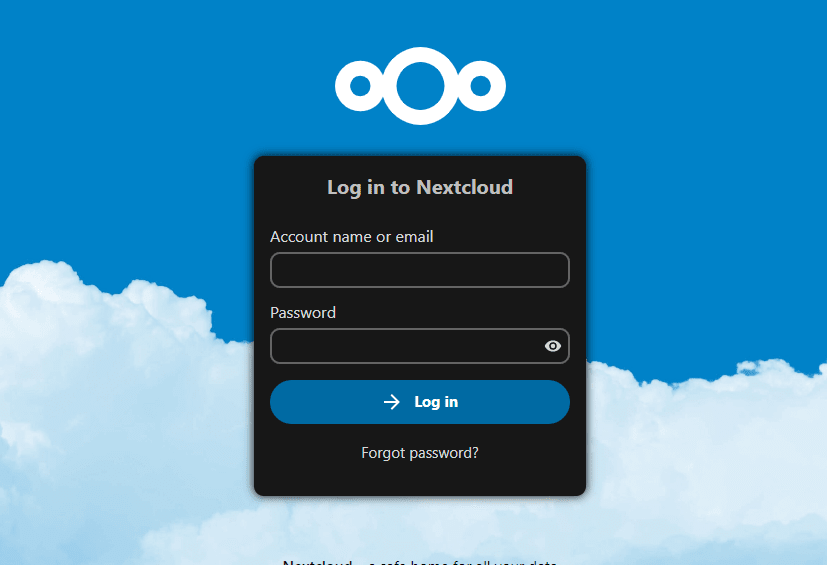
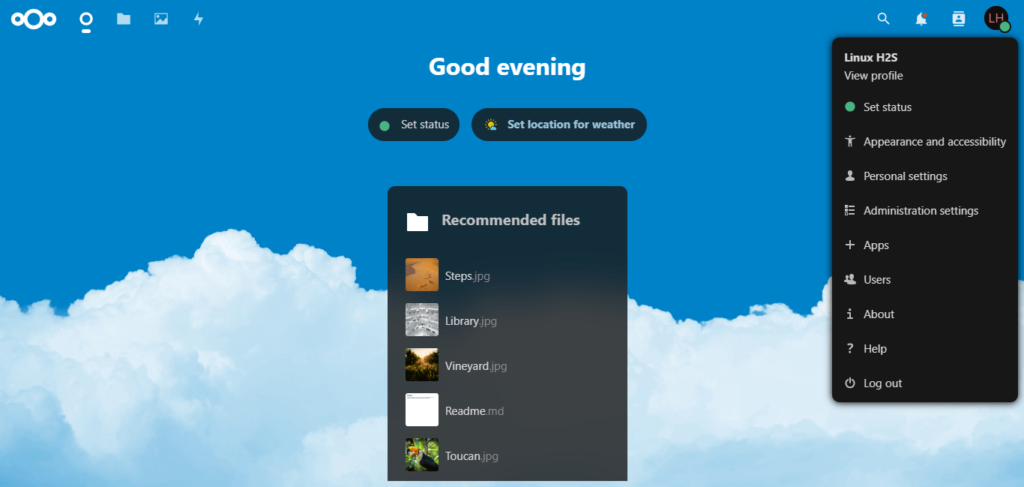
Step 8. Login to NextCloud Dashboard
When you have the Login page, enter the details of the Admin user you have created and sign in to have the NextCloud Dashboard to upload files.
Note: In case you forget the Admin password then here is the article to change it – How to reset NextCloud Admin Password using the command.
Step 9. Command to Update NextCloud
In the future, if you want to upgrade your NextCloud easily using the command, then here is one to follow:
Edit php.ini
sudo nano /etc/php.ini
Scroll to the end of the file:
--define apc.enable_cli=1
Save the file using Ctrl+O, hit the Enter key, and then press Ctrl+X
Once you have added it, run this command to check NextCloud upgrades whenever available to install.
sudo -u apache php --define apc.enable_cli=1 /var/www/html/nextcloud/updater/updater.pharStep 10. Set Let’s Encrypt SSL for NextCloud (optional)
Those who also want to set an SSL certificate need to run the following commands:
Note: Make sure in your Domain DNS “A” record is pointing to the Ip-address where you have installed NextCloud.
sudo dnf -y install certbot mod_sslsudo certbot certonly --standalone -d cloud.example.com --preferred-challenges http --agree-tos -n -m [email protected] --keep-until-expiringOnce the SSL certificate has been issued successfully edit your existing Apache Configuration:
sudo nano /etc/httpd/conf.d/nextcloud.confDelete the existing configuration and add the following one. And don’t forget to replace the cloud.example.com with the domain name you want to use access NextCloud.
<VirtualHost *:80>
ServerName files.example.com
ServerAdmin [email protected]
RewriteEngine On
RewriteCond %{HTTPS} off
RewriteRule ^(.*)$ https://%{HTTP_HOST}$1 [R=301,L]
</VirtualHost>

<IfModule mod_ssl.c>

<VirtualHost *:443>

ServerName cloud.example.com
ServerAdmin [email protected]
DocumentRoot /var/www/html/nextcloud

<directory /var/www/html/nextcloud>
Require all granted
AllowOverride All
Options FollowSymLinks MultiViews
SetEnv HOME /var/www/html/nextcloud
SetEnv HTTP_HOME /var/www/html/nextcloud
</directory>

SSLEngine on
SSLCertificateFile /etc/letsencrypt/live/cloud.example.com/fullchain.pem
SSLCertificateKeyFile /etc/letsencrypt/live/cloud.example.com/privkey.pem

</VirtualHost>
</IfModule>
Save the file by pressing Ctlr+O, hit the Enter key, and then exit the same using Ctrl +X.
Restart the Web server:
sudo systemctl restart httpdThose who want to install NextCloud Client can see our article –
Install Nextcloud Client on Debian 11 Bullseye Linux
How to install the NextCloud sync client on Almalinux or Rocky Linux
FAQ:
Yes, NextCloud is like Google Drive but on it, all the data is under your control and on your personal server. Whereas on Google Drive all data and servers are under Google’s control. Hence, it is one of the best personal cloud solutions.
NextCloud is a fork of ownCloud therefore both are the same, but, different in terms of ideology. On one side NextCloud focuses on adding new features, while Owncloud trying to be a well-stable enterprise-grade file collaboration platform.
Yes, 2GB of RAM is enough to install NextCloud because the recommend minimum memory requirement of this personal cloud software is 512MB only.
As per the official documentation of the NextCloud MariaDB or MySQL open-source database servers are best to use, however by default it is set to use SQLite.
Yes, we can use NextCloud Server or Client on both Windows 10 and Windows 11 versions of Microsoft.
Yes, NextCloud is secure because it can use SSL or TSL to transfer data and also can encrypt the data using a default military-grade AES-256 encryption with server-based or custom key management. However, if you are installing it on your server then overall security is in your hands.