Sharing files and collaborating on different projects is a key need of businesses and even of individuals in today’s world where data plays an important role in our lives. So, to make the data, we need, accessible by us everywhere we can use the ‘Internet and some cloud platform’. However, if you want full control of your data or just don’t trust public platforms then you can create your own cloud solution with the help of open source software platforms like Nextcloud. It is a simple but powerful solution not only for personal users but also can be trusted by businesses to manage their files, calendars, contacts, and more.
In this step-by-step guide, we will go through the command required to install Nextcloud on Amazon Linux 2023 on AWS Ec2.
Introduction to Nextcloud
Nextcloud is an open-source client-server online collaboration platform that lets you store, share, and collaborate on your data securely. It offers features similar to public cloud storage like Dropbox and Google Drive. Using Nextcloud, you cannot only store your data to access it anywhere but even can perform synchronization between various devices. Further, it comes with secure file sharing, built-in document editing, and more, making it a perfect solution for individuals and organizations seeking control over their data.
Note: We don’t recommend Amazon Linux for NextCloud, it is better to either go for Almalinux/Rocky Linux or Ubuntu/Debian. It is because of third-party package support.
- How to install NextCloud on Almalinux 9 | Rocky Linux 9
- How to install NextCloud on Debian 11 Bullseye Linux
Prerequisites
To follow this tutorial of installing NextCloud on Amazon Linux 2023, you need an active AWS account, access to Instance either directly or via SSH along with Sudo rights to install various packages we required.
Step 1: Launching an Amazon Linux 2023 Instance
First, access your Amazon Linux command terminal. For that log in to your AWS Management Console, navigate to the EC2 dashboard or Lightsail where you have created the Amazon Linux AMI instance. After that either connect it directly from your AWS Dashboard or use SSH to remotely connect using the local system’s terminal or command prompt.
Step 2: Start with Updating packages
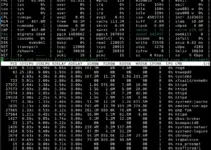
Once you have the Terminal access to your Amazon Linux, execute the system update command to refresh the DNF’s package index cache and update the installed packages.
sudo dnf updateStep 3: Installing LAMP Stack
NextCloud is a PHP-based application and requires a web server to serve users along with Database to store data, therefore here we are setting up a LAMP stack. Run the given command which will install Apache, MySQL, Perl, and PHP on your Linux.
sudo dnf install httpd mariadb*-server php php-mysqlnd php-json php-gmp php-intl php-mbstring php-gd php-curl
Unfortunately, NextCloud also requires a PHP-zip module which is not available to install using the default system repositories of Amazon Linux 2023 that is weird, though we can have that using PECL. Here are the commands to follow:
sudo dnf install php-devel php-pear libzip libzip-develsudo pecl install zipecho "extension=zip.so" | sudo tee /etc/php.d/20-zip.iniNote: If even after installing the PHP-ZIP extension, later, if NextCloud is not detecting it then reboot your server.
After completing the installation of all necessary components, activate the Apache and MariaDB services:
For starting and enabling HTTPD service:
sudo systemctl enable --now httpdTo check the service is running without producing any errors use:
sudo systemctl status httpd --no-pager -l
Similarly, start and enable MySQL/MariaDB service:
sudo systemctl enable --now mariadbAnd check the status:
sudo systemctl status mariadb --no-pager -lDon’t forget to enable and start the PHP-FPM service required by NextCloud.
sudo systemctl enable --now php-fpm.serviceIncrease PHP Memory Limit:
sudo sed -i "s/memory_limit = .*/memory_limit = 512M /" /etc/php.iniRestart Apache Server and PHP-FPM:
sudo systemctl restart httpdsudo systemctl restart php-fpmStep 4: Create a Database for NextCloud
Secure and set a password for your MariaDB root user before creating a Database to use with NextCloud. Use the given command and follow the text-based wizard it gives.
sudo mysql_secure_installationYou will have the following options to answer:
Enter current password for root (enter for none): //Press Enter key
Switch to unix_socket authentication [Y/n] //Press Y and hit Enter key
Change the root password? [Y/n] //Press Y and hit Enter key
Remove anonymous users? [Y/n] //Press Y and hit Enter key
Disallow root login remotely? [Y/n] //Press Y and hit Enter key
Remove the test database and access it. [Y/n] //Press Y and hit Enter key
Reload privilege tables now? [Y/n] //Press Y and hit Enter key
After that Login to MariaDB and create the Database
mysql -u root -pCreate the Database and User. Here the database name we have used is “nextcloud” and the user is “nextclouduser”, you can change them as per your choice.
CREATE DATABASE nextcloud;
CREATE USER 'nextclouduser'@'localhost' IDENTIFIED BY 'your_password';
GRANT ALL PRIVILEGES ON nextcloud.* TO 'nextclouduser'@'localhost';
FLUSH PRIVILEGES;
EXIT;
Step 5: Installing NextCloud on Amazon Linux 2023
Now, let’s download the NextCloud and configure it to use with the Apache web server.
Download NextCloud Server
wget https://download.nextcloud.com/server/releases/latest.zipIf you don’t have wget then to install it use:
sudo dnf install wget
Extract the downloaded file and move it to your Apache’s web root directory:
unzip latest.zipsudo mv nextcloud /var/www/htmlsudo mkdir -p /var/www/html/nextcloud/dataCreate Apache configuration file:
Let’s create an Apache configuration file for NextCloud on Amazon Linux 2023, to serve the file in case you are using the domain name or multiple websites that are running on the same server.
sudo nano /etc/httpd/conf.d/nextcloud.confPaste the following lines:
Note: Don’t forget to replace cloud.example.com with the domain name you want to use. If you don’t have any then leave it as it is.
<VirtualHost *:80>

ServerName cloud.example.com
ServerAdmin [email protected]

DocumentRoot /var/www/html/nextcloud

<directory /var/www/html/nextcloud>
Require all granted
AllowOverride All
Options FollowSymLinks MultiViews
SetEnv HOME /var/www/html/nextcloud
SetEnv HTTP_HOME /var/www/html/nextcloud
</directory>

</VirtualHost>
Save the file by pressing Ctrl+X, Y, and then hit the Enter key.
Step 6: Set required permissions
We have configured the NextCloud successfully, and now set permissions for Apache, so that it can access the NextCloud files without any problem. Also, remove the welcome page of Apache.
sudo chown -R apache:apache /var/www/html/nextcloud/
sudo chmod -R 755 /var/www
Remove the welcome page
sudo rm /etc/httpd/conf.d/welcome.confRestart Apache and PHP-FPM service:
sudo systemctl restart httpdsudo systemctl restart php-fpmStep 7: Access NextCloud to set it up on Amazon Linux 2023
On your local browser, type the Ip-address or domain that you have used to access the NextCloud service. For example http//your-server-ip-address.
Soon you will see the initial interface of this personal cloud service to configure the Database and username.
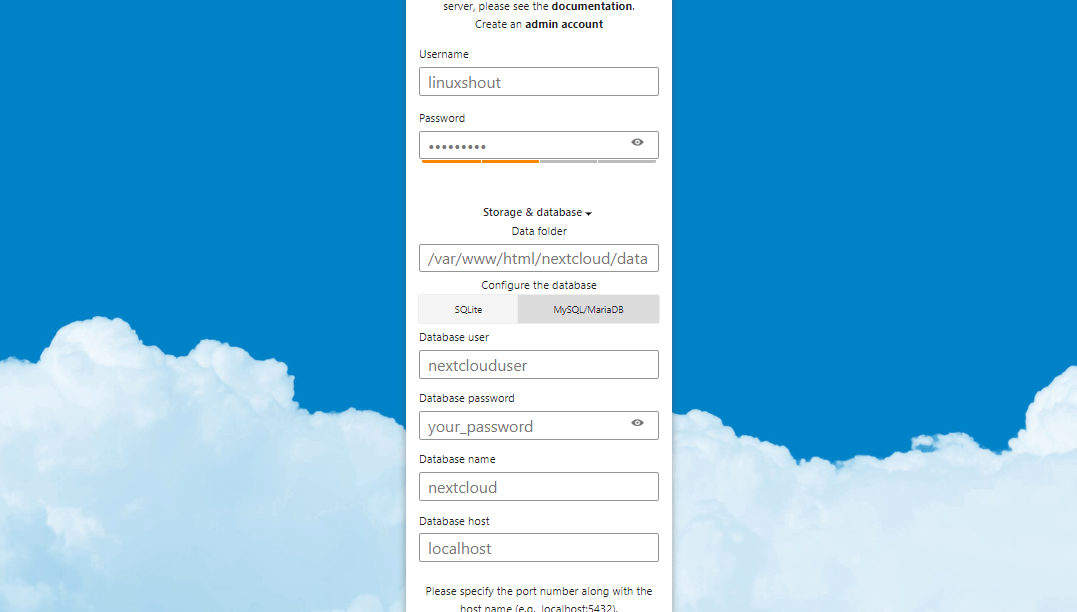
Enter the Username and Password you want to set and click on the Mariadb/MySQL tab. Further, add the details of the Database you have created.
Click on the “Install” button to start the final setting up of this cloud platform.
Now, you will see the Login Interface, use the username and password you have created in the previous step.
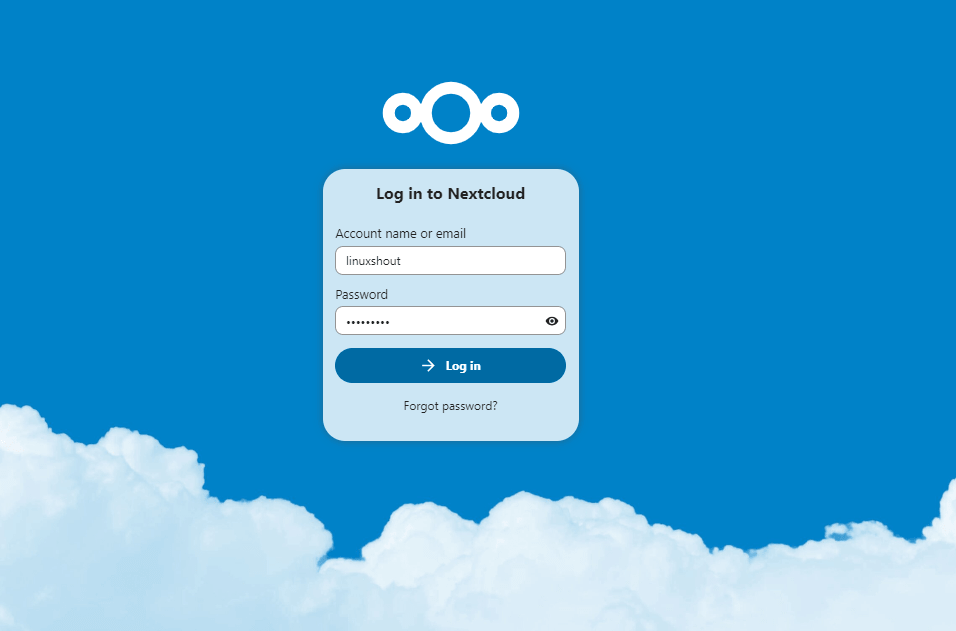
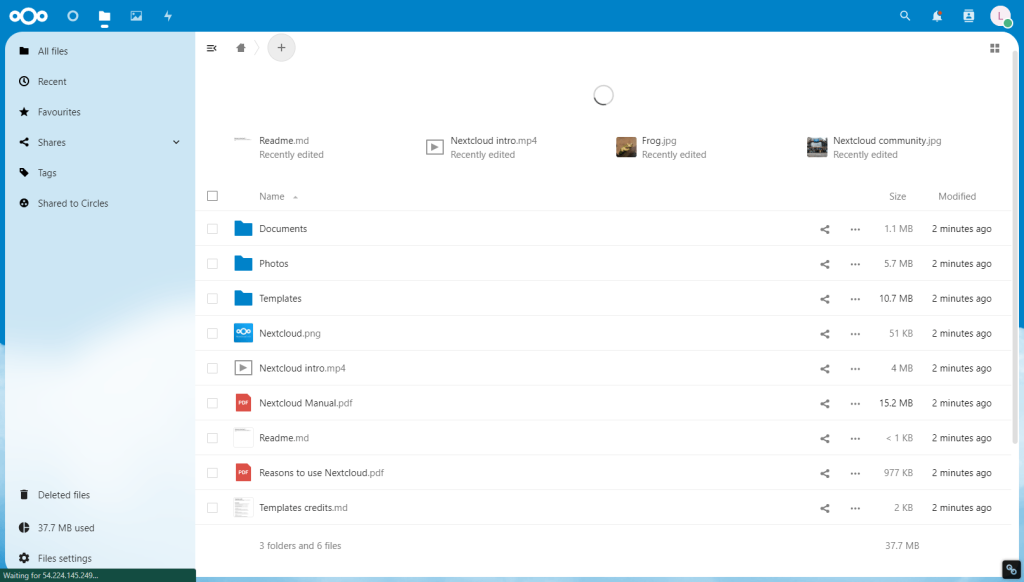
Finally, you have the NextCloud Dashboard to upload or share the files.
Other Articles: