Let’s learn commands and steps – how to share files and folders using Samba by installing it on Linux Mint which is not there by default.
What is a Samba server?
Samba is a popular, open-source networking software that computers with a Unix or Linux – operating system allow the sharing of network resources from Windows -networks, such as files and printers. However, it is not limited to Windows only, we can install and use on Unix / Linux- based servers pr Desktop to share resources over the network. The common protocols Server Message Block (SMB) and Common Internet File System (CIFS, an open version of SMB) are the basis on which Samba is based. The name ” Samba ” is just a name given to represent “SMB”.
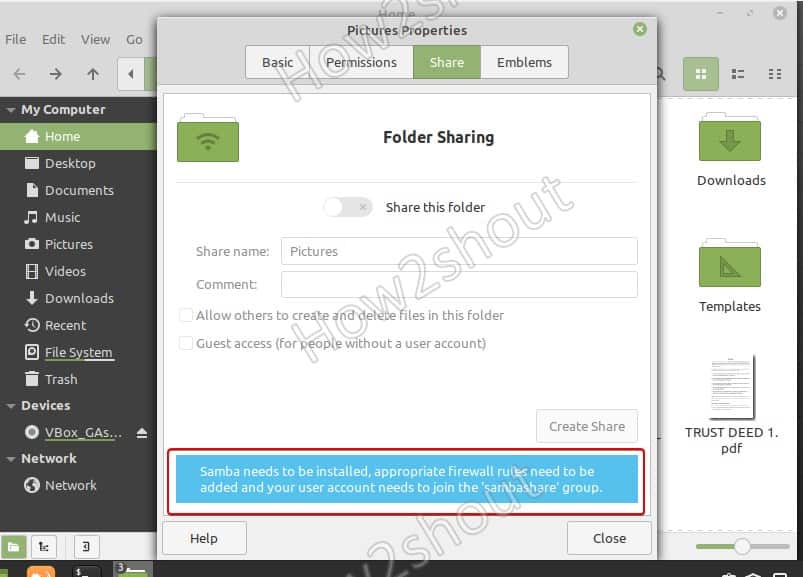
If you are using Linux Mint and want to share some folder, then right-click on it and select properties. And then the Share Tab. However, you will not able to enable this option because samba is not there yet. To confirm, you can see a message given at the bottom “Samba needs to be installed, appropriate firewall rules need to be added and your user account needs to join the ‘samba share group“.
To solve this let’s follow the given steps in this article…
Install and Configure Samba Server on Linux Mint 20
1. Run system update
Well, it is not a necessary step, however, run the system update command to rebuild the repo cache and make sure all the system installed packages are up to date.
sudo apt update
2. Install Samba on Linux Mint
Next, in your command terminal use the APT package manager to install Samba on your Linux Mint. The packages to set it up are already there in the system repository, thus we don’t need to add anything extra.
sudo apt install samba
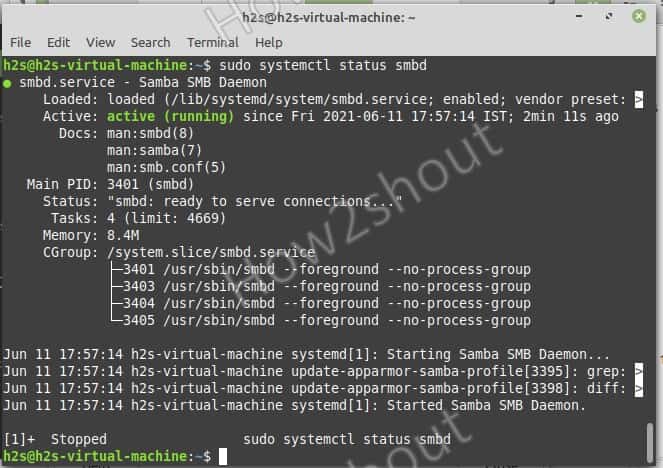
Check its service is active and running:
sudo systemctl status smbd
If it is not active then run:
sudo systemctl --enable now smbd
3. Allow samba in Linux Mint Firewall
To connect and access the shared files over SMB protocol, we have to first whitelist and allow its service to get accessed from the outside of the computer. Thus, allow it in the firewall
sudo ufw allow samba
4. Add your user to the Samba group
Let’s add the current System user to the SambaShare group, so it can access all files and folders shared under it.
sudo usermod -aG sambashare $USER
set the password for share: This will be different from your system password.
sudo smbpasswd -a $USER
Note: $USER means your current user, if you want to set some other user then change $USER with the particular user name. Also, the file or folder you want to share must be accessible to that particular user.
Alternatively, if you want to add some other users to the SAMBA group use:
sudo usermod -aG sambashare your-user
To set password:
sudo smbpasswd -a your-user
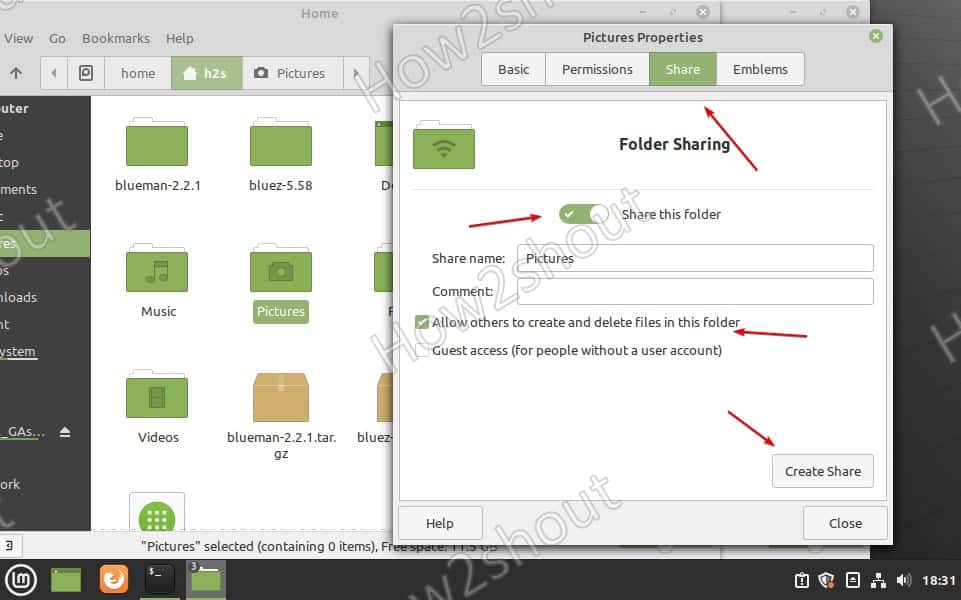
Lets’ say I want to share the Pictures folder or any other on my Linux Mint that is owned by my current user. So, for that simply go to that folder, right-click on it and select the Share tab.
Now, we can mount the Linux Mint shared folder on other Windows or Linux systems available in the same network or domain.
On Windows 10/8/7
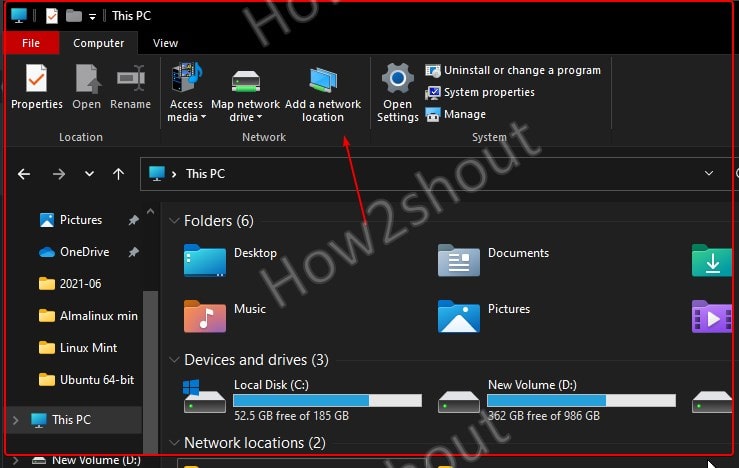
- Open My Computer or This PC
- Select Add network location icon given in the top menu.
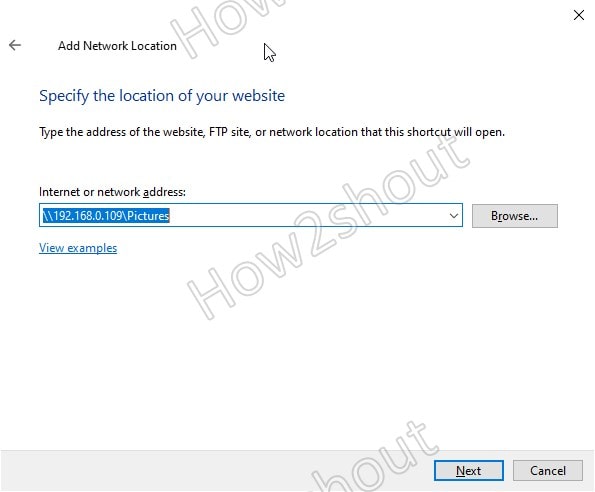
- Add your Linux Mint \\server-ipaddress\shared -folder-path– For example, here we have shared the Pictures folder, the path will be like this- \\192.168.0.109\Pictures
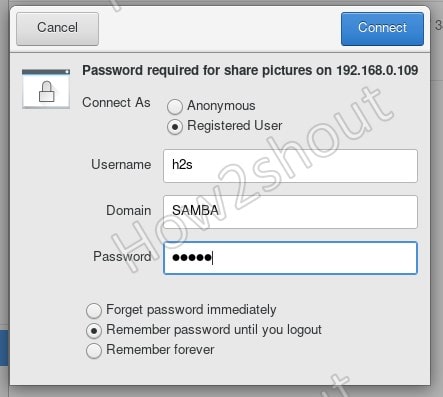
- Enter Samba User and password

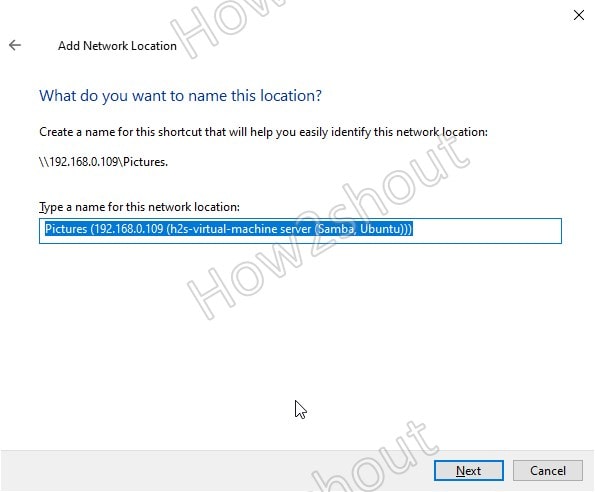
- The system will set a random name for your shared folder, however, you change to something easy to remember.
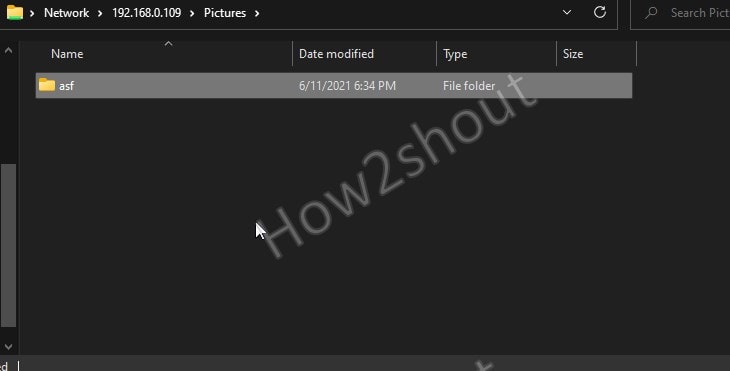
- Finally, you have the shared folder with read and write access.
On Linux systems such as Ubuntu, CentOS, and others…
The place to connect the samba server can be different from Linux to Linux, depending upon the desktop environment.
Here we are showing an example for Ubuntu and CentOS using GNOME.
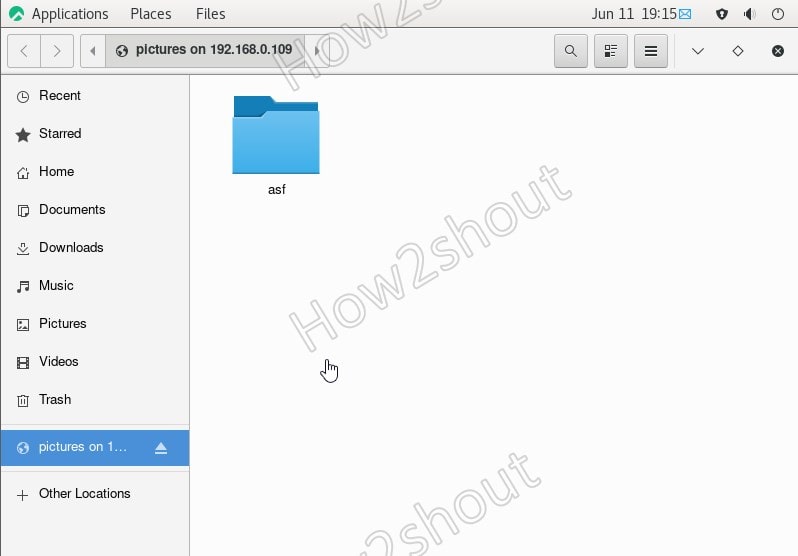
- Open File Manager
- Select Other Locations from the right side given panel.
- At the bottom, in the “Connect Server” box type-
smb://server-ip/shared-folder-path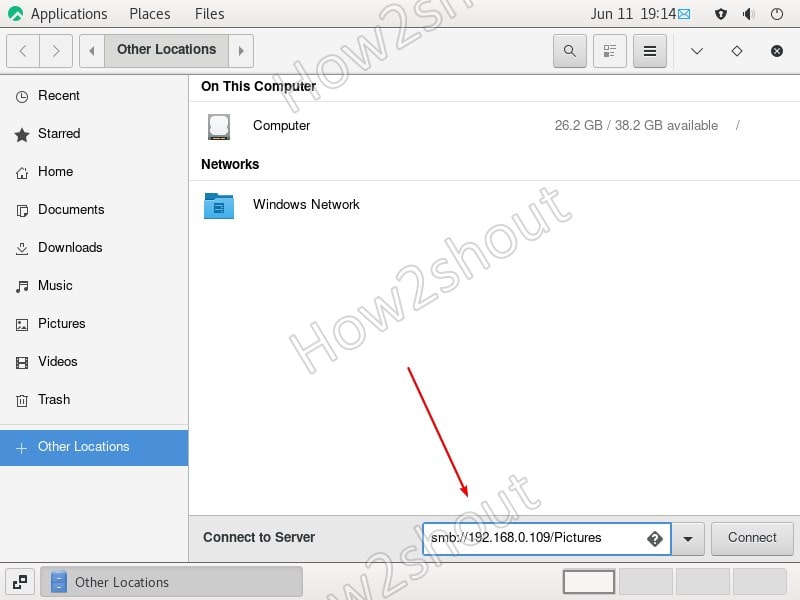
If you want to create a new user to access the folder you want to share except it cannot access anything else then follow the below steps:
Create users:
sudo useradd new-user
Add user to Sambashare group
sudo usermode -aG new-user sambshare
Change the folder rights of a folder that you want to share to read and write for all users. So, that our new user can access that.
sudo chmod 777 folder-path
Example- Pictures
sudo chmod 777 Pictures
Now, you can access the shared folder using the new user and its password.


Your commands to check and start the samba daemon say “smdb”. That should be “smbd”
Thanks for pointing out the typo error
I had to use “sudo smbpasswd -a $USER” otherwise I got the error “Failed to find the entry for user …”
Otherwise, a very straightforward setup. Many thanks.
Awesome walkthrough, thank you!|
One minor typo in the “Add user to Sambashare group” step:
Command should be `sudo usermod -aG sambashare new-user`
…and then it might be good to set the password for that new user immediately following:
`sudo smbpasswd -a new-user`
For the command line “sudo systemctl –enable now smbd”
in my version – Linux Mint 17.3 “Rosa” Cinnamon – I had to shorton to “sudo enable now smbd” to work.
Everything working fast, I have an old gateway DX4200 with 8 GB, and a tablet with Windows 10. Your tutorial was accurate and worked for me. Thanks so much, would please provide a xfer link and send you $ufficient grace.
step 4 is missing instructions on how to create the user in the first place.
step 5 is bad. nemo sharing is terrible. it won’t let you specify who you share what with, it just shares it with everyone
Thanks
Thanks. This worked between linux mint and mac as well.