To schedule various processes on Linux systems, including Amazon Linux 2023, we use “Cron, ” a command line utility. Here we learn how to install Crontab on Amazon Linux to manage the Cron jobs…
Schedule tasks by Corntab also known as Cron jobs, that are meant to run periodically at predefined intervals or specific times. It helps the users to automate certain system maintenance and administration tasks, for example, you want to run the system update command on Linux automatically at some specific interval of time. Apart from running simple commands, Cron can perform various tasks from executing shell scripts and system maintenance routines to sending email notifications and fetching updates from remote sources.
Let’s see the command to install and configure Corntab on Amazon Linux 2023 instance
Step 1: SSH your Al2023 Instance
Either by using the AWS Management console web-based SSH client or a local terminal with SSH and a private key, connect to your Amazon Linux 2023 instance, so that we can run the commands given in this article.
Step 2: Install Crontab on Amazon Linux 2023
Your Amazon Linux may 2023 already have Cron, however, if not then we can get this service by installing a package called “cronie” available through the default system repository of Amazon Linux. This package also includes the cron daemon (crond) and related utilities.
sudo dnf install cronie
Step 3: Start and Enable Cron Service
By completing the previous step, our AL2023 will have a Cronie package that offers the Crontab command line tool. However, before using that let’s start and enable the Cron service so that it can automatically start in case of a service crash or system boot.
sudo systemctl start crondsudo systemctl enable crond
Step 4: Accessing the Cron Configuration:
Once we ensure that the Crond service is running without producing any error we can use the Crontab command to manage the corn jobs which also includes creating, editing, and deleting cron entries in the future. To edit the Cron configuration file execute the given command:
crontab -eTo schedule commands with sudo rights, use:
sudo crontab -eWell, the above command will open a text editor either using vi or nano to edit the user-specific crontab file. Those who want to edit the system-wide crontab can directly add files to the /etc/cron.d/ directory.
Step 5: Creating Cron Jobs:
Now, whatever job you want the Cron to perform, add that to the file opened in the previous steps. Each line represents a separate cron job, with the syntax:
* * * * * /path/to/commandReplace “/path/to/command” with the command or script you want to execute, where “*****” in the command is meant to configure the timing based on when you want to schedule the desired script or command.
In this cron job command syntax:
The “first asterisk” represents every minute of every hour. We can use minute values from 0 to 59.
The “second asterisk” represents every hour of every day. Valid values range from 0 to 23, where 0 represents midnight and 23 represents 11:00 PM.
The “third asterisk” represents every day of the month. Valid values range from 1 to 31, depending on the month.
The “fourth asterisk” represents every month. Valid values range from 1 to 12 or can be specified using the first three letters of the month name (e.g., Jan-Dec).
The “fifth asterisk” represents every day of the week. Valid values range from 0 to 7, where 0 and 7 both represent Sunday or can be specified using the first three letters of the day name (e.g., Sun-Sat).
The timing is specified as a space-separated list of values or ranges. For example:
0 2 * * *: This cron job runs at 2:00 AM every day (minute = 0, hour = 2).0 3 * * 1: This cron job runs at 3:00 AM every Monday (minute = 0, hour = 3, day of week = 1).*/15 * * * *: This cron job runs every 15 minutes (minute = every 15 minutes).
furthermore, we can have the time definition by typing;
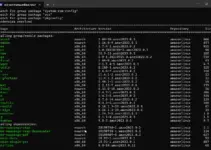
cat /etc/crontab
Examples: Here are a few common examples or tasks we can define in the Cron job user file to schedule on our Amazon Linux 2023.
Running a Script Every Hour
Let’s say you want to run some particular script every hour then the command to add in the Cron jobs file will be like the one given below syntax. This cron job runs the script at the beginning of every hour (when the minute is 0).
0 * * * * /path/to/myscript.shSchedule your PC to Restart
So, if you want your Amazon Linux should restart itself at a specific time then that can be done using the given commands:
sudo crontab -eAdd the following line and save the file.
0 3 * * * /sbin/shutdown -r now >/dev/null 2>&1This cron job schedules a system reboot every day at 3:00 AM using the shutdown -r now command.
Updating Package Repositories
Similarly, if you want to create a job that will automatically check the updates and install them, you just need to add the following line after running “sudo crontab -e” which will run the “dnf -y update” command every day at 2:00 AM.
0 2 * * * yum -y update >/dev/null 2>&1
Step 6: Saving and Exiting:
If you are using VIM then press Esc and then type :qw and hit the Enter key. Whereas, the nano editor users can press Ctrl+O, hit the Enter key, and then to exit use Ctrl+X.
Step 7: Verifying Cron Jobs:
To verify that your cron jobs are set up correctly, we can list the jobs by using the given command:
crontab -lConclusion:
Cron jobs are not limited to a few examples we have shown in this article there is much more you can explore and do as per your requirements. It can help automate various tasks on Amazon Linux 2023 and enhance overall productivity. You can refer to the crontab man page for more information related to options available to use with it.
Other Articles:
- How to configure Unattended Upgrades in Ubuntu 20 using crontab
- Automatically Update Ubuntu 22.04 LTS using Unattended upgrades
- How to install PHP Composer on Amazon Linux 2023
- Installing Netcat on Amazon Linux 2023