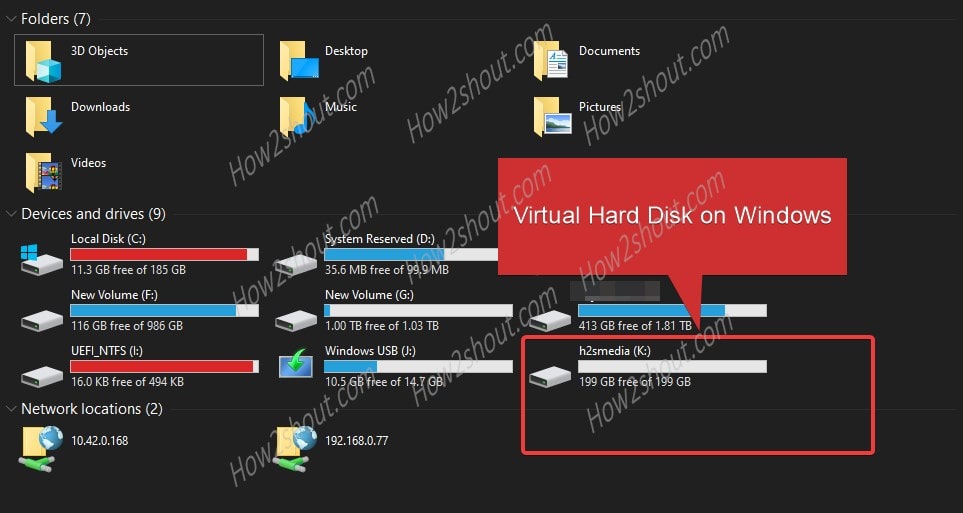
Do you want to have a Virtual Hard disk drive on Windows 10 or Windows 7, that you can use to store your data? Yes, then we will show here how to create one and enable encryption on that.
Bow, before going further, what exactly is the VHD (Virtual Hard Disk)?
If you have ever dealt with virtual machine platforms like VirtualBox, then you definitely have created VHD (Virtual Hard Disk). It basically resides on your actual physical hard drive in a file format that can be used to store data just like the physical hard derive attached to our PC or laptop.
What is the purpose of a virtual hard drive?
The first biggest advantage of Virtual Hard disk drives is they let us install different operating systems on a single host machine in the form of VMs. Saving files in the Virtual HDD will be safer if you are in the testing and development field. Being in a file format, we can move them easily, and also the transferring of files between the host system and created VHD is possible as the physical ones at high speed. It acts the same as physical HDD, thus no need to create an extra partition, if you want one for a particular purpose.
Furthermore, it is easy to deploy, removing viruses or malware from VHD comparatively easier because of the smooth Backup and restore process; isolation feature is another benefit when using them with the virtual operating systems.
So, let’s see how to use the ability of Windows 10 to create Virtual Hard Disks.
Create Virtual Hard Disk Drives in Windows 10
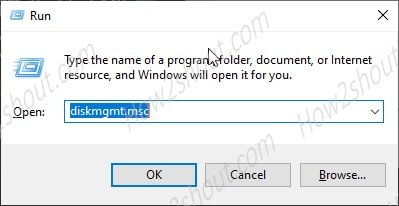
- Press keys Win+R and type diskmgmt.msc to open the disk management panel of Windows 10 for creating a virtual drive. However, you can also get the same by right-clicking on ThisPC icon-> Manage-> Disk Management.
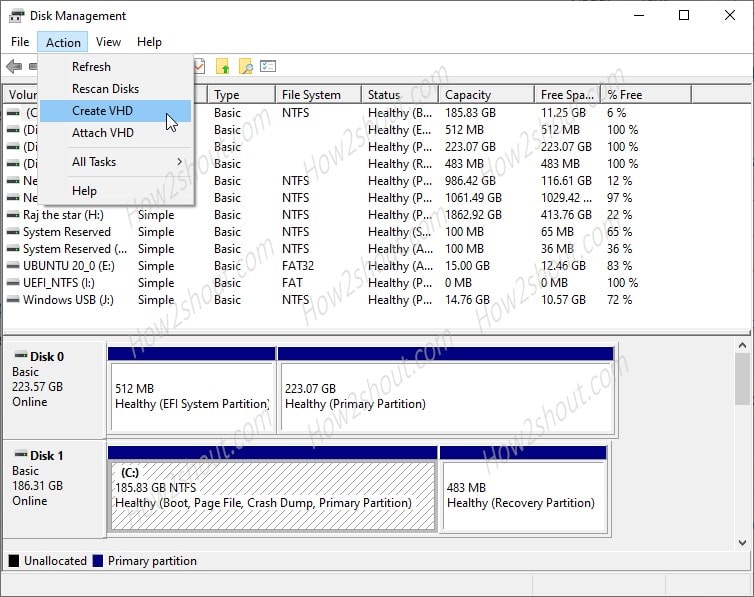
- To create a Virtual Harddisk, on the Disk Management panel, click the Action option given on the menu. A pop-up will open there, select “Create VHD“.
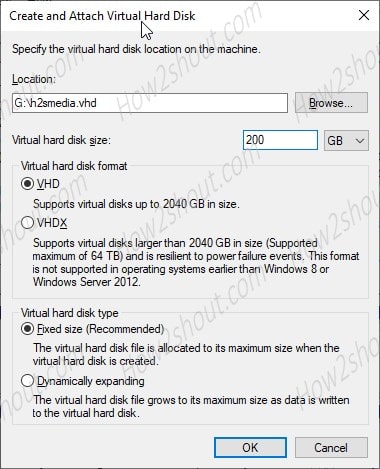
- The first thing which you need to do is selecting a location, where the system can create a file for Virtual Disk. Click on the Browse button and select the drive where you want to create it. Note: I would like to recommend you to choose the physical drive that has some extra available storage. Because, although it is Virtual HDD, still it consumes the space of your existing physical drive.
- Enter the amount of storage you want for Windows 10 Virtual Hard Disk drive in the Size box.
- Select virtual disk format, by default it will be VHD that supports the size of 2TB (2040GB). Those want more they can go for that VHDX up to 64TB.
- Next, is the Virtual Hard disk file type. There will be two options, Fixed Size and Dynamically expanding. Fixed-size will allocate a particular amount of space that you have defined above while the dynamic one will increase its size as the data inside it grows. You can choose as per your requirements. However, here we are choosing “Dynamically” as it creates quickly by the system.
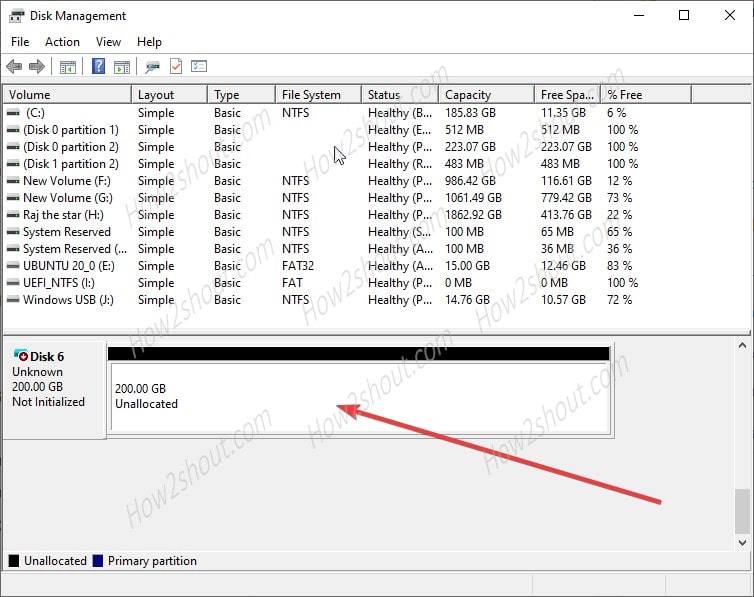
- A new Windows 10 virtual disk drive with the stipulated amount of unallocated space will show along with other physical drives in the Disk Management after a few seconds.
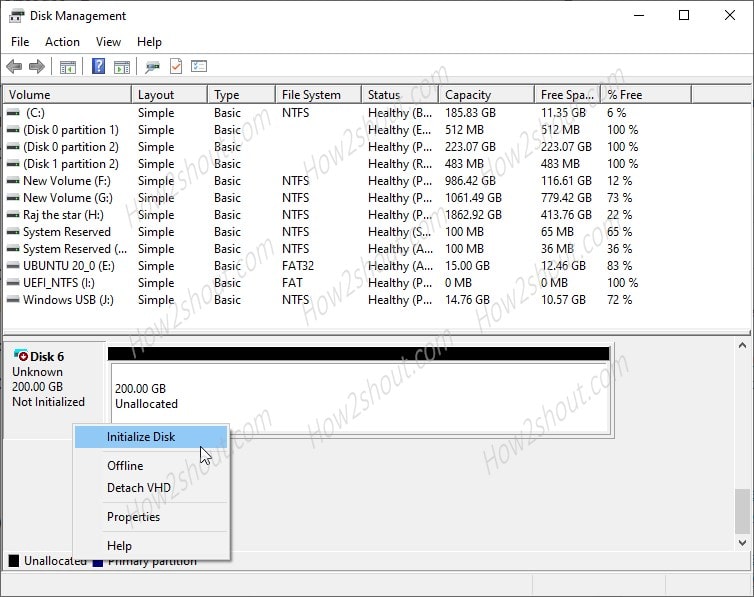
- Right-click on the Disks and select the opinion “Initialize Disk“.
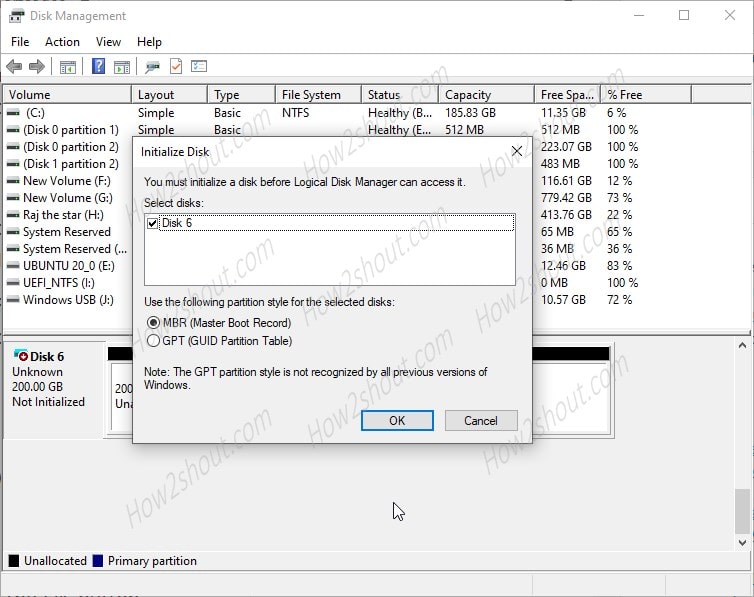
- Let, the default option MBR (Master boot record) selected and just click on the OK button.
- Now, the Virtual HDD is online, again right-click on the white space and select the New Simple Volume for Drive, this will open a wizard, hit the Next button.
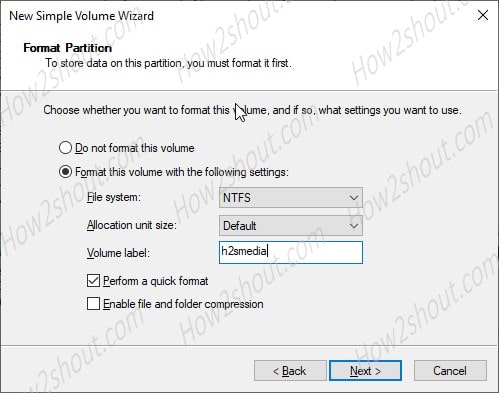
- Assign Driver letter or path Virtual Drive and select the file system type to format volume in it. However, Leave the file system type to NTFS. You can also use some particular name, to easily recognize in the Volume label box.
- To access the Windows 10 or 7 created Virtual Hard disk, go to MyComputer or ThisPC. Among all other attached physical drive portions, the Virtual HDD one will also be there. Click on it.
Bitlocker Encryption for Virtual Hard disk (VHD)
As I said earlier, the Virtualization disk drives work the same as the physical one, thus it is possible to encrypt and protect them with a password.
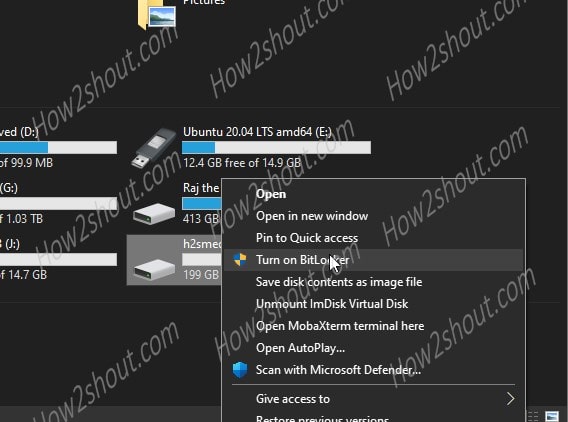
- Right-click on the created Windows 10 VHD and select the “Turn on Bitlocker” option.
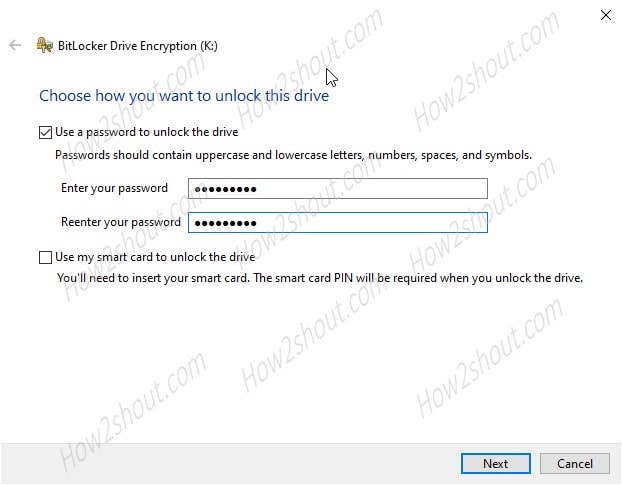
- Create a password that you want to use to unlock and access the Virtual Drive later.
- Take a recovery of your backup key. It is very important because in the future if you forget the password, this key will help to reset the same. There are multiple options, choose the feasible one.
- Leave the Default option “Encrypt the used disk drive space” to make the process faster.
- Select the New Encryption method and start the Windows VHD encryption process.
Read Further:
- Enable and disable the preview pane on a Windows 10
- How to use VeraCrypt encryption on PC to secure files
- 6 Best disk space analyzer tools for Windows 10
- Step to use Vmware and Hyper-V on single Windows 10 PC

Related Posts
How to Reopen Closed Windows or Tabs in Firefox
How to Install Django on Windows 11 or 10
How to set Gemini by Google as the default Android assistant
How to create data bars in Microsoft Excel for numeric values
How to open HEIC images on Windows for free
How to install Server Manager Windows 11 or 10