
VeraCrypt, a successor to TrueCrypt is largely compatible with it enables the complete or partial encryption of data carriers. Like the template, the freeware is distributed under an open-source license.
If you are really concerned about your files on a computer, especially for security, there is hardly anything better than encrypting them. Even if you keep your files on the cloud, encrypting them before uploading ensures the privacy of your data. If you want to upload some private photos of you or other such sensitive files, and you don’t have any other option, other than uploading them to the cloud, encryption seems to be the most viable option. There are a number of ways you can encrypt your data, and if you are on Windows, you might already know about BitLocker, even if you haven’t used it ever in your life.
What is VeraCrypt?
You can find out, how you can use BitLocker to encrypt all your files on a Windows computer here. But if you work across multiple platforms, you need some cross-platform solution. Here comes VeraCrypt, which is an open-source and cross-platform encryption software available for Windows, Mac, Linux, and BSD for securing sensitive data has been further developed taking into account the recently known brute force attacks.
So, whatever platform you are on, VeraCrypt is available. If you have coding skills, you can also get the source code and modify it and build it up to your requirements. It can both be installed, and you can even use it as a portable program, to carry your encrypted files safely everywhere. There are a number of advantages of VeraCrypt, over proprietary BitLocker, and you can find them once you start using VeraCrypt. By default, the software uses 256-bit encryption to make data illegible for attackers.
See: How to install VeraCrypt on Ubuntu Linux
Downloading and installing VeraCrypt Open source disk encryption
VeraCrypt makes it possible to make individual folders, entire drives and partitions or even the entire system inaccessible to attackers. In addition, the software can also create a new, hidden partition, which can not be found by outsiders when browsing the hard disk without considerable effort. Users have access to the fully encrypted content via a previously defined password.
So, without any further delay, let’s get started with how you can set up VeraCrypt and use it to secure all your files.
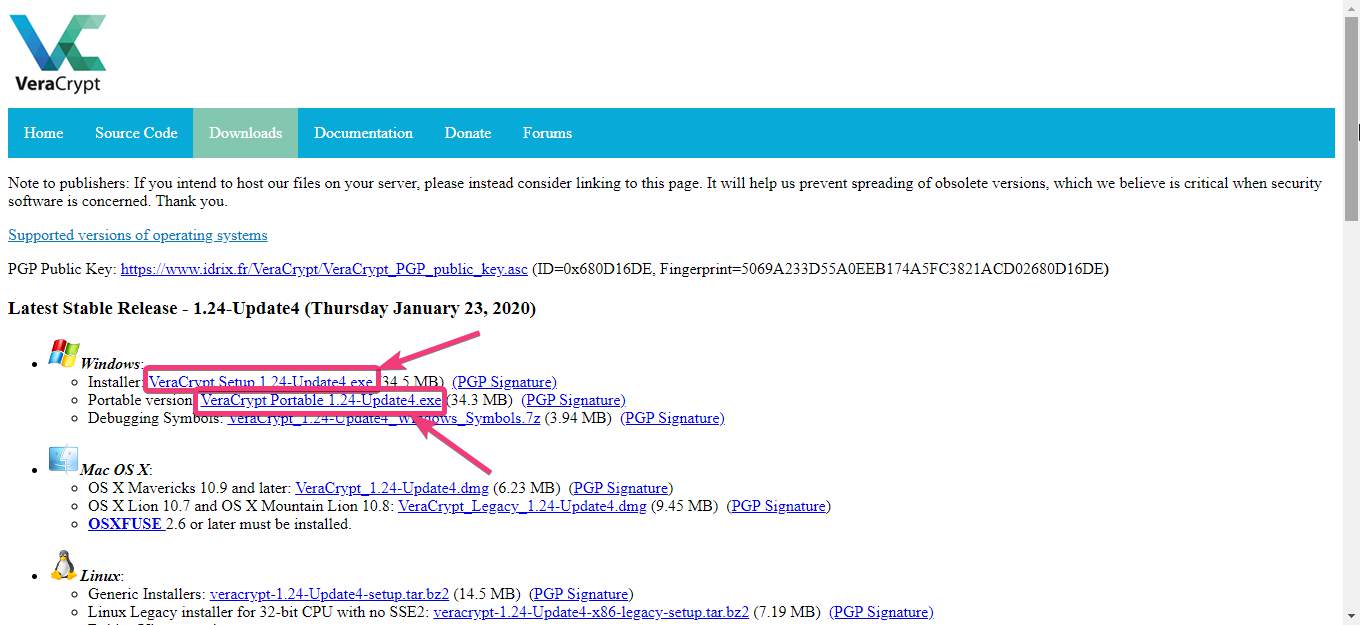
Step 1: Download standard or portable version of VeraCrypt
Download VeraCrypt on your Windows computer and install it the same way you install other Windows programs. You can alternatively download the portable version of VeraCrypt, as well.
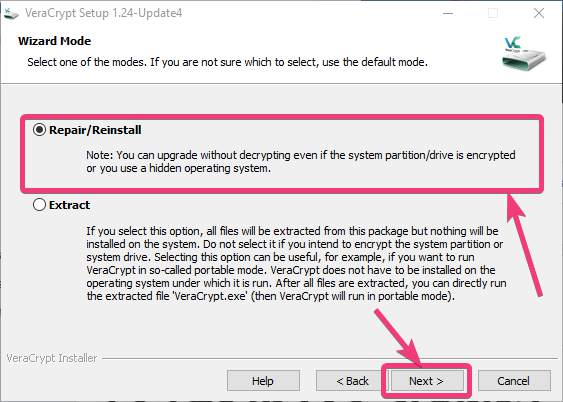
Step 2: Install it on the system or extract as a portable version
After the download starts, you can also choose, whether you want to install it, or just keep the portable version of VeraCrypt. Just use ‘Repair/Reinstall’ to install VeraCrypt.
After you have downloaded and installed VeraCrypt, open the VeraCrypt application, and the first step is to set up encryption.
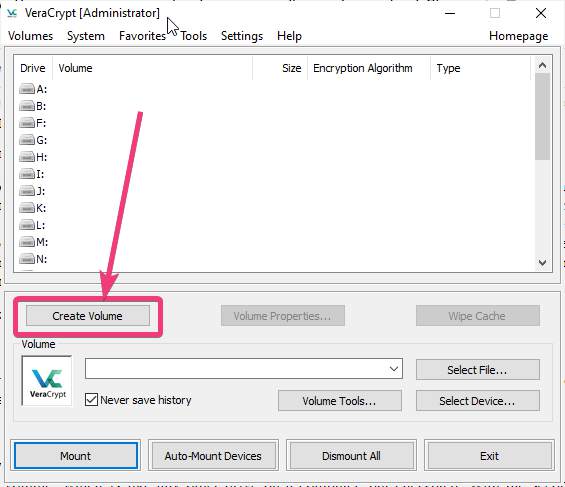
Step 3: Creating an encrypted drive
Using VeraCrypt, you have three different ways to encrypt your files. Using one of the options, you can encrypt an entire drive, which means, all the files within the drive will be encrypted. The second option will encrypt the system partition or drive. The third or the best option is to create a virtual drive and encrypt the same. After you mount the drive, all the files that you will keep within it will be encrypted. So, here, I will discuss, how you can set up VeraCrypt encryption, using the third option.
After you open the VeraCrypt application, click on ‘Create Volume’.
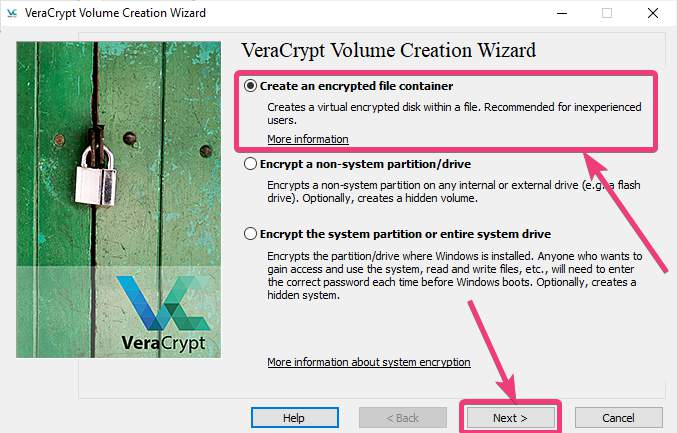
Next, you will find the three ways to create encrypted volumes, as I just discussed. Just select ‘Create an encrypted file container’, which should be the default option, and click on ‘Next’.
“Apart from this, Encrypt a non-system partition/drive option is there to encrypt a non-system partition such as external hard drives or flash drives; also it let’s create a hidden volume. And Encrypt the system partition or entire system drive one allows the users to encrypt the Windows installed partition or drive which makes it password protected and one has to enter the set security password to use the access and use the system, read and write files etc. So, after using this encryption setting, we need to enter the correct password each time before Windows boots.”
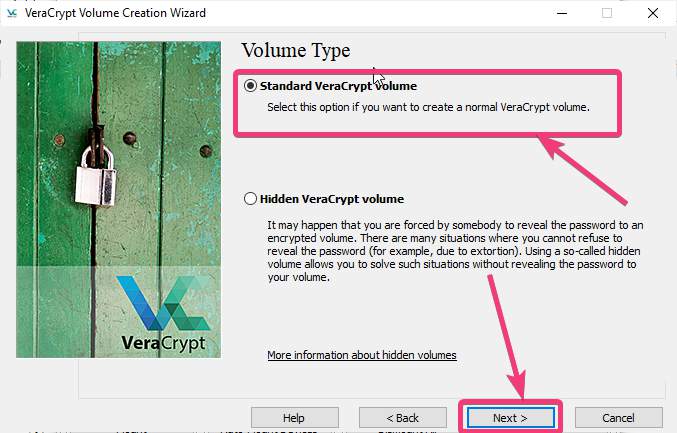
Step 4: Standard VeraCrypt volume
Next, you will have to choose the type of volume that you want to create. You can create a normal volume, which is like any other drive on a computer, but encrypted. With the second option, you can create a hidden volume, which is a useful option if you want to hide your encrypted volume from others. Hidden encrypted volumes can be useful if you often face situations when you need to disclose your password under pressure. So you can choose the second option if you want. But I will proceed with the first option or ‘Standard VeraCrypt volume’. After that, click on ‘Next’.
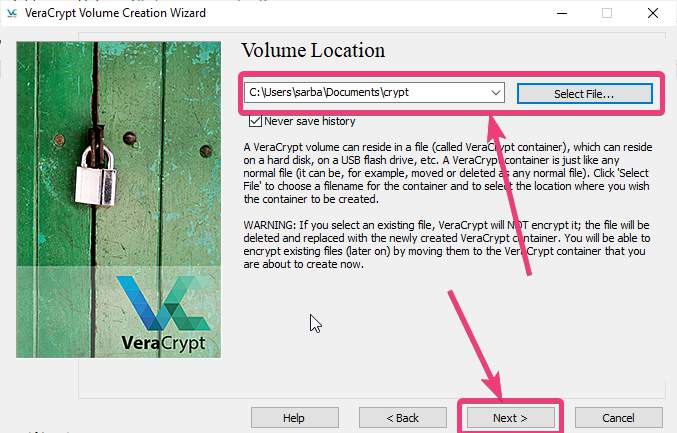
Step 5: Choose the name of the virtual drive
Now, click on ‘Select File…’ to choose the name of the virtual drive, and the location, and click on ‘Next’. You should select an empty file in this step. Do not select an existing file, as this is not going to encrypt the selected file. This step is only going to create a virtual drive whose contents will be encrypted using VeraCrypt.
Step 6: Select the VeraCrypt Encryption Algorithm
In the next step, you will have to choose the encryption algorithm, which is ‘AES’ by default. Just click on ‘Next’ after you choose the encryption and hashing algorithm from the drop-down menu.

Step 7: VeraCrypt Volume Creation Wizard
The next important step is to choose the size of the encrypted drive volume. Just choose the unit, and enter the size. Here, I am creating a 300 MB volume. You can create a bigger or a smaller drive as per your requirements. After you enter the size, click on ‘Next’.

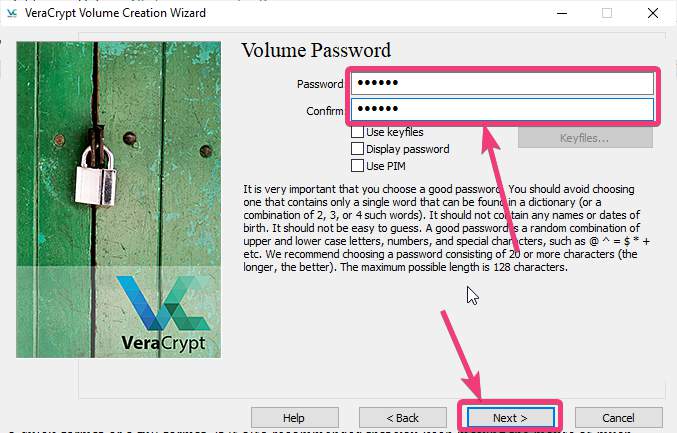
Step 8: Choose a password
The most important part is to choose a password. To keep your files safe from brute-force attacks, choose a strong and big password that is a combination of letters, numbers and special characters. After you choose your password, click on ‘Next’. You might be prompted to enter a big password.
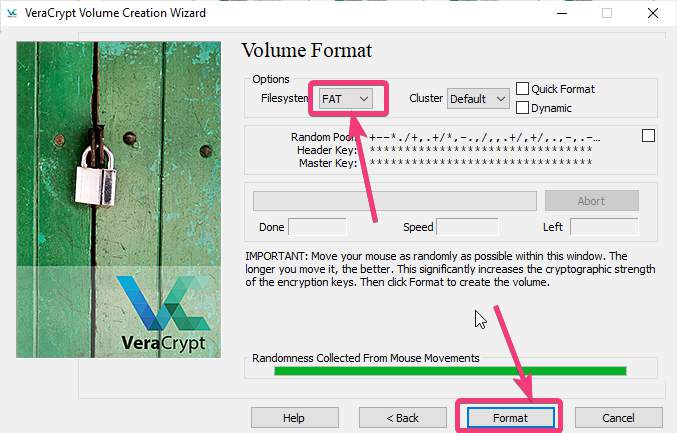
Step 9: Choose the file system and format
In the final step, you will have to choose the file system, cluster size, and whether you want to do a quick format or a full format. It is also recommended that you keep moving the mouse as much as you can to generate randomness and strengthen the encryption keys. Finally, click on ‘Format’ after you have selected all the necessary options.
After the format is complete, click on ‘Next’, and you can now exit the wizard.
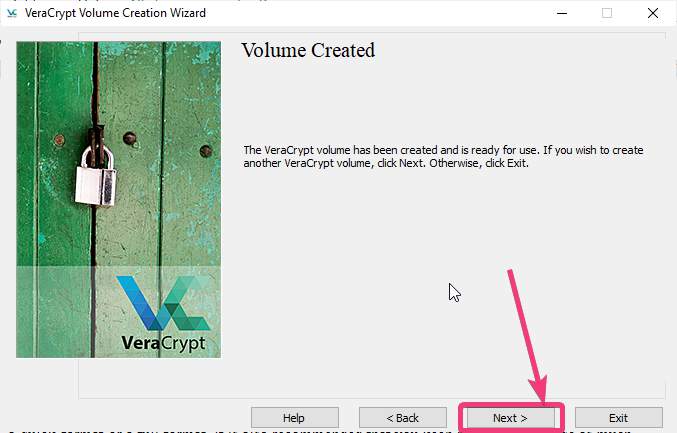
Your virtual drive is now created. It is time to mount the virtual drive and add some files to it.
Step 10: Mounting and adding files
To mount an encrypted volume, just open VeraCrypt, and click on ‘Select File…’ Now choose the file created by you in the last step, and that will be mounted as a drive on your computer. Choose an unused drive letter from the list, and finally click on ‘Mount’.

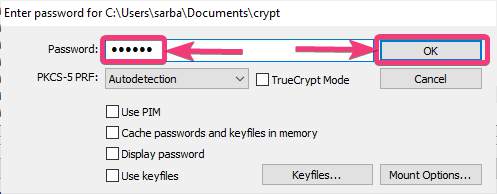
Now, enter the password, and click on ‘OK’.
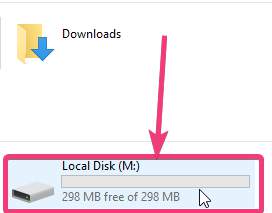
Now, you can find the drive within ‘My Computer’ or your default file manager on Windows or the Linux distribution that you are using.
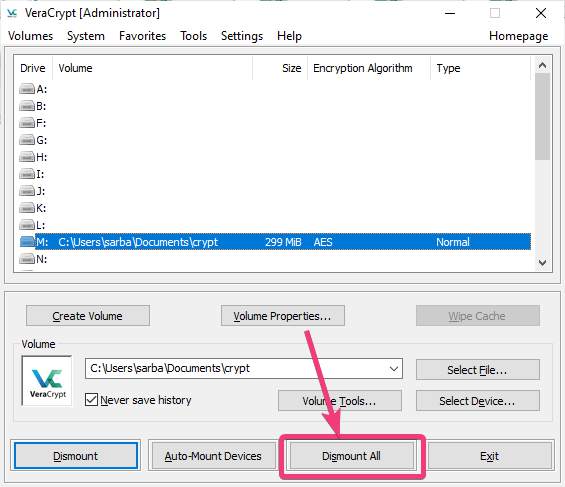
To unmount the drives, open VeraCrypt, choose the drive that you want to unmount, and click on ‘Dismount’, or click on ‘Dismount All’.
The steps are exactly similar if you are using VeraCrypt on other platforms like Linux or Mac OS. After a drive is mounted, you can treat it like a regular drive, on all the platforms. You can even format the drive, if necessary. Unlike BitLocker, VeraCrypt offers more convenience and it is a must-have if you are looking for the best level of security for all your sensitive data.
So, that was all about how you can get started with VeraCrypt on your computer. Did you face any problems? Feel free to comment on the same below.
Other Articles:
Related Posts
How to install Winget package manager in Windows 2022 Server
How to View Listening Ports Using Netstat
How to Install Pygame Zero on Windows 11
Single Command to install Android studio on Windows 11 or 10
11 Best Free and Open source NAS or SAN software
Download Visual studio code portable for Windows 11/10 or Linux