Most of the Indian peoples depend on other countries to get the operating systems for their computers, laptops, smartphones, and other gadgets. May it be Windows, or any Linux distribution like Ubuntu, RedHat or Linux Mint. None of them are Indian. Well, everybody depends on others for something or the other, and there is nothing bad about it. After all, India also exports a number of finished products, which are not available in other countries. Whatever may it be, if you are looking for an open source PC operating system, which is based in India, the BOSS OS is the one you can go for.
BOSS or Bharat Operating System Solutions is based on the Linux kernel and is available for download. It comes with lot of pre-installed apps, and there is even provision to download some more. If you are looking for an operating system for everyday usage, do not want to pay a lot for Windows, and want to become proud using an Indian product, BOSS can be the most appropriate option you can go for. You can install BOSS both on a dedicated system as well as a virtual machine to check it out.
Apart from the availability of BOSS for PCs, you can even download BOSS for Server, for educational purposes, or for other requirements.
Before proceeding with the process to install it, and give a small verdict about it, let’s find out the minimum system requirements for installing the BOSS operating system.
Minimum system requirements for BOSS operating system.
- 512 MB RAM
- 10 GB of unpartitioned hard drive space. (You may require more for installing additional third-party resources and programs)
- Any processor that supports the i386, ppc or x86_64 architecture. Basically, you can install BOSS on even the old systems, as well. (But the performance will not be equally good on old systems)
- DVD drive for installation from DVD drive or a USB interface
- An internet connection for downloading apps and packages from the repository and other places.
- 800×600 pixels screen resolution for best display performance.
Downloading BOSS OS
You can download BOSS OS from here. Choose the most appropriate version for your requirements. I will be using the BOSS 6 Anoop x64 for PCs for this tutorial. The size is almost 1.8 GB.
Installing BOSS OS on PC
So let’s find out how to install it.
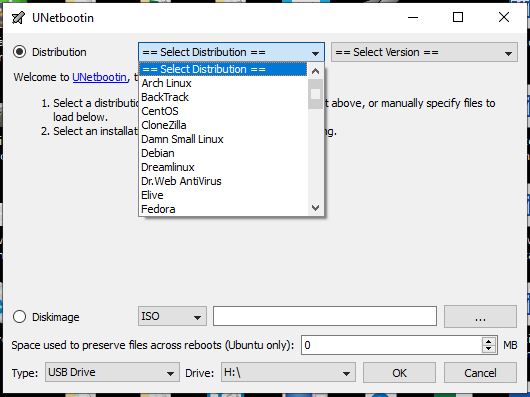
Step 1: If you want to install BOSS from a USB storage device, you will first have to make it bootable. You can read this article to know how to make a USB storage device bootable, and put BOSS into it. Though the article is meant for Ubuntu, you can even read the article to make a USB storage device bootable with BOSS operating system.
Step 2: Put the BOSS bootable DVD or the USB drive on your computer, and configure your computer to boot from that drive by going to BIOS settings.
Step 3: You will get the following screen after the booting starts from the drive, where the BOSS OS is present. Use your navigation keys to move on to ‘Graphical install’ and hit the enter key.

After this, the mouse can be used for navigation.
Step 4: Now you will have to choose the language for installation. There are 10 Indian languages to choose from apart from ‘English’ language. Choose the most appropriate one depending upon which one suits best for you. I am choosing ‘English’ here. After that click on the ‘Continue’ button.

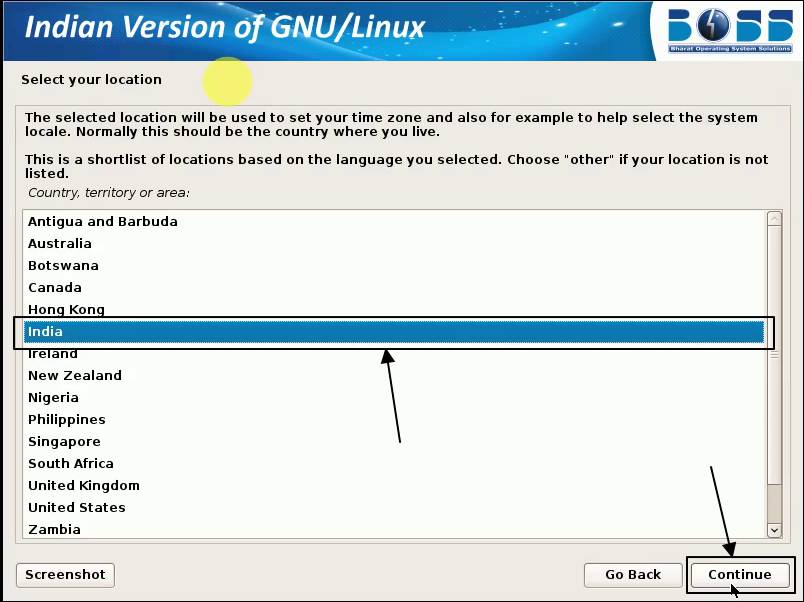
Step 5: Now you will have to choose the location. The location will be used to detect the time zone and other small things. I am choosing ‘India’, and I don’t think I need an explanation why. Click on ‘Continue’ after you have done choosing.
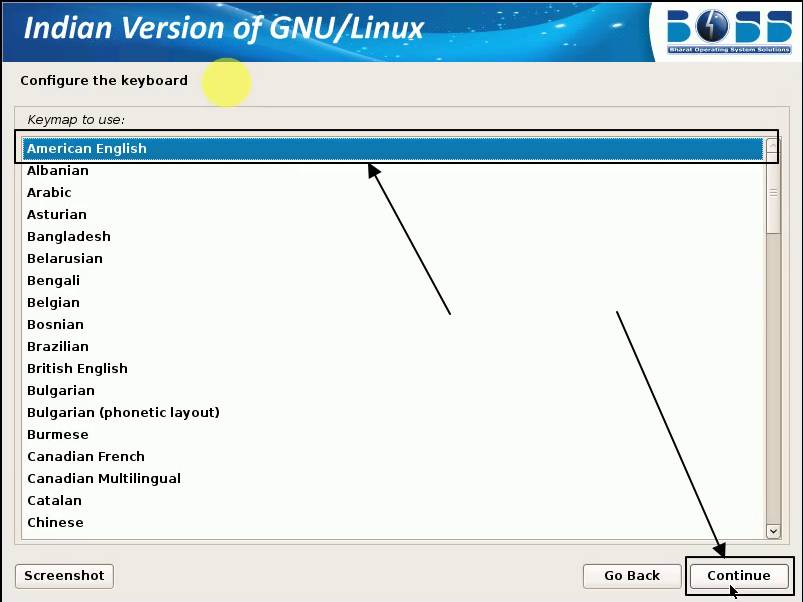
Step 6: Choose the keyboard configuration after this. I am choosing ‘American English’ here. Click on ‘Continue’ after that. You can even get a number of other different key configurations, and some of them are Indian, as well.
Step 7: Now some additional tasks will be done, and to his might take a few seconds to complete. After those tasks are completed, you will have to enter the host name for the system. Once you are done entering the hostname, click on ‘Continue’.

Step 8: The hostname will be used to recognize your system on the network. So choose the name judiciously. Though, these settings can also be changed after the installation is complete.
Step 9: Now you will have to assign the domain name to the system. You can also leave this thing blank, which I will be doing. Again click on ‘Continue’.

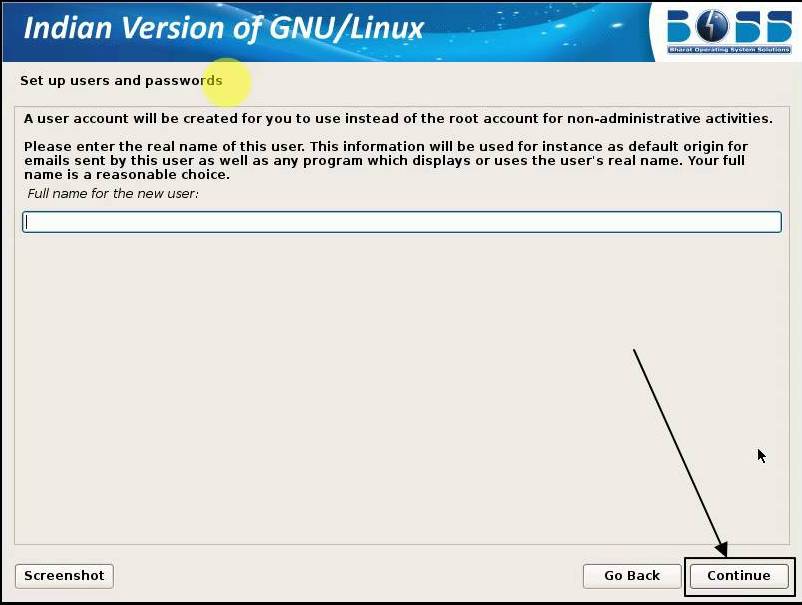
Step 10: Now you will have to set up the usernames and the passwords. You can also leave this thing blank if you want. Then click on ‘Continue’.
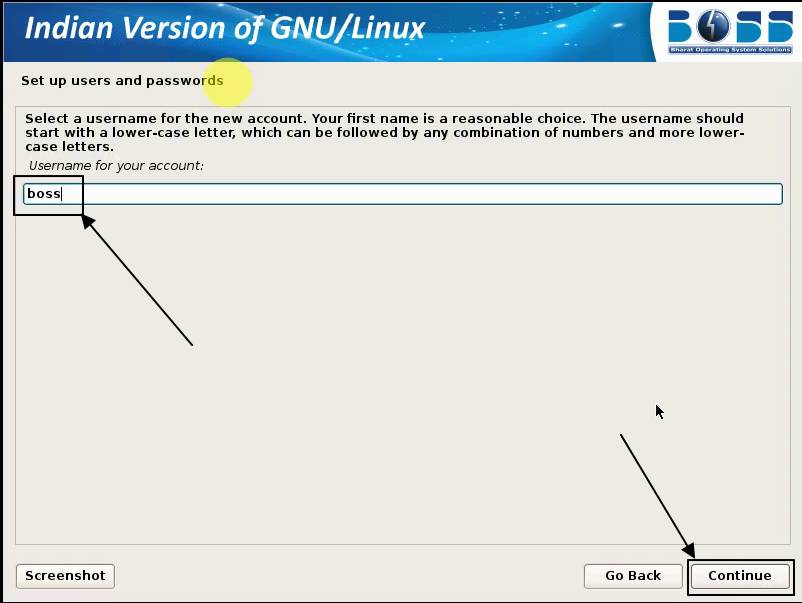
Step 11: Now you will enter the username. I am keeping it as ‘BOSS’. You can put other names, as well. Click on ‘Continue’ once you are done.
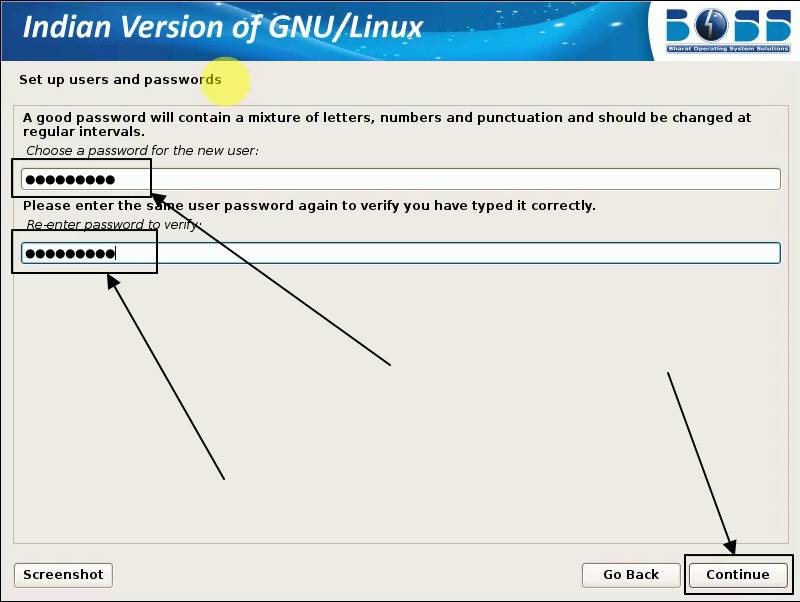
Step 12: Now enter the password twice, as usual. Choose a tough password to secure your system. That is quite obvious. After that, click on ‘Continue’.
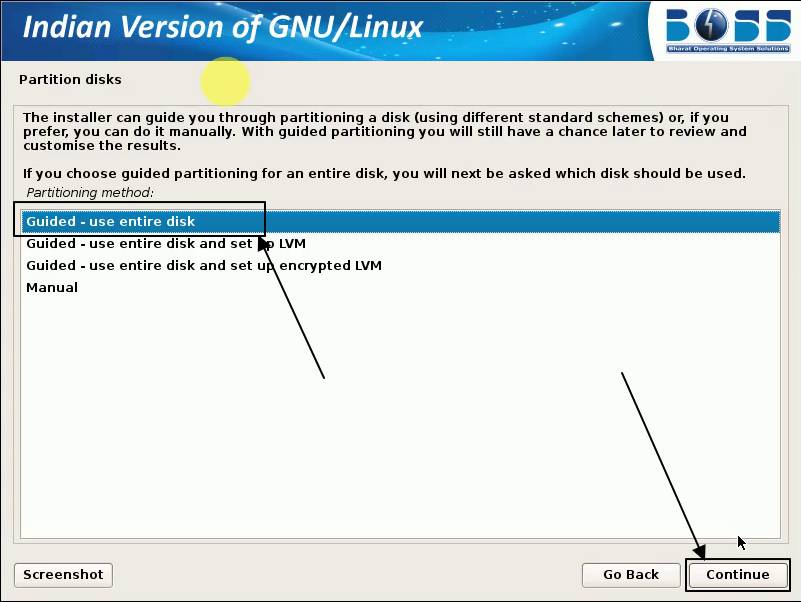
Step 13: It will again take some time to set up the clock and do some additional tasks. Now you will have to partition the disks. You can either use the entire disk for installation or can even create partitions. As I am installing BOSS for testing purposes, I will be choosing ‘Guided – use entire disk’ After you have selected the disk partitioning scheme, click on ‘Continue’.
Step 14: Now choose the disk for installation, and click on ‘Continue’ again.

Step 15: Now there will be multiple options. I will be choosing ‘All files in one partition (recommended for new users)’ and click on ‘Continue’. You can even separate the /home, or /home, /usr partitions, as per your requirements.

Step 16: Now click on ‘I finish partitioning and write changes to disk’, and click on ‘Continue’.

Step 17: Select ‘Yes’ and again click on ‘Continue’. After that, the installation process will start and might take several minutes depending on the system you are using.

Step 18: Now you will have to install the GRUB boot loader. Just select ‘Yes’ and click on ‘Continue’. But if there is any other operating system, which is not detected by the BOSS installer, that operating system can only be booted by modifying the GRUB later on.

Step 19: Now select the hard drive volume, where your operating system is installed, and click on ‘Continue’.

Step 20: Now the installation will be completed. Just click on ‘Continue’. After a few seconds, the system will reboot.

Step 21: Now choose the operating system to boot into, enter the password to log in, and start using BOSS, the Indian version of GNU or Linux. On the first start, you will be shown the license agreement. That is a kind of formality. After that, the BOSS operating system is all yours.
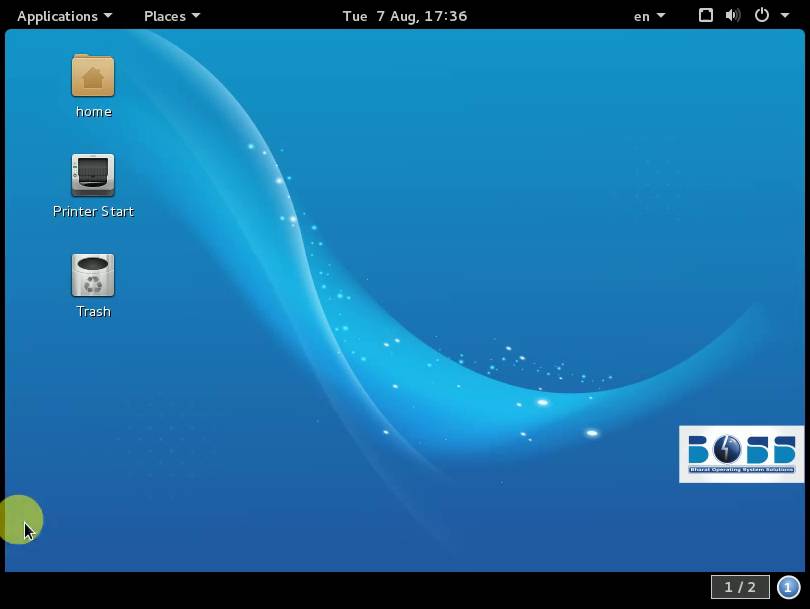
Boss comes with a plethora of pre-installed apps for everyday functionalities. They include everything from Firefox Web Browser, Chromium Web Browser LibreOffice, gedit, Maps to other apps like GIMP, VLC Media Player, and many more. I am sure, all the programs will surely be more than enough to carry out your everyday tasks.
If you want to install any new apps, you can easily do that by downloading them from the APT repository.
Just type ‘sudo apt-get install <package_name>’ to download and install a new package from the apt repository.
If you are getting a low-resolution display on your computer, you can easily change it to 1360×768 or other resolutions by opening ‘Settings’, and by choosing ‘Display’ from it.
The limitations of BOSS (if compared to Ubuntu or other distros)
BOSS is not the perfect Linux I would say. Unlike Ubuntu or other Linux distributions, there are numerous differences, which I will discuss here.
- Unlike Ubuntu or other Linux distributions, the BOSS OS doesn’t come with a Store, where you can download apps. Though the Store on other Linux platforms is not completely reliable. Nevertheless, the Store is useful for some users.
- You can only download apps from the APT repository on BOSS. There are other great repositories like YUM or SNAP. The provision to download apps from those repositories is not available, at least natively.
- Ubuntu or other Linux distributions have a huge community. No such dedicated community with a huge number of co-operative users is not present for BOSS. That is a kind of limitation, I would say for the beginners, who are not that experts in using Linux.
My verdict
Though BOSS might not be perfect, but it isn’t a deal breaker if you are looking for an operating system made in India, and want to become proud of being an Indian. But if you are into development, BOSS might not be the most perfect piece of an operating system for you. But you can always try it out and check, whether it is your most appropriate cup of tea.
Hope the information on the Indian BOSS operating system was helpful for you. Have questions? Feel free to comment it down below.
You might also like to See:
- 14 Best Linux Distro for Beginners all the time to learn Linux
- 9 Free & Open source Linux kiosk Distros and Browsers Tools
- 10 Top Most Beautiful Linux Distros or Operating systems
- 14 Best Lightweight and Fastest Linux Distros for laptops and old computers
- 20 Basic Linux commands for beginners with examples and syntax
- Comparison between CentOS, Debian and Ubuntu


HOW TO INSTALL BOSS ON LENOVO DESKTOP MODEL NO. AIO 300-23ISU All-in-One (ideacentre)
Prashant, you can create a bootable USB stick with BOSS, and install it on your All-in-one PC by setting the USB stick to boot first from BIOS.
If ubuntu or windows is already present and to install BOSS along with it, should we create some free disk space and select manual in step 12???
Yes, you have to manually create three partitions home, root and swap. But before installing BOSS you should create a separate partition for the same on Ubuntu or Windows 10/8/7. It would be a little bit safe.
in live session it is asking for username and password, I am wondering what it would be?