BalenaEtcher can be used on any popular operating system including Debian 12 Bookworm Linux. It is free and open-source software that is meant to create bootable USD drives and SD cards using various ISO or IMG format images. For example you want to install some Linux operating system using a USB drive or need to create a bootable disk for your Raspberry Pi projects, BalendEtcher can help you.
Furthermore, its interface is simple, so users with limited technical expertise can operate it easily. BalenaEtcher even verifies the flashed image’s integrity after writing it to the storage device, if needed. It provides a safer flashing process by preventing accidental overwrites of the system drive and confirming the target device before proceeding. Being an open-source tool, its source code is public which fosters transparency, community contributions, and trust among users.
Step 1. Perform the Debian 12 Update
Those who have not updated their Debian 12 for a while, first run the system update command before following the article further. This helps our system to configure the latest available updates for installed packages making it more stable and reducing compatibility issues.
sudo apt update -yStep 2. Download BalenaEtcher APPImage
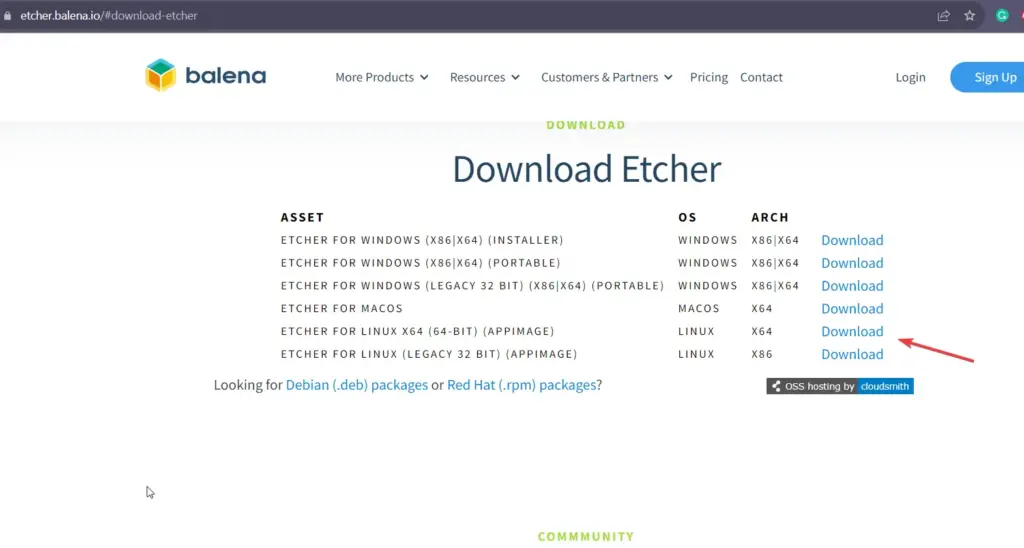
AppImage is the easy and portable way to use the BalenEtcher on Debian 12 Linux. Visit the official download page of Etcher and select the AppImage to download.
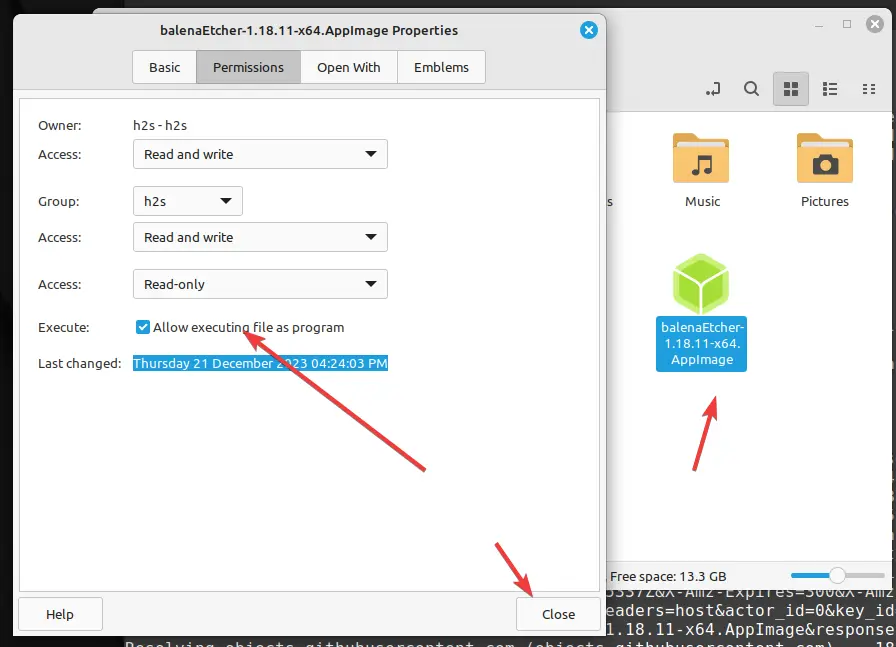
Step 3: Set Executable Permission
After downloading the AppImage file, right-click on it and the properties option from the context menu. After that go to the permissions tab, select the box given for “Allow executing file as program” and then click on the Close button.
Note: The repository method is not working anymore…
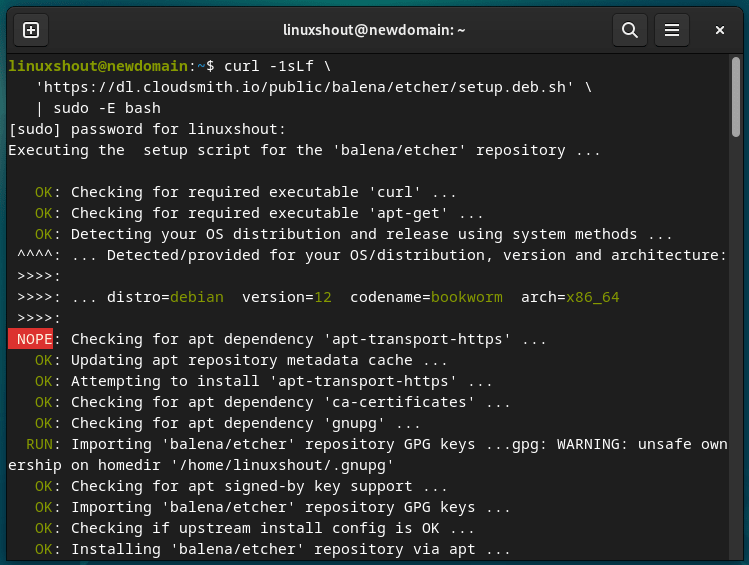
Step 2. Add BalenaEtcher Repository
Even though BalenaEtcher is an open-source software, it is not available to install directly using the system repository of Debian 12. Therefore, the best way to get it is, we add the repository manually instead of using AppImage because we can have the updates timely by just running the system update command.
The given script command will not only add the required repository but also download the required dependency to install BalenEtcher.
curl -1sLf \
‘https://dl.cloudsmith.io/public/balena/etcher/setup.deb.sh’ \
| sudo -E bash
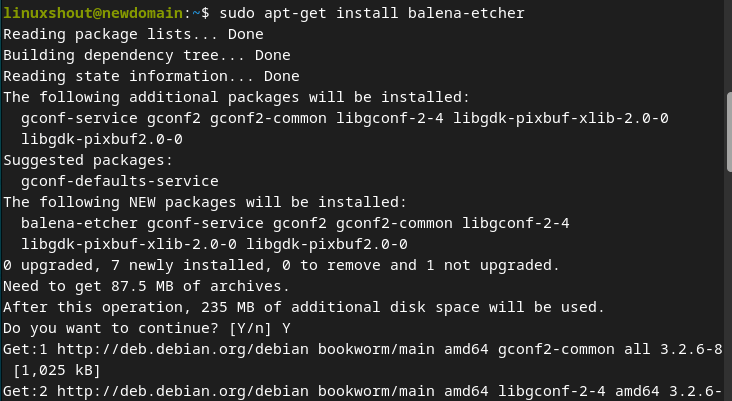
Step 3. Install BalenaEtcher on Debian 12
Once you have added the repository of Etcher, the installation of its bootable USB maker on Debian 12 will be easy just like any other package using the default system’s package manager i.e. APT.
sudo apt install balena-etcher
Step 4: Run the Bootable USB maker
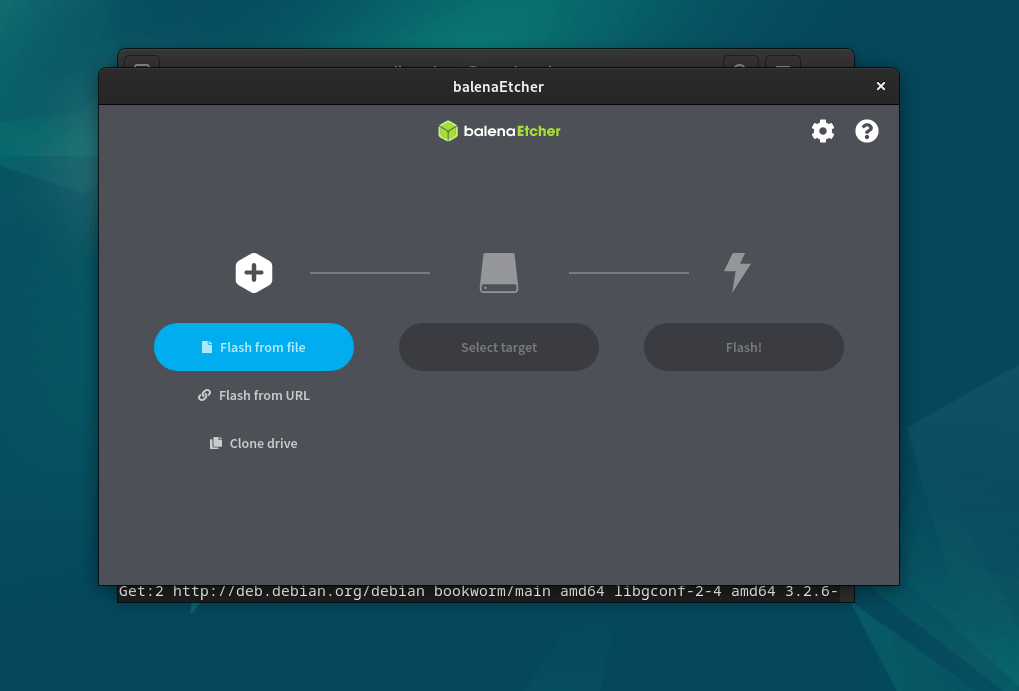
Now, double-click on the AppImage file and it will launch the graphical interface of the software to create bootable USB drives.
Step 5: Flash an Image
- You will have running BalenaEtcher.
- Now, plug in your USB drive or SD card to the PC that you want to flash.
- After that, click on the “Flash from file” button and select the operating system image you want to write.
- Choose the target drive (the connected storage device).
- Double-check that you’ve selected the correct drive, as the data on the drive will be overwritten.
- Click the “Flash!” button to start the flashing process. BalenaEtcher will show you the progress and notify you when it’s done.
Step 6: Eject the Drive
After the flashing process is complete, you can safely eject the storage device from your system.
Step 7: Uninstallation (optional)
In case you don’t want this bootable USB maker anymore, remove it using the following commands:
sudo apt remove balena-etchersudo rm /etc/apt/sources.list.d/balena-etcher.listsudo apt-get clean sudo rm -rf /var/lib/apt/lists/*Conclusion:
Well, if you are using Windows OS then we recommend Rufus which is better software in terms of flashing USB drives because some users claim that BalenaEtcher creates unnecessary portions on your USB drive which would not be good. Otherwise, the software is a valuable tool for various tasks, such as creating bootable USB drives or preparing SD cards for Raspberry Pi projects. By following this guide, you’ve successfully installed BalenaEtcher on your Debian-based system and learned how to use it to flash images onto storage devices.


Very good