TeX Live is a comprehensive distribution of the TeX typesetting system, which was originally developed by Donald Knuth. It provides all the essential components and packages for typesetting documents using TeX and its variants, such as LaTeX, ConTeXt, and others. It enables users to create professional-quality documents, including books, scientific papers, articles, presentations, and more. Whereas, “Vanilla” TeX Live refers to the original, official distribution of TeX Live.
The term “vanilla” is used to distinguish it from customized or modified versions of TeX Live that may be provided by specific Linux distributions, such as Debian’s own TeX Live packages.
The benefit of installing and using “vanilla” TeX Live distribution is we can have direct access to the latest TeX Live updates and packages, which may not be available through the default package manager and repositories of the Linux system. So, the Vanilla version comes into the picture for those who want a more up-to-date TeX environment with the latest features and bug fixes.
Hence, by installing the TeX Line “vanilla” on Debian you can have better flexibility and control over your TeX setup.
Step 1: Open Debian Terminal
First of all, on your Debian 11, 12, or any other version you are using, open the command terminal application. You can have it under the Applications area. After that, run the system update command to install the latest available updates for your system. It will also refresh the package manager’s index cache.
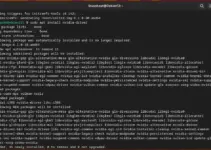
sudo apt updateStep 2: Install Necessary Dependencies
There are a few packages we need to install on our Debian Linux before setting up the Vanilla TeX Live. So, follow the given command and execute it in your command terminal.
sudo apt install perl wget fontconfig xzdecStep 3: Download the TeX Live installation script
As we are not installing the TeX from the Debian repository instead directly what is available currently by its developers, so, we use wget to download its Archive. Here is the command:
wget http://mirror.ctan.org/systems/texlive/tlnet/install-tl-unx.tar.gzStep 4: Extract the downloaded archive
Through the previous command, we will have the archive of Vaniall TeX Live that contains a script to install it on Linux systems including Ubuntu, Debian, and other systems.
tar -xf install-tl-unx.tar.gzChange the directory to the extracted installation script:
cd install-tl-*/Step 4: Install Vanilla Tex Live on Debian 11 or 12
After extracting the archive and switching to it, we will have an installation script that will launch a text-based interface.
sudo ./install-tlPress “I” and hit the Enter key when the setup asked for it. This will start the Tex Live installation in text mode.
Note: The default paper size is a4. If you want the default to be a letter, add –paper=letter to the end of the above install-tl command.

Step 5: Add TeX to System’s PATH
By default Tex folder where it has been installed will not be in your system’s PATH, therefore to use its command tool we need to switch to its folder every time. However, we can solve this by manually updating the system’s PATH variable to include TeX Live binaries.
Once the installation is completed you will see the folder path where the TeX is installed. Copy that.

Open the .bashrc file in a text editor:
nano ~/.bashrc
After that scroll to the end of the file and add the line in the following format. Replace the bold text or path with yours.
export PATH="/usr/local/texlive/2023/bin/x86_64-linux:$PATH"
Save the file and exit the text editor by pressing Ctrl+X, type Y and then hit the Enter key.
Update the current session’s environment variables by running the following command:
source ~/.bashrc
Step 6: Check the version
Once the process of installation and configuration is done, we can check the version of the installed TeX Live using the given command.
tex --version

Uninstallation
In the future, those who want to remove the Vanilla TeX Live completely from their Debian system just need to delete the folder where the version of Tex Live you want to remove is located i.e under /usr/local/texlive
If you have multiple versions installed then can remove the specific one using the version year. For example, if we have installed the 2023 version, then the command to remove it will be:
rm -rf /usr/local/texlive/2023rm -rf ~/.texlive2023Similarly, you can remove the other versions, if you have. However, to remove all the versions completely, you can delete the main Texlive folder, using:
rm -rf /usr/local/texliveIn this way, you can successfully install “vanilla” TeX Live on Debian to typeset your documents using LaTeX and other TeX-related tools.