Have you ever felt a problem of sharing files or other data between the Virtual Operating systems installed on VirtualBox? I don’t know about others but it really a pain when you have to copy some text from Virtual Host to Guest operating system or share some files. If you are feeling the same then this tutorial on the VirtualBox Drag and Drop plus Shared Clipboard features is for you.
Yes, if you are unaware from it then you will know now. It is a simple feature but would not be easy to work by default without installing some external packages provided by the Oracle VirtualBox team. However, most of the article you find online they only tell you to have to install the Virtualbox guest addition CD to enable these features but sorry to say this won’t be work alone. I did it my self multiple time but never get success until I find a solution to overcome from this problem. So, let see how to enable the Virtualbox drag and drop on Ubuntu along the way to use the Clipboard.
How does VirtualBox drag and drop work in Ubuntu
Step 1: Turn on the VirtualMachine
Here we are using the Windows 10 as Host operating system on which the Ubuntu 18.04/1810 has been installed as Virtual operating system using the VirtualBox. It could be different in your case. However, the procedure to enable the VirtualBox drag and drop will be the same for all Ubuntu installed Virtual machines on any VirtualBox. Even for the earlier Ubuntu version such as 17.04/17.10;16.04/16.10… So turned on your Ubuntu virtual machine and login into it.
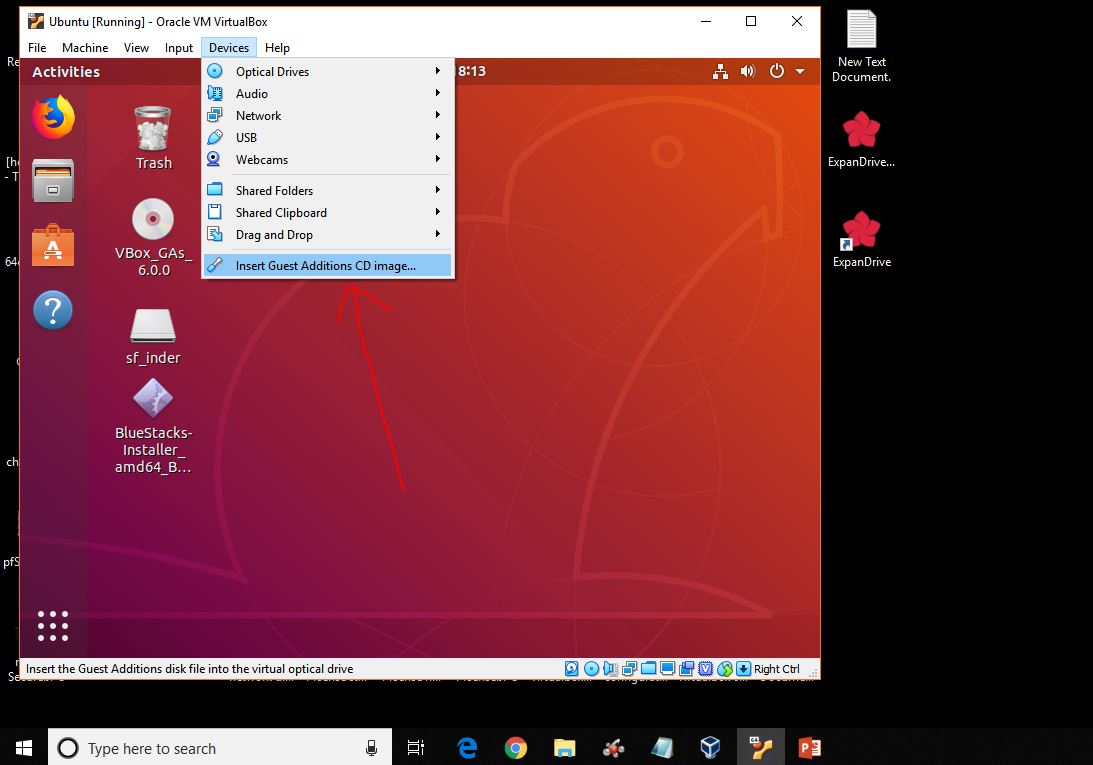
Step 2: Install VirtualBox guest additions CD or files
Once the Ubuntu VirtualMachine gets up and running. Click on the Devices option given in the Menu of the VirtualBox and then on the Insert Guest Additions CD image…
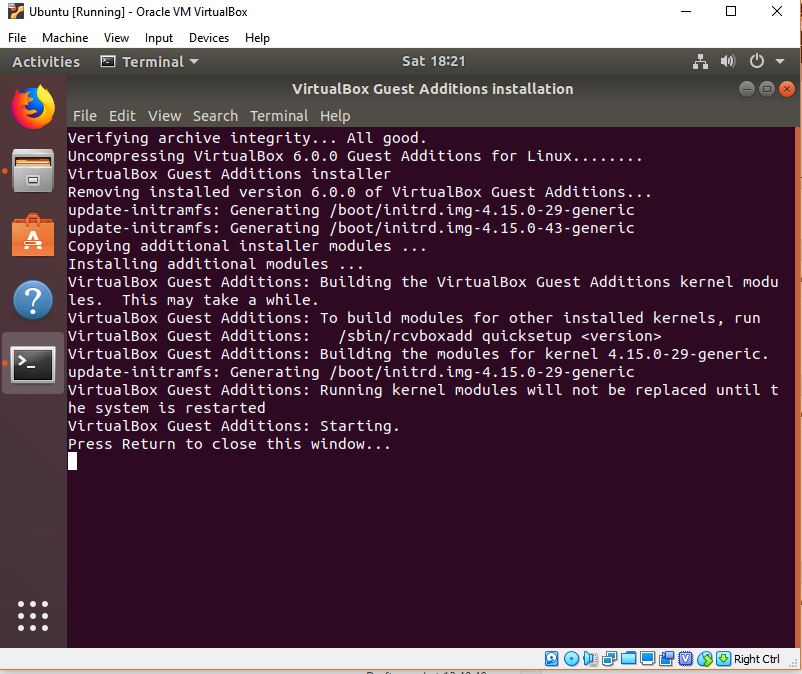
Step 3: VirtualBox Guest Additions installation
When you click on the Insert guest additions option it will automatically open the Command terminal to install the additional packages for VirtualBox. In case it not, then you will find a VBox_GAS_xx named CD icon on the Ubuntu Desktop double click on that and then on Run Software option. After installation, you will ask to press Enter button which will exit the command terminal. Do that.
Step 4: Install standard Ubuntu desktop build packages for VirtualBox
Again open the Command Terminal (shortcut key CTRL+ALT+T) and use the below-given commands to download and install some additional packages.
sudo apt-get install virtualbox-guest-dkms

sudo apt-get install virtualbox-guest-utils

sudo apt-get install virtualbox-ext-pack
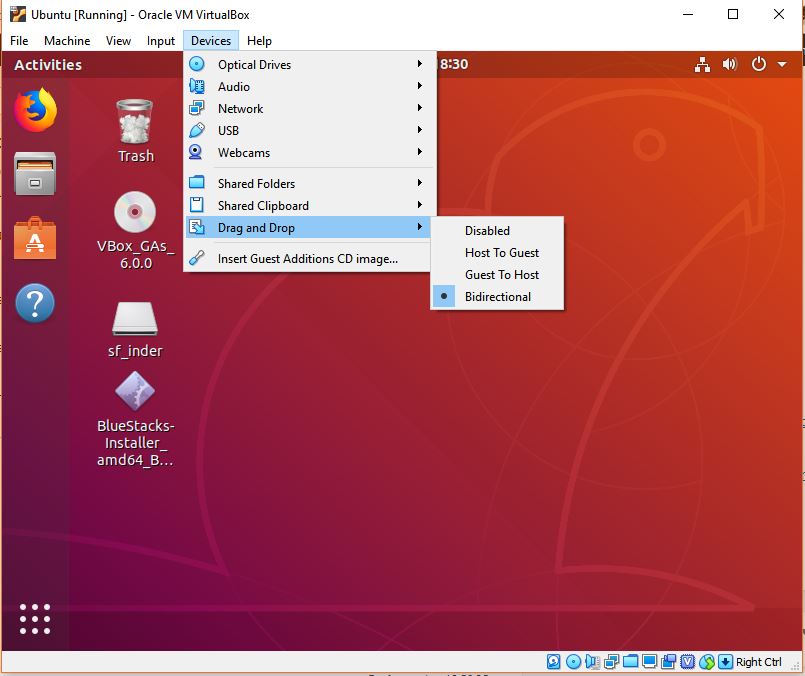
Step 5: Enable Drag and Drop option of VirtualBox
After installing additional packages using the above-given commands; now enable the Drag and Drop option. Just click on the Devices and select the option according to your choice;
Host to Guest– This will enable the copying of files or their dragging and dropping from Host to guest operating system.
Guest to Host: It does the same as the Host to Guest function but conversely, means from Guest to Host. For example, if Ubuntu on VirtualBox and Windows 10 is your host OS then from Ubuntu to Windows 10 only.
Bidirectional: From both sides of the OS, means guest to host and vice versa.
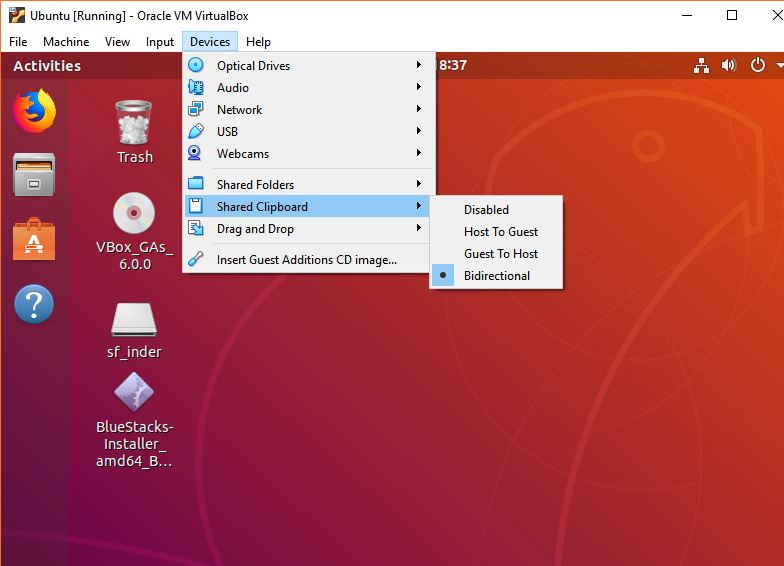
Just like the drag and drop also enable the Shared Clipboard option too.
Step 6: Reboot Ubuntu
Once you performed all above given steps reboot the Ubuntu virtual machine to get the changes into effect.
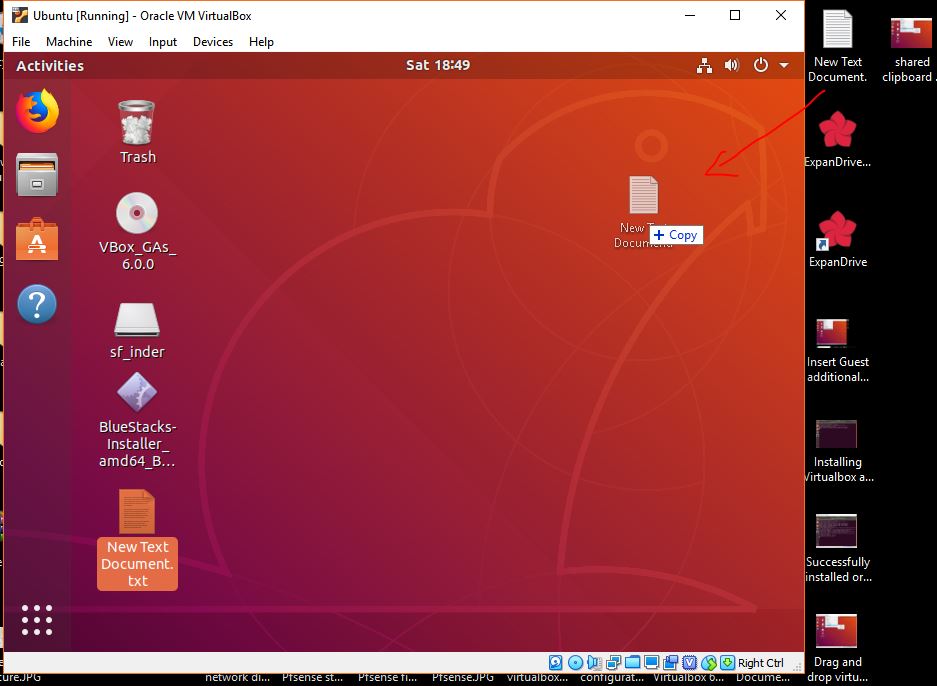
Step 7: Copy the files
Now you can simply drag and copy the files from the host machine to your Ubuntu virtual machine on VirtualBox.
Other Useful Resources:
- Install Ubuntu on Windows 10 using Virtualbox Virtual Machine
- Install VirtualBox extension Pack on Windows MacOS & Ubuntu Linux
- How To Install Hyper-V on Windows 10
- Install Android VM Image on Virtualbox or Vmware
- How to create Windows Virtual machine on Linux (Ubuntu)


Hi. Why do you need step 3 and step 4?
I think you only need one of them, right?
Thx.
Saw a lot of tutorials, but this was the only that worked. Thanks man!
keep writing. excellent tutorial.