TOR or ‘The Onion Router’ is a term, which most internet users come across while accessing it. Well, geeks know about TOR quite well, but there are many, who don’t know about it. TOR is a service, which can hide your identity on the websites you visit, hence making your anonymous. It can thus, help you get access to region-locked services, access the dark web, which I will not recommend unless you take the responsibility of the things, you do on the platform. The bottom line is, you can go anonymous by surfing the internet with the help of the TOR browser.
TOR is actually an open-source project, and you can install TOR on your system, by downloading it from its official website. If you are on Windows, downloading and installing TOR browser can be a piece of cake, but not for all the Linux users out there. If you are having a lot of experience working with Linux, you can easily download and install TOR browser on your Linux system. But if you have just started using Linux, and need to download TOR browser right now, it can be a little complicated. Yes, a little. But don’t worry, I will guide you here.
So let’s get started with downloading and installing TOR on your Linux system.
Steps to install the Tor browser on Ubuntu Linux
- Download TOR from the official website, i.e. https://www.torproject.org/. You can even download the TOR browser for Linux with the help of the following links.
- All downloadable links.
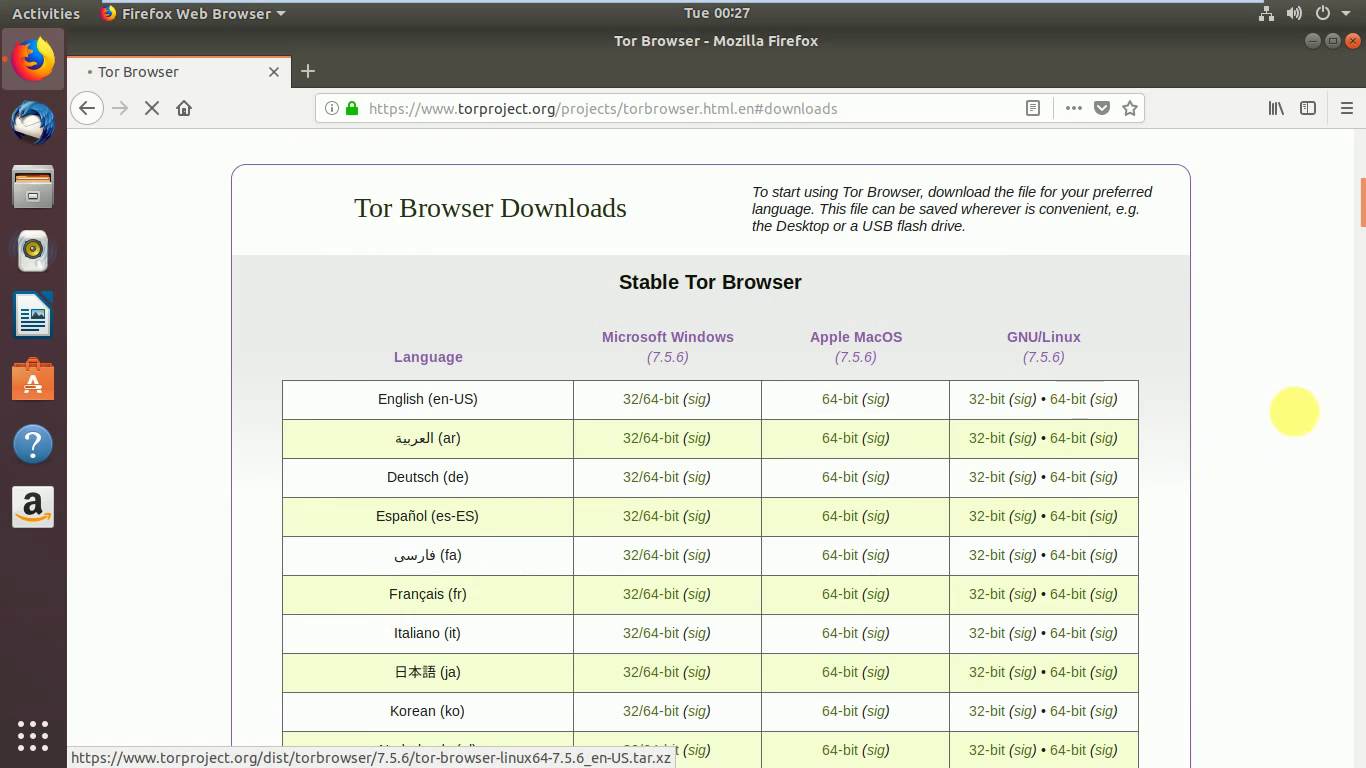
- Stable releases
- I will not recommend you to go for the Experimental releases for the best experience of using TOR. For this tutorial, I will be downloading the x64 stable version of TOR. Apart from the name of the downloaded file, no other things should be different at the time of installation.
- Once you are done downloading the TOR browser from the website, you can close the browser, and open your ‘Terminal’.
- Move on to the directory where the downloaded file exists. It should typically be the Downloads folder. Just type the following command ‘cd Downloads’ to move on to the ‘Downloads’ folder.

- Type ‘ls’ and hit the enter key to find a list of files present in the directory and to find out the name of the ‘tar’ archive.
- As I have downloaded the x64 version of TOR, my command will be somewhat like this. You should replace the filename with the one you have downloaded.
-
tar -xvf tor-browser-linux64-*.*_en-US.tar.xz
-
- After that hit the enter key.
- Once the process of unarchiving starts, you will get the following screen, showing you the name of the files unarchived. It means the process is going on.
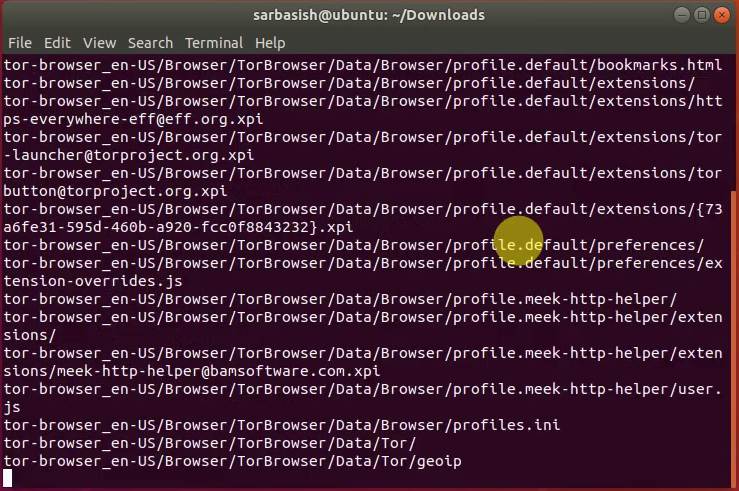
- Once the unarchiving is complete, you will get back the prompt.

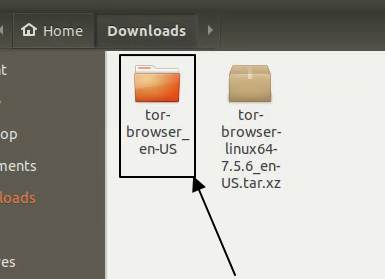
- Now exit the Terminal, and move on to the ‘Downloads’ folder from your File Manager. You should get the list of things you have download, and a folder, which will come with the name, ‘tor-browser_en-US’. Just open the folder. The name of the folder can be different. The appropriate folder should start with the name ‘tor-browser’.
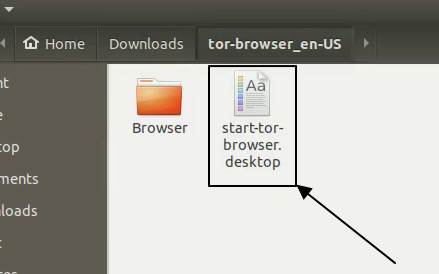
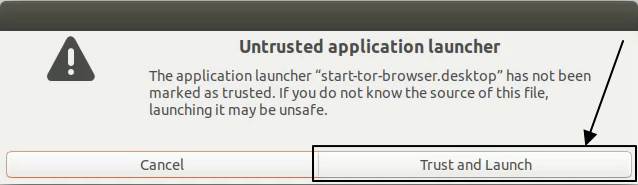
- You will again get one directory and file within it. Just double-click on the file, which comes with the name ‘start-tor-browser.desktop’.
- You will get a warning message. Just click on ‘Trust and Launch’ The icon should change to the actual icon of TOR browser on doing that.
- Now again double click on the TOR browser and you will get the following screen. It will only appear for the first time. Just click on ‘Connect’.
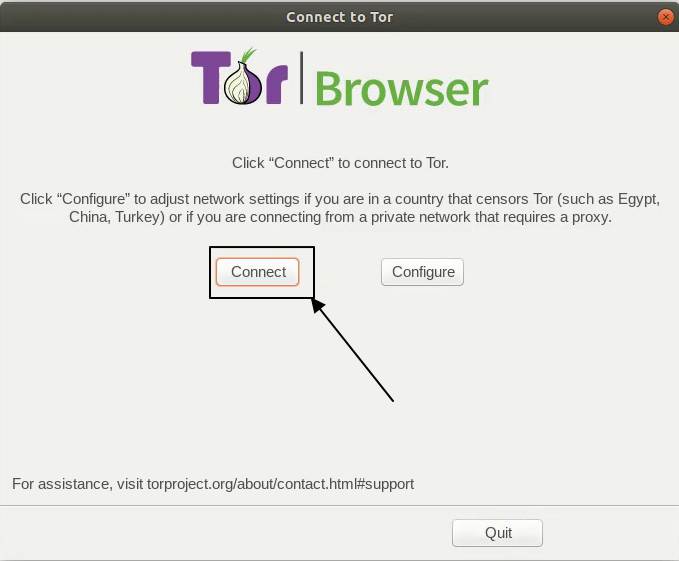
- You can also click on ‘Configure’ if you want to configure the circuit settings, and enter any kind of proxy details. They are only applicable if you are using a proxy to connect to the internet.
- On clicking on the ‘Connect’ button, it will take some time for the connection to be established depending upon your internet connection.
- Once you are done, you can now anonymously access the internet with the TOR browser.

To make sure, TOR is working fine, I will recommend you to check your IP address from your TOR browser, and a normal browser like Google Chrome or Mozilla Firefox. Just ensure that the IP addresses are not the same. The IP address, which will be shown to you in the TOR browser, will show a different country.
You can visit https://whatismyipaddress.com/ or other similar websites to know your IP address.
TOR browser on Linux doesn’t require any kind of installation. You just need to take the files out of the archive to get started. So no sudo, and apt-get. Depending on the websites you are visiting, some websites might try to track you. You yourself should know the ways to keep yourself anonymous while using TOR. You should not sign in to your favourite websites or provide any personal information that authenticates you.
If you do so, you will have to compromise with your anonymity. Sometimes, you might see the time-out error, as TOR bounces the web traffic through different servers or relays, which can slow down the overall connection, and eventually show you the error. So retry numerous times unless you are able to load the website, which you want to visit.
I think the small information on how to install the TOR browser on Linux was helpful for you. Have any questions about the installation of TOR? Feel free to comment it down below.
You might also like to know about:
- How to install Audacity on Ubuntu Linux using terminal
- How to install Kali Linux on VirtualBox on Windows, Linux, Mac, or other platforms
- List of All Mozilla Firefox about config commands & Settings
- How to Install Java in Ubuntu / Linux mint using Terminal
- How to install Wine on Ubuntu or Linux Mint using Terminal To Run Window Apps
- Download and install Google Chrome on Ubuntu using command line Terminal


‘tar -xvJF tor-browser-linux64-7.5.6_en-US.tar.xz’
not work mint…2021.
Please check out this updated article:
https://www.how2shout.com/linux/how-to-install-and-use-tor-browser-on-linux-mint-20-error-free-method/