Learn the steps to install MySQL Workbench software on Rocky Linux or AlmaLinux 8 using the terminal to manage MySQL database via the graphical user interface. MySQL Workbench is a graphical modeling tool and development system for MySQL databases.
Managing and modeling multiple databases is complicated using the command line interface of MySQL. Therefore, to make things easy Oracle also offers a GUI software platform called – MySQL Workbench. It offers a graphical user interface and a set of tools for working with MySQL databases. It provides extensive functions for daily work with the databases and can be used to design, create, edit, administrate and display databases. The software is able to extract structures from already existing databases and reproduce them clearly.
MySQL Workbench is available in a free and a commercial edition. Developers can visually design databases offline and host them on a MySQL server. For advanced users who need additional functions, extensions with scripting languages can be integrated into the tool.
It is cross-platform software, hence can be used on computers with the operating systems Linux, macOS, or Microsoft Windows.
Features and capabilities of MySQL Workbench
Here is a glimpse of key MySQL Workbench functions it provides:
• Managing databases
• Migration, Monitoring, and optimizing the performance of databases
• Design and modeling of databases
• Developing, creating, and optimizing databases
• Documentation of databases
• Reverse engineering of databases
Steps to install MySQL Workbench on Rocky Linux | AlmaLinux 8
1. Requirements
• Rocky / Almalinux / Oracle Linux 8 / Any RedHat based
• CPU 64bit x86 CPU (minimum) or Multi-Core 64bit x86 CPU (recommended)
• RAM 4 GB (minimum) / 8 GB or higher (recommended)
• Display 1024×768 1920×1200 or higher
• A non-root user with sudo access
• Internet connection to download Workbench
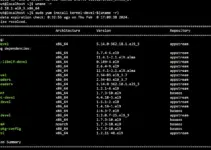
2. Add MySQL Workbench repository
Unlike MySQL database server, the package to install MySQL Workbench GUI is not available through the base repository. Therefore, we need the add the latest available one using the command terminal. Here is the one to follow; while doing this tutorial, the latest available version was 8.0.
sudo dnf install https://dev.mysql.com/get/mysql80-community-release-el8-3.noarch.rpm
It will ask you to allow the adding of repo, just press Y and hit the Enter key.

3. Run DNF update command
After adding the repository, the next step is to run the system update command that will refresh the repository cache to make sure, the system will get the latest available packages from the added Repos.
sudo dnf update -y
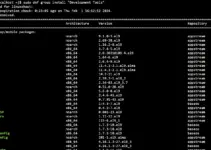
4. Install MySQL Workbench on Almalinux 8 | Rocky Linux 8
We have successfully added the source to get the packages for Workbench, the next step is to use the DNF package manager to easily download and install MySQL Workbench on RedHat-based operating systems.
sudo dnf install mysql-workbench-community -y
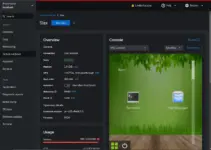
5. Run this GUI app to manage Databases
That’s it, you would already have the Workbench on your system. Now, we can run the application, for that either type- mysql-workbench on the terminal or go to the Application launcher, search for it and click when its icon appears.

6. How to update
We have used a dedicated repository to install WorkBench, hence if there is any kind of version update available, running the system update command will download and install that as well.
sudo dnf update
Uninstall or Remove Workbench
Those who don’t want to MySQL Workbench anymore on their Almalinux or Rocky Linux systems they can remove that with the help of given commands:
sudo dnf remove mysql-workbench
Remove repository:
sudo rm mysql-community.repo mysql-community-source.repo
To know more about it, readers can visit the official website of this tool.
Other Articles:
• 4 Ways to Check MySQL or MariaDB version on Linux
• 2 ways to Install Mysql Workbench on Debian 11 Bullseye Linux
• How to Install and Use SQLite On Ubuntu 20.04 LTS Focal Fossa