Jenkins is a software common in the field of professional software development. When more than one developer is working on a software project, it becomes confusing when all of their changes are put together. To solve this Jenkins comes in to picture. Jenkins is a Continuous Integration System (CI system) programmed in Java, which is used in agile software development: It ensures that small code changes are always immediately tested and imported into the software. Jenkins was first known as Hudson but after some dispute, all developers involved in this (open source) project decided to rename it to Jenkins.
Hence, in a few words, Jenkins is an open-source project that helps software developers in development by automating various aspects of software app coding such as building, testing, and deploying…
Jenkins also supports Docker and Kubernetes such as technologies that run microservices. To run Jenkin 4GB of RAM and 50 GB of the hard disk would be good to go for small teams. In terms of software, it needs Java to run. While doing this article the supported version of Java was Java 8 and 11.
Steps to install Jenkins on Debian 11 Bullseye Server
Update the package repository
On your Debian 11 terminal run the system update command that will refresh the APT repository cache and also install any security updates, if available.
sudo apt update
Install OpenJDK
Although the user can go for Oracle Java, however, here we are opting for Open source Java supported by Oracle as well as its community. The version we are choosing is the OpenJDK 11 which is also the default version of Java in Debian 11 bullseye to install.
sudo apt install openjdk-11-jdk
Add Jenkins GPG key on Debian 11
The packages to install are not available in the default repository of Debian 11, hence to add its repository first add the GPG key used to sign its packages.
curl -fsSL https://pkg.jenkins.io/debian-stable/jenkins.io.key | sudo tee \
/usr/share/keyrings/jenkins-keyring.asc > /dev/null
Enable Jenkins repository on Bullseye
After adding the GPG key successfully, let’s integrate the Jenkins official repository using the command given below.
echo deb [signed-by=/usr/share/keyrings/jenkins-keyring.asc] \
https://pkg.jenkins.io/debian-stable binary/ | sudo tee /etc/apt/sources.list.d/jenkins.list > /dev/null
Run system update
Once more run the system update command using the APT package manager to refresh the cache and let the system know about the newly added repository.
sudo apt update
Command to Install Jenkins on Debian 11
Finally, we have configured everything we initially needed to set up Jenkins on our Linux operating system. Now, like other packages use the APT package manager to install it.
sudo apt install jenkins
Check the Service status
To confirm the Jenkins is working fine without throwing any error, check its service using the given command:
systemctl status jenkins
If the service is not running or active, then you can use this one:
sudo systemctl enable --now jenkins

Find Jenkins Administrator password
By default, the setup will assign an Admin password to login to the Jenkins Dashboard for the initial setup, which of course will not require later once we create a new admin user. But initially, we need to find the same using the given command:
sudo cat /var/lib/jenkins/secrets/initialAdminPassword
Copy the string of numbers in the output.
Access Web Interface
Open the browser of your local or remote system that can access the domain or IP address of the server where you have installed the Jenkins.
http://server-ip:8080
On the Web interface, enter the password that you got in the previous step to start the setup process securely.

Install Plugins
On the next screen, the setup will ask you to install plugins. You either can install all the suggested plugins or select only those you want.

Setup User for administration
As you are done with the installation of the plugin, in the next step create your first admin user to log in and use Jenkins with in the future.

Jenkins Dashboard on Debian 11
Finally, after following the other few steps you will have your Dashboard to start creating projects for testing and developing along with your developer’s Team.

There are two architectures in which Jenkins works. Controller-Agent architecture / controller-controller architecture
The agents can be set up on the “Nodes” page. Go there enter the nodes name, define the properties of the nodes, assign agents to the controller and then start the agent nodes. To know further, you can refer to its official documentation.


Other Articles:
• How to Install Jenkins on AlmaLinux 8 or Rocky Linux
• Install MySQL 8.0 Server on Debian 11 Bullseye
• How to install FreeOffice 2021 on Debian or Ubuntu


Thanks so much for a great article on installing Jenkins on Debian 11.
I’d like to share the article with other Jenkins users, but the Jenkins project has intentionally changed its phrasing from the term “slave” to the term “agent” and from the term “master” to the term “controller”. If you could update the article to use the preferred terms, I’d be happy to propose to share the article through Jenkins social media channels.
Hello Mark, thanks for the suggestion, I have updated the article as you suggested.
Hi
Nice guide, but does not work for a newbee.
When upgrading a fresh Debian 11 install and following the guide, the jenkins install script fails!
Think it has some thing to do with java8 dependencies.
Arm/ARMBIAN running Bullseye, 1 that works, jenkins run fine! its been upgraded along the way.
1 running a fresh install of Arm/ARMBIAN bullseye on the Orangiplus(Older H3 Allwinner)
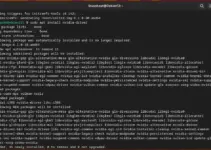
Created symlink /etc/systemd/system/multi-user.target.wants/jenkins.service → /lib/systemd/system/jenkins.service.
Job for jenkins.service failed because a timeout was exceeded.
See “systemctl status jenkins.service” and “journalctl -xe” for details.
invoke-rc.d: initscript jenkins, action “start” failed.
● jenkins.service – Jenkins Continuous Integration Server
Loaded: loaded (/lib/systemd/system/jenkins.service; enabled; vendor preset: enabled)
Active: activating (auto-restart) (Result: timeout) since Fri 2022-10-21 13:06:18 CEST; 40ms ago
Process: 2046 ExecStart=/usr/bin/jenkins (code=exited, status=143)
Main PID: 2046 (code=exited, status=143)
Status: “Jenkins stopped”
CPU: 2min 18.860s
openjdk version “11.0.16” 2022-07-19
OpenJDK Runtime Environment (build 11.0.16+8-post-Debian-1deb11u1)
OpenJDK Server VM (build 11.0.16+8-post-Debian-1deb11u1, mixed mode)
After this operation, 93.6 MB of additional disk space will be used.
Selecting previously unselected package jenkins.
(Reading database … 48892 files and directories currently installed.)
Preparing to unpack …/jenkins_2.361.2_all.deb …
Unpacking jenkins (2.361.2) …
Setting up jenkins (2.361.2) …