Nextcloud is a powerful, self-hosted cloud storage and collaboration platform that empowers individuals and organizations to regain control over their data. In this detailed guide, we will walk you through the step-by-step process of installing Nextcloud on a fresh instance of Debian 12 Bookworm.
Step 1: Update Debian 12 Packages
First, being a Linux it is important to start with system update commands especially when you are planning to install a new package. This also ensures you have the latest security patches and bug fixes. Open a terminal and execute the following commands:
sudo apt update
sudo apt upgrade
Step 2: Install Apache Web Server
Nextcloud requires an Apache web server to serve its files to clients, so in your Debian configure the Apache2 package.
sudo apt install apache2Step 3: Install PHP and Required Extensions
Being a PHP-based application platform, Nextcloud relies on PHP to run and perform various tasks. To install the PHP and its required extensions execute the following command:
sudo apt install php libapache2-mod-php php-mysql php-common php-gd php-xml php-mbstring php-zip php-curlStep 4: Configure Apache for Nextcloud
To configure Apache to host Nextcloud, create a new configuration file:
sudo nano /etc/apache2/sites-available/nextcloud.confAdd the following content to the file:
<VirtualHost *:80>
    ServerAdmin [email protected]
    DocumentRoot /var/www/html/nextcloud/
    ServerName your_domain_or_IP_address

    <Directory /var/www/html/nextcloud/>
        Options +FollowSymlinks
        AllowOverride All
        Require all granted
        <IfModule mod_dav.c>
            Dav off
        </IfModule>
        SetEnv HOME /var/www/html/nextcloud
        SetEnv HTTP_HOME /var/www/html/nextcloud
    </Directory>

    ErrorLog ${APACHE_LOG_DIR}/error.log
    CustomLog ${APACHE_LOG_DIR}/access.log combined
</VirtualHost>
Save the file and exit the editor by pressing Ctrl+X, type Y and then hit the Enter key.
Step 5: Enable the Nextcloud Apache Configuration File
Enable the Nextcloud configuration file by creating a symbolic link:
sudo ln -s /etc/apache2/sites-available/nextcloud.conf /etc/apache2/sites-enabled/Also, enable a few modules:
sudo a2enmod headers rewrite env dir mime
Step 6: Restart Apache
To apply the changes, restart the Apache web server:
sudo systemctl restart apache2 --no-page -lStep 7: Install and Configure MariaDB
Nextcloud requires a database to store its data. Install MariaDB (a MySQL-compatible database) by running:
sudo apt install mariadb-serverSecure your MariaDB installation:
sudo mysql_secure_installationFollow the on-screen prompts to set a root password and answer the security-related questions.
Step 8: Create New Database for NextCloud
Once you have configured MariaDB, the next step is to create a Database to store the data generated by the NextCloud:
Login To MySQL
sudo mysql -u root -pCreate a new database and user for Nextcloud:
CREATE DATABASE nextcloud;
GRANT ALL ON nextcloud.* TO 'nextclouduser'@'localhost' IDENTIFIED BY 'your_password';
FLUSH PRIVILEGES;
EXIT;
Replace 'your_password' with a strong password of your choice.
Step 9: Download and Extract Nextcloud
Download the latest stable release of Nextcloud from the official website:
wget https://download.nextcloud.com/server/releases/latest.tar.bz2Extract the downloaded archive:
tar xvf latest.tar.bz2Move the extracted files to the Apache document root:
sudo mv nextcloud /var/www/html/Also, Create a data directory:
sudo mkdir -p /var/www/html/nextcloud/dataSet the correct ownership and permissions:
sudo chown -R www-data:www-data /var/www/html/nextcloud/
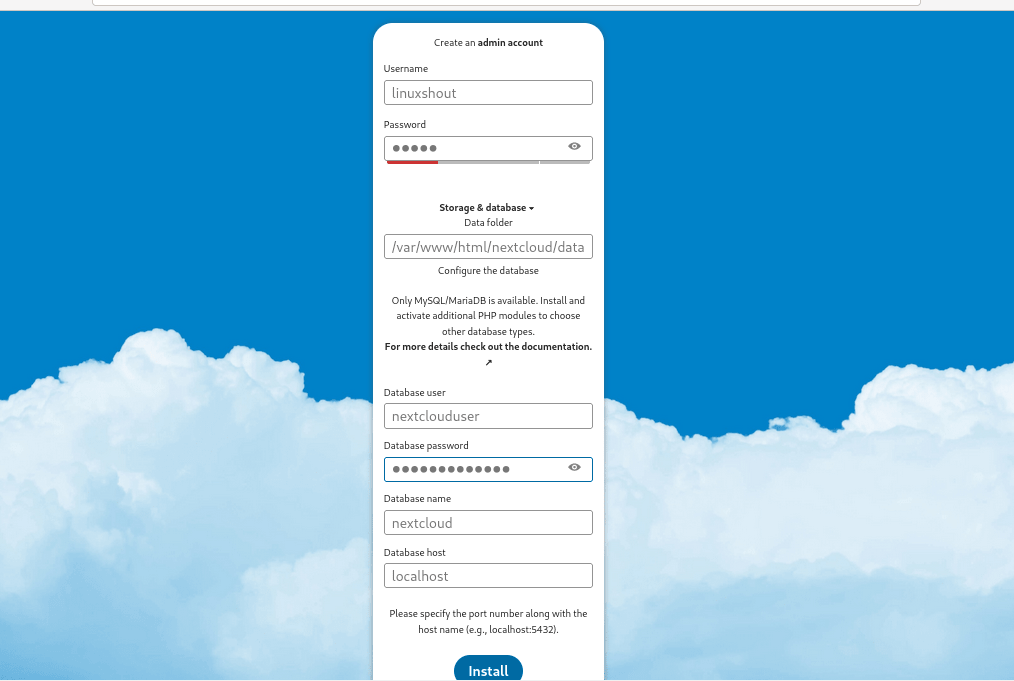
sudo chmod -R 755 /var/www/html/nextcloud/Step 10: Install Nextcloud on Debian 12 via Web Installer
Open your web browser and access http://your_domain_or_IP_address/nextcloud.
Create a Username and Password for the NextCloud Admin user and after that also add the details of the Database you have created for NextCloud to store data.
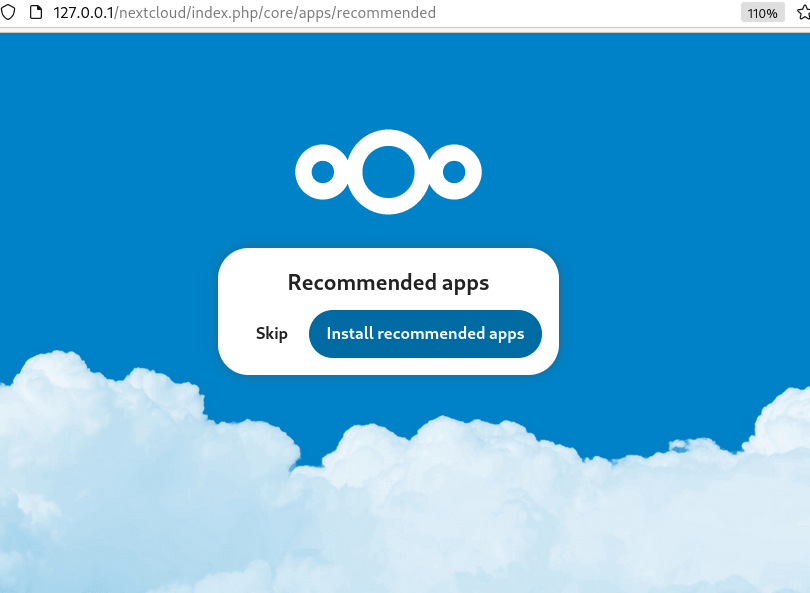
Install recommended apps:
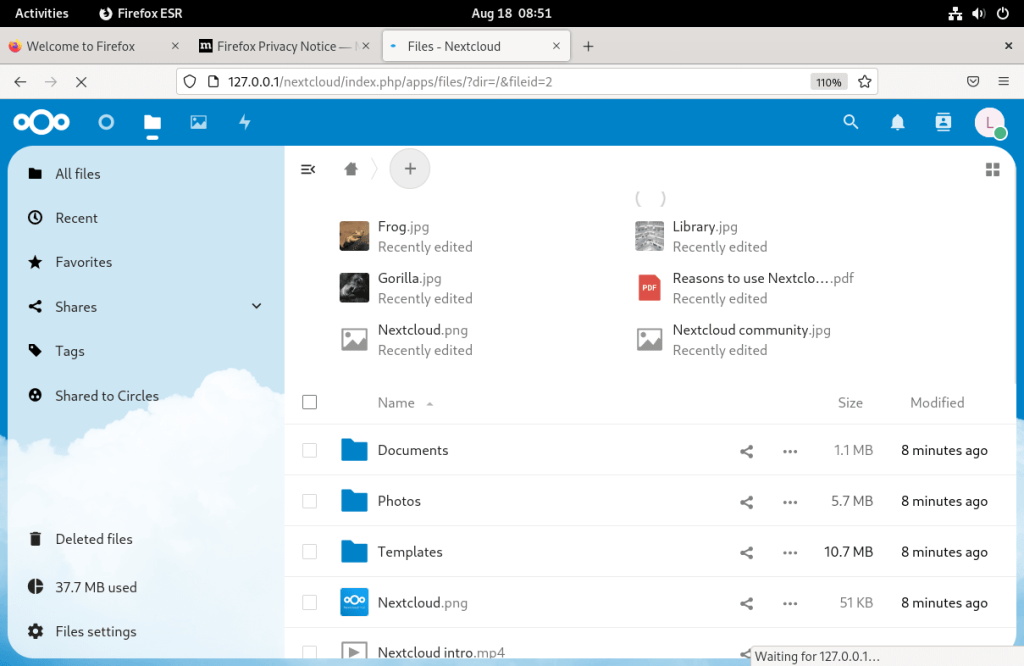
Finally, you can start using your web-based private cloud storage system.
Step 11: Secure the Nextcloud Installation
To enhance the security of your Nextcloud installation, consider implementing the following best practices:
- Enable HTTPS by obtaining an SSL/TLS certificate from a trusted certificate authority.
- Regularly update Nextcloud and its components to benefit from security patches and new features.
- Implement strong passwords and enable two-factor authentication for user accounts.
- Regularly back up your Nextcloud data to protect against accidental loss.
Conclusion: By following this comprehensive step-by-step guide, you have successfully installed and configured Nextcloud on Debian 12. Squeeze out the benefits of self-hosted cloud storage while maintaining control over your data. Remember to follow security best practices and keep your Nextcloud installation up to date for a secure and seamless experience.


1. Why are you using Apache instead of the faster Nginx? (By the way the Apache config is simply wrong and not working. A not working Admin Mail Address is illegal in some Countries, no reminder of replacing Domainname)
2. Why aren’t you using redis?
3. fail2ban is entirely missing in the Security section.
4. MFA for Nextcloud is entirely missing in the Security section.
5. Firewall configuration is entirely missing in the Security section.
6. The Advice to ONLY use HTTPS should be much more prominent! Using Passwords via HTTP is little schizophrenic.
7. I can’t find any advice to monitor the system with a tool like Monit, netdata, Nagios, etc.
At the Moment the Article would be more useful, if you just Link to this script: https://codeberg.org/criegerde/nextcloud-zero
Sorry for the harsh words, but if anyone decides to use your Manual, he will get an really insecure Nextcloud Installation to save potential Important data, like tax files or Insurance data and that is simply in acceptable.
Greetings
KaeTuuN