Learn how to install Microsoft Azure CLI (Command Line) on Windows 11 to manage Cloud resources directly from your system.
To manage Azure resources, Mircosoft has created an open-source cross-platform tool. We can install it on Windows, macOS, and Linux, hence it is cross-platform supported too. Azure CLI is written in Python and offers a set of commands to manage nearly all Azure resources. The tool is lightweight hence can be installed and use instantly.
It is possible to use this command line tool on windows via the web through the Azure Cloud Shell or by installing it inside a Docker container. The source code is available on GitHub.
Steps to install Microsoft Azure CLI on Windows 11
We can install the Microsoft Azure CLI either using the GUI or command or package managers such as Chocolatey or Winget. In this tutorial, we will learn how to use all these ways to set up Azure CLI.
1. Install Azure CLI using MSI
There are many users who don’t want to use Powershell or Command prompt to install Azure CLI, especially beginners, for them the easiest way is the traditional MSI.
- Download the Azure MSI from the official page of Microsoft or simply click this Download Link and you will have the latest version of this CLI utility on your Windows 11.
- Once you have the MSI setup of Azure CLI, just like for any other software to install double click on it as well. And follow the common installation wizard.
- After completing the installation, close it. Now, to check whether the Azure CLI has been configured on our system successfully, let’s check its version.
- For that open Windows Command Terminal. You can easily run it by searching Terminal in the Search Box of Windows or by right-clicking on the Start menu.
- As you are on Terminal, type the given command.
az --version
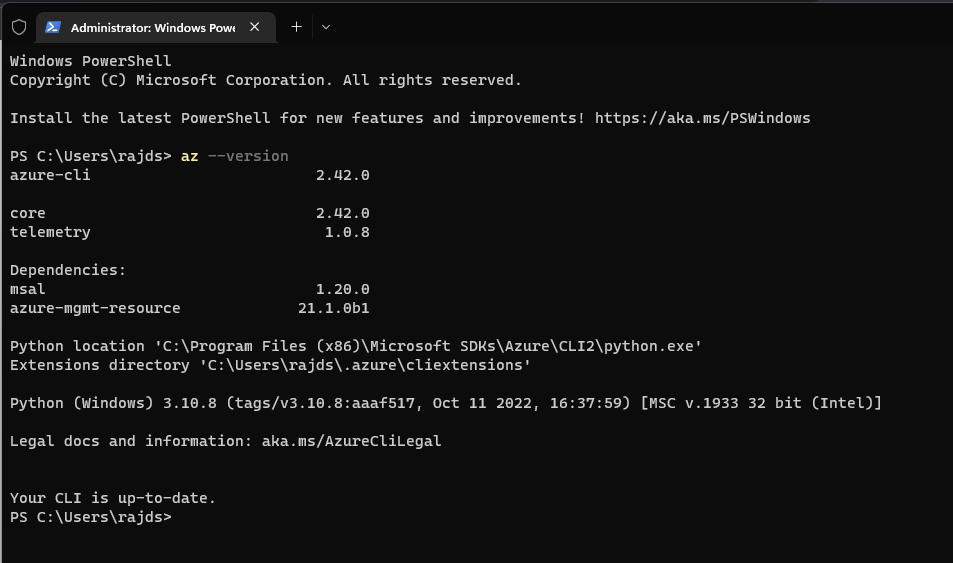
- If everything goes well, you will see the version, as shown in the following screenshot.

2. Installing using Windows Terminal (Powershell or CMD)
This method is purely based on a command in which we manually download and install the Azure CLI MSI but using Powershell or Command Prompt.
- Open Windows 11 Terminal that in return will start the Powershell to run commands for various tasks. For that, you can right-click on the Start menu button and select Terminal (Admin).
- Use the given command to download the MSI for Azure CLI directly on your PowerShell interface. Hence, just copy the below-mentioned command and paste it into your Terminal.
Invoke-WebRequest -Uri https://aka.ms/installazurecliwindows -OutFile .\AzureCLI.msi
- Start the Azure CLI silent installation without giving any output or pop-up to accept any terms and conditions.
Start-Process msiexec.exe -Wait -ArgumentList '/I AzureCLI.msi /quiet'
- Once the installation is completed, you can remove the downloaded AzureCLI MSI setup with the help of this command.
Remove-Item -Path .\AzureCLI.msi
Note: Close your terminal or PowerShell and open it again to check the version.

3. Use the Winget Package manager
Well, Winget is a default package manager available in Windows 11 systems. To use it just open your Windows Terminal as Admin. For that, right-click on the Start menu button and select “Terminal (Admin)“.
After that, run the given single command and you are done.
winget install Microsoft.AzureCLI
4. Install Azure CLI using Chocolatey PM
Chocolatey is a popular package manager for the Windows operating system with hundreds of applications in its repository. However, unlike Winget, it is not available on Windows 11 systems out of the box and the user has to install it manually. Here is the tutorial on it- How to install Chocolatey on Windows 11
We are assuming that you already have the Choco package manager, if yes, then you can go for the further given command.
- Open your Windows Terminal as Admin, for that right click on the Start button, and select the “terminal (admin)” option. After that just run the given command:
choco install azure-cli
How to upgrade
In the future, if you want to install the latest available update for Azure CLI then we can use its own command line to do that. Here is the syntax that you just need to run in your Powershell.
az upgrade
Uninstall Azure CLI from Windows 11
If you don’t want this command line utility to manage Azure resources anymore from your Windows 11 system. Then you can uninstall it.
- For that, click on the Windows search icon or open the start menu and type – Settings
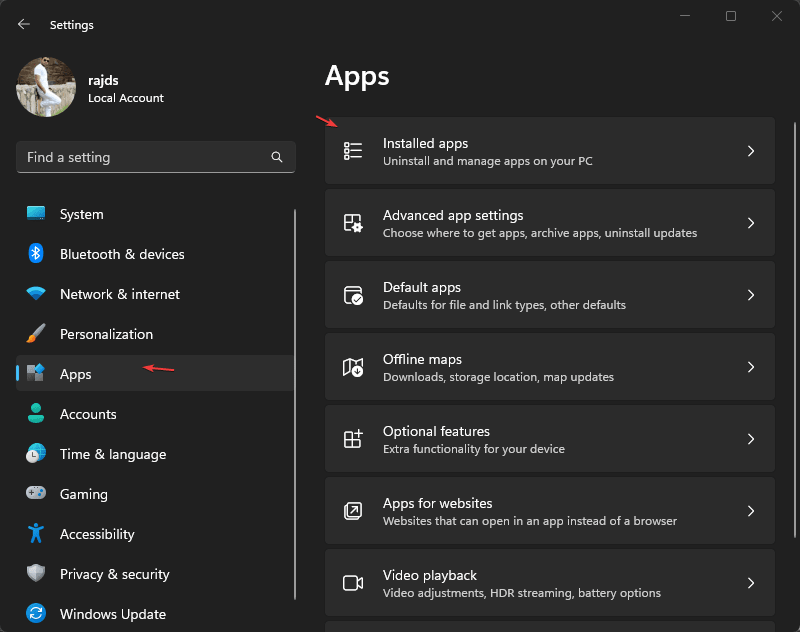
- In the Settings window, select Apps then Installed Apps.
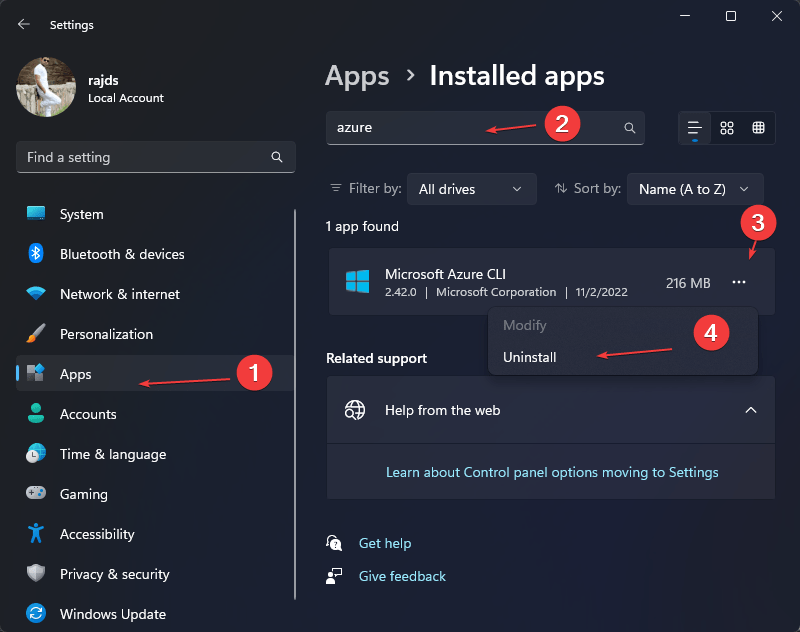
- There, search for Azure
- As it appears, click on the Three dots given in front of it to select the “Uninstall” option.


Other Articles:
⇒ Windows 11 or 10: How to Delete, Create and format Partitions
⇒ 2 Ways to install Git on Windows 11 or 10 – CLI & GUI
⇒ 4 Best tools to install WordPress Local on Windows without Xampp
⇒ How to install Heroku CLI on Windows 11 or 10
⇒ Find the Wi-Fi password using the command prompt in Windows 11.
Related Posts
How to Reopen Closed Windows or Tabs in Firefox
How to Install Django on Windows 11 or 10
How to set Gemini by Google as the default Android assistant
How to create data bars in Microsoft Excel for numeric values
How to open HEIC images on Windows for free
How to install Server Manager Windows 11 or 10