If you want to install Akaunting for a demo on a local server or for permanent purposes on a cloud/hosting VPS server then here is the tutorial to guide you on the steps for the installation of Akaunitng on Ubuntu, CentOS, Debian, Linux, Elementary OS, and other similar Linux.
Akaunting is free and open-source accounting software that uses PHP & MySQL to run and is available on GitHub. Thus, no need to use any client or the installation of accounting software on each and every system of a company or home. Any user who wants to use the Akaunting for small and medium business or personal usage can access it locally or remotely with the help of the internet and browser, once installed.
It provides a web interface like some WordPress-based websites and the procedure of its setup is also similar to it. That’s why it is not only user-friendly but also a device too. Yes, we can use it on smartphones and tablets as well.
Akaunting Features:
- Completely Free accounting software to use.
- Access financial data online anytime on Mac, PC, tablet, or mobile phone.
- Open Source Accounting software with Github repository
- Add deposits to and transfers between accounts
- Send professional invoices to clients
- Vendor Management system
- Create and manage bills
- Add non-billable expenses
- Manage the finances of multiple companies
- Accept bulk payments
- Automatically create invoices, revenues, bills, and payments for ongoing jobs
- Discount management
- Customer Summary
- Graph and Visual reporting
- Mutlicurrencies support
Akaunting requirements:
The requirements of this software are very common and easily provided by almost every hosting service provider.
- PHP 8.0 or higher
- Web Server (eg: Apache, Nginx, IIS)
- Database (eg: MySQL, PostgreSQL, SQLite, SQL Server)
- URL Rewrite (mod_rewrite)
- Php extensions:
- PDO
- OpenSSL
- Mbstring
- Tokenizer
- XML
- Zip
- Official website and Github link of this software
Install Akaunting software on Ubuntu or CentOS Linux
Almost all the steps are the same for both Ubuntu and CentOS, except for a few such as the Apache installation command.
1: Install Apache server for Akaunting
If you already have Apache installed on your Linux server or Desktop where you want to set up Akaunting then move to the next step.
For Ubuntu, Debian, and Linux Mint
sudo apt update
sudo apt install apache2
For CentOS & RedHat
yum update
yum install httpd
2. Enable and Start Apache
Once the installation procedure is completed on your server, run the following commands to enable and start the webserver along with system boot.
Ubuntu, Debian, and Linux Mint
sudo systemctl enable apache2

sudo systemctl start apache2
CentOS, Redhat, and Fedora
sudo systemctl enable httpd
sudo systemctl start httpd
3. Install MySQL server for Akaunting database
To store financial data created by the Akaunting software, we need some database, here that will be provided by MySQL. However, you can also use PostgreSQL and SQLite.
To install MySQL on Debian or Ubuntu-based systems use this command:
sudo apt install mysql-server
Whereas for CentOS or Redhat, one can use this one:
yum install mysql-sever
4. Enable MySQL services
After setting up MySQL, just like Apache, we also have to enable and start this database service at boot level, which means whenever our system reboots, Apache and MySQL services should start automatically.
sudo systemctl start mysql

sudo systemctl enable mysql
5. Akaunting database setup
Login to MySQL first:
sudo mysql
Set root password:
ALTER USER 'root'@'localhost' IDENTIFIED WITH mysql_native_password by 'MyPassword@123';
Note: Change MyPassword@123 with some strong password, you want to set.
Exit:
exit;
Run the Secure Installation script again.
sudo mysql_secure_installation
The script will ask these questions.
Enter the password for user root: type your set password and then press ENTER.
Change the password for root? Press N, then ENTER.
Remove anonymous users? Press Y, then ENTER.
Disallow root login remotely? Press Y, then ENTER.
Remove test database and access to it? Press Y, then ENTER.
Reload privilege tables now? Press Y, then ENTER.
Now use the following commands to create a database that we will use in this open-source accounting software. It will be the same for any Linux OS.
Note: Replace the red color text with whatever you want to use.
sudo mysql
create database h2smedia;

create user 'h2s'@'localhost' IDENTIFIED BY 'your-pass';
grant all privileges on h2smedia.* to h2s@localhost;
flush privileges;
exit;
6. Install PHP or high version along with modules
The install Akaunting, the minimum PHP version we need to set up for this open-source accounting software is PHP 8.0 or higher.
For Ubuntu and its equal Linux, here are the commands:
However, For Ubuntu 20.04 will not have the PHP 8.0 version using the default system repository. Therefore to have the latest PHP 8.0 version, we need to add a PPA repo, here are the commands to follow:
sudo apt install software-properties-common
sudo add-apt-repository ppa:ondrej/php -y
sudo apt install php-imagick php8.0-common php8.0-mysql php8.0-gd php8.0-bcmath php8.0-curl php8.0-zip php8.0-xml php8.0-mbstring php8.0-bz2 php8.0-intl
For PHP 8.1 you can replace 8.0 with 8.1 in the above command.
Run:
sudo update-alternatives --config php
Select PHP 8.0 as the default system version.

To install PHP on CentOS and other similar Linux
sudo yum install epel-release yum-utils -y

sudo yum install http://rpms.remirepo.net/enterprise/remi-release-7.rpm

sudo yum-config-manager --enable remi-php72

sudo yum update
sudo yum install php libapache2-mod-php php-bcmath php-common php-imap php-mbstring php-xmlrpc php-soap php-gd php-xml php-intl php-mysql php-cli php-ldap php-zip php-curl
7. Download the zipped Akaunting file to setup
In this step, we will download the latest release file of the Akaunting free software and then extract the same in the public web folder for further usage.
wget -O Akaunting.zip https://akaunting.com/download.php?version=latest
sudo mkdir -p /var/www/akaunting/
sudo apt install unzip
sudo unzip Akaunting.zip -d /var/www/akaunting/
Now, change the permission of the cloned folder:
sudo chown -R www-data:www-data /var/www/akaunting/
If you get an error” chown: invalid user: ‘www–data:www-data’” after running the above command use this one:
sudo chown -R apache:apache /var/www/akaunting/
Now give the apache user full read and write permission:
sudo chmod -R 755 /var/www/akaunting/
See: 10 top opensource accounting software
8. Configure the Apache site configuration file for Akaunting
Here, we will create an Apache site configuration file for Akaunting to tell it where to look at the folder to execute the files and what other things should it follow.
Ubuntu: sudo apt install nano
CentOS: yum install nano
Create a file:
Ubuntu or Debian
sudo nano /etc/apache2/sites-available/akaunting.conf
for CentOS
sudo nano /etc/httpd/sites-available/akaunting.conf
Now add the following lines exactly as they are here including space and break:
Replace the red text with your own domain or values.
<VirtualHost *:80>
ServerAdmin localhost
DocumentRoot /var/www/akaunting/
ServerName example.com
ServerAlias www.example.com

<Directory /var/www/akaunting/>
Options +FollowSymlinks
AllowOverride All
Require all granted
</Directory>

ErrorLog ${APACHE_LOG_DIR}/error.log
CustomLog ${APACHE_LOG_DIR}/access.log combined

</VirtualHost>
To save and exit the nano editor, press: Ctrl+X keys and type: Y, and then hit the Enter button.
Enable the configuration and rewrite modules.
sudo a2ensite akaunting.conf
sudo a2enmod rewrite
sudo a2dissite 000-default.conf
Finally, restart the apache to make the changes into effect.
Ubuntu: sudo systemctl restart apache2
CentOS: sudo systemctl restart httpd
9: Setup & Dashboard of Akaunting open source accounting software
Now, that everything is ready, go to your browser and open the server IP address or domain name (if you are installing it on cloud or VPS hosting).
Here, we are installing Akaunting for a demo on our local server, thus we are using the local IP address of the same.
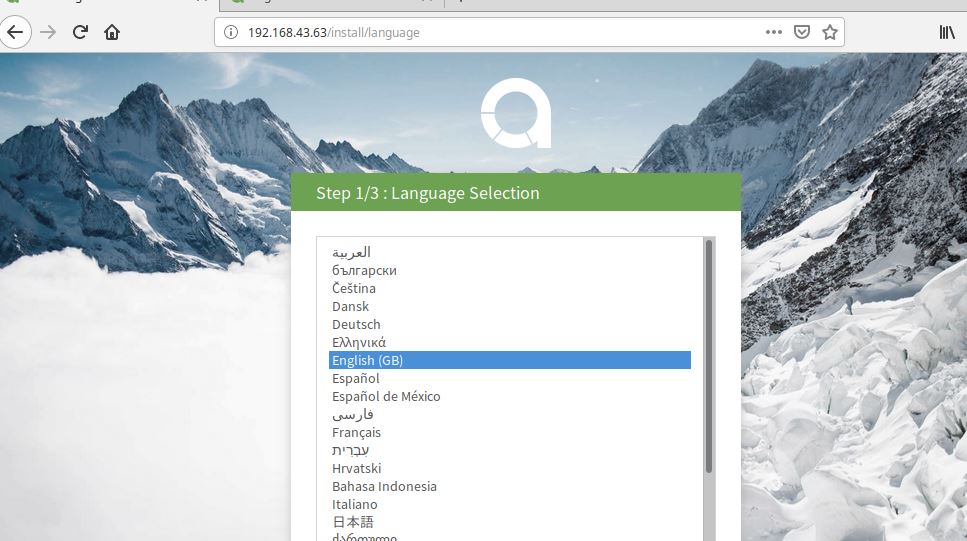
- As you point the domain or IP to access the server, a setup page of the Akaunting will open. First, select the language in which you want to install it, by default it will be English.

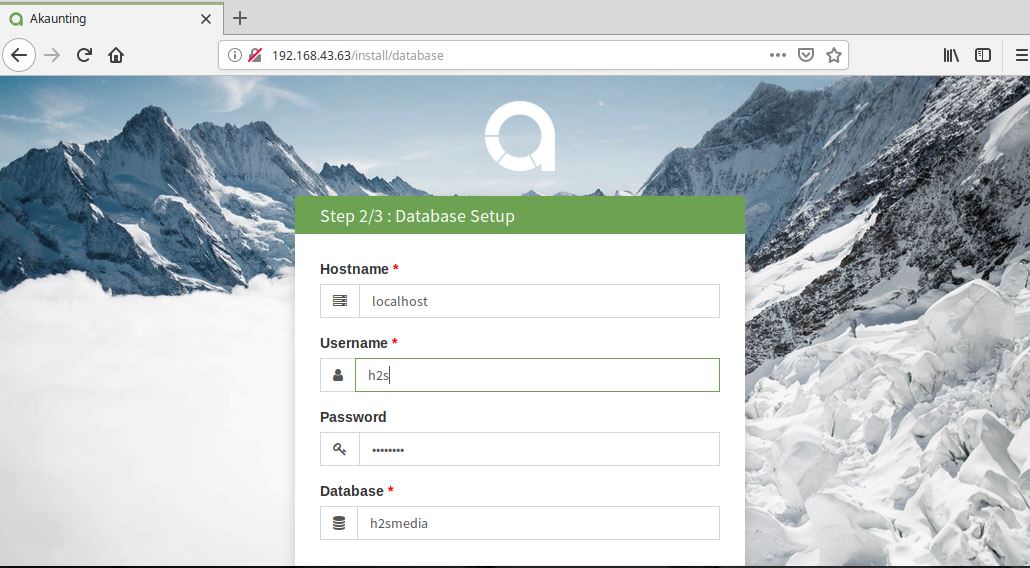
Select language - Add the details of the MySQL database which we have created in this article.

Setup Akaunting database - Add the details of the company along with the admin email and password which will be used to access this free accounting software from anywhere.

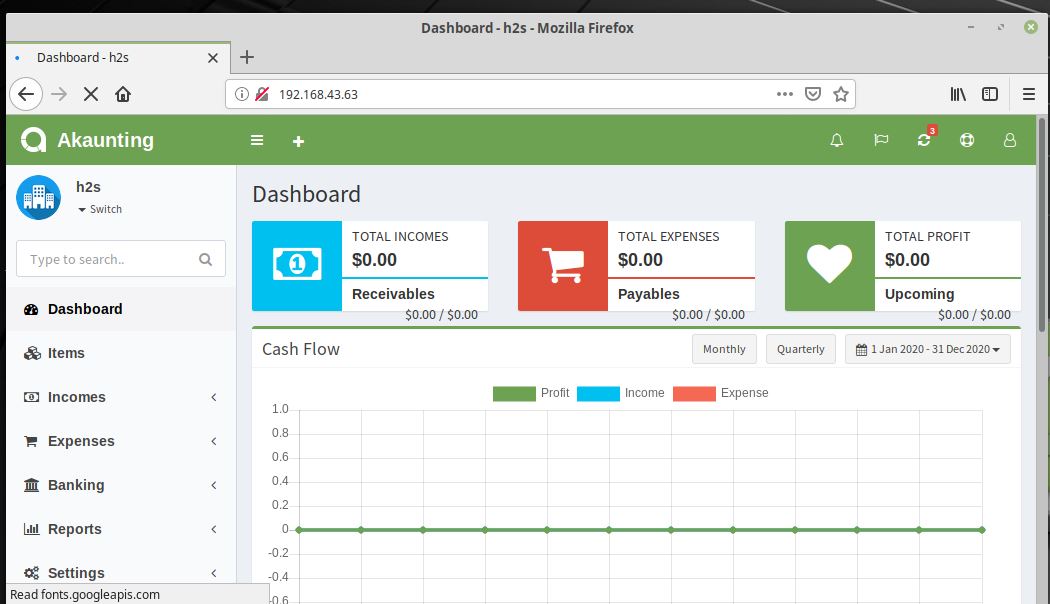
Company and admin details - Finally, the Dashboard of the software will be in front of you. Now, start performing your financial calculations.

Akaunting free accounting software installed on Ubuntu Linux
Other Articles:

Related Posts
How to install Winget package manager in Windows 2022 Server
How to View Listening Ports Using Netstat
How to Install Pygame Zero on Windows 11
Single Command to install Android studio on Windows 11 or 10
11 Best Free and Open source NAS or SAN software
Download Visual studio code portable for Windows 11/10 or Linux