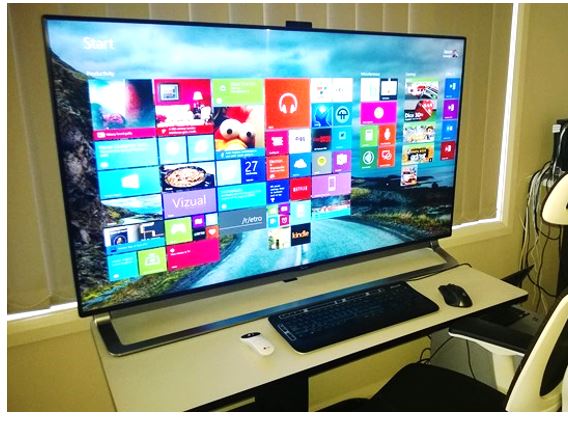
As nowadays, we are used to multiple electronic gadgets and most of the people have the habit of spending a long time every day using their PC either for work purposes or entertainment. But still, the TV is the biggest entertainment media available to any common person. Many frequent computer users still prefer the TV as their pass time companion. As the computer has a monitor with it, it is a common question raised at many minds that can we watch TV on a computer or not? There are multiple solutions available for that now. But another thing which is the common requirement that can we use the TV as a computer monitor screen and TV as well as possible or not. As there are many ways and many claims to do it, multiple confusions still out there about the solution. In this article, we are going to bust all the wrong theory as well as we are going to discuss the right procedures step by step. Apart from the combined use of a TV as second monitor and a normal TV as well, there is also one more reason because of which many people like to use a high-end TV as a monitor because TV tends to have more pixel count than any normal monitor. High-end monitors are way costly, were better quality pixel enabled TVs are cheaper than those. Though any TV available in the market cannot replace a traditional monitor so while buying knowing the purpose and specification are very important.
Ways of Connecting a TV to a PC
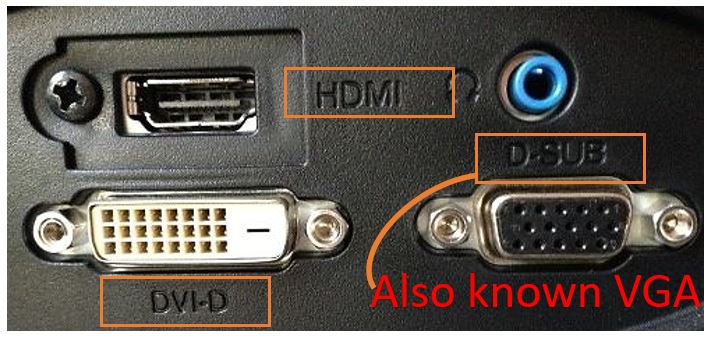
There are mainly three types of connectors available those can be used to connect the TV with PC. The most common is the VGA connector, which only supplies the display output, so while using a VGA connector to do the job, the user definitely needs an RC connector to connect the audio output jack to the TV. Another popular connector is a DVI connector. DVI connector does supply both audio and video signals. Though there are very models of TV available in the market which do support the DVI cable audio output system. The HDMI connectors are the latest addition to this sector. HDMI connectors do supply Audio and video signals Simultaneously. All the new available TVs do support this type of connection. Though for more High definition audio output a user can use the RC cable connection to connect the external Speakers.
The procedure and installation of the connections are described step by step below.
Connection Using VGA or DVI cable
This procedure is mainly for these TV s which are relatively old and is laying around your house and you want to put it for some good use. As new LED or LCD TVs do not usually contain the VGA or DVI port. The VGA or DVI both connectors are MALE to MALE in terms of connection. So, there is no issue about the right side or wrong side.
What to check first
As many latest motherboards do not have the VGA or DVI port support built in with it, so the user needs to check it first as the VGA or DVI type port is available in his PC or not. Though many latest mid-range or entry-level Motherboards still do contain the VGA and DVI type ports. And in the side of the TV, a basic checking also should be done, be confirmed about the ports availability, and be sure about whether it is VGA or DVI port. In most of the cases in the TV, the VGA and the DVI ports are labeled as the “Computer in” or “PC in” tag.


How to connect VGA or DVI cable from PC to TV
Step 1: Connecting the connector is just a walk in the park. One should take care only about the pins in the connector so that the pins do not break. Then the user has to connect the audio cable too. The audio cable is nothing but a 3.5mm universal audio jack which has come out from the speakers. The audio connector port can be found in the back side of the PC near to the display connector jack, and it is the same for any motherboard in the world. There can be 3-4 audio jacks available, the user has to connect the connector to the Green colored jack only while the Pink one is for the mic and the blue one is for the line in connections.
Step 2: After the connection and switching on the pc the user has to change the input mode of the TV using the Remote or built-in TV buttons. The button should be labeled as “Source” or “Input”. In some modern TVs, this step may not be required as they have an auto-detecting feature in it.
Step 3: This step is required only for those users who tend to use dual monitors. On the desktop, the user has to do a “Right click” and click on the “Display settings”. In the newly popped up window, two buttons can be found, “Identify” and “Detect”. Using the detect button the user can be sure about the assigned number of the Previous monitor and the new TV just connected.
Step 4: Beneath the “Orientation” option another option named “Multiple Display” can be found. Clicking on which the user will find four more options “Extend These Displays”, “Duplicate these Displays”, “Show only 1” and “Show only 2”. Extending the display will allow the user to enhance the desktop size for more workspace while duplicating the display will just copy the content of the first display to the second display. The user has to choose the option according to his need and apply the settings and it is done.

Connection Using HDMI connector
HDMI connector port is the most common kind of port in any motherboard and TV nowadays. Connecting through the HDMI connector just same as connecting with VGA or DVI connectors.
Both of the ends of the HDMI connector are same, so connecting any end at the PC and to the TV going to work fine. HDMI port looks almost like the USB port, so while pushing the jack into the port be sure about it’s a USB or HDMI hub.
What to Check first
The user has to check that his motherboard is HDMI supported or not, it can simply be done by a quick check at the back panel of the PC. If there is an HDMI port available that means that pc is HDMI enabled. Many TV has more than one HDMI port available, so the user has to note the port number in which he is connecting the jack, it will be needed later at the time of setup.
Things to keep in mind
The user has to keep mind that if his computer has a Graphics Card installed in his pc, then there will more than one HDMI ports available in the back panel of the pc. Some graphics cards also do consist of multiple HDMI port. In this case, if the user connects the HDMI connector in the Motherboard’s HDMI port then no display signal will be received by the TV, hence no picture will be coming there. The user has to connect the HDMI connector in the Graphics Card’s HDMI port only to make it work. If the Graphics card has multiple HDMI ports then connecting the connector to the port no 1 is to be done.
How to connect HDMI to PC
Step 1: Connecting the connector is very easy. Put one end of the connector into the HDMI port of the PC and the other end of the connector into the HDMI port of the TV, and it’s done. HDMI connector does supply the Audio and Video signals both at the same time, so no worries about Audio connections. The user does not need any speakers for the audio connection as well. But if a user desires for better quality sound output then he can use some speakers for that and the connection will be the same as described before.
Step 2: After the connection and switching on the pc the user has to change the input mode of the TV using the Remote or built-in TV buttons. The button should be labelled as “Source” or “Input”. From that button, the user has to navigate to the HDMI option and has to select it. In some modern TVs, this step may not be required as they have an auto-detecting feature in it.
Step 3: The display settings option can be navigated as described before in this article.
Step 4: The dual monitor setup can be done as we described before in this article.
Using the TV as Monitor and a TV at the same time
Now some user may desire to use the TV as a monitor and a TV both. If the TV has a single VGA or DVI port available, and no HDMI port available, then the PC connection has to be made using that VGA or the DVI connection only, while the normal TV connection can be done using Tri-colored RC cable (the default TV connector with 3 pins colored Red, White & yellow) only. This type of connector port is available on every TV regardless of the model. To navigate between TV and PC the user has to use the “Source” or “Input” button of the remote. In this case, the user will need to set up speakers for the audio output of the pc.
If the TV has a single VGA and a single HDMI port available, then the PC connection can be done using the VGA or the HDMI whatever the wants. Of course, the HDMI serves better picture quality. Then the TV connection can be done using the HDMI (If not used for pc connection), or the using the default RC ports.
If the TV has multiple HDMI ports available, then the both of the connections should be done with using HDMI ports only. HDMI port will allow the user to gain better quality picture output (1080p), while the default RC ports allow only 480p output. Most of the modern LED TVs tend to have two HDMI ports. So, this option will be relevant for most of the users.
Conclusion
Using a TV as a monitor is a good idea, as the TV provides a good quality picture output, and it also can serve as a TV and a PC both. Using a single piece of hardware in multiple purposes can be a money saving idea. Some users may also desire about the dual monitor setup, having a TV in the dual monitor setup will help the user in many aspects for sure. If any user is confused about the productivity of the dual monitor set up, then he should check some videos at YouTube about it. Using dual monitor is really productive. In the case of gamers or streamers, it is a game-changing idea. Using a TV as a monitor will provide a better output for the Gamers as well.
You might also want to be read:
- What is Arduino? Arduino vs. Raspberry Pi. All you need to know
- Different audio formats explained. Which one to go for?
- Why do we need SSL Certificate on the website? Top 5 reasons
- What is the difference between OTT and IPTV?
- What are hot-swappable and cold-swappable devices? How do they differ?
- What is Powerline Ethernet Adapters? How do they work?
Related Posts
Dell U4323QE monitor Leaked specs- 42.5-inch 4K resolution
How to Install Sensu Go Monitoring on Windows 11 or 10 via WSL
AVerMedia ExtremeCap UVC BU110 Review
Manage & Monitor multiple Windows 10 PC using browser & WAC
Shinco has updated its TV UNIWALL – UI with 5 new apps & COVID19 Updates
Acer launches new Swift 3 laptop with AMD Ryzen 4000 Series in India