JUnit is a quite useful tool for Java developers to test their code so that they can identify whether there are any errors or not. Using it you can verify the correctness of individual units (methods, classes, or components) of your Java application. Those who are using Eclipse IDE for Java development can use JUnit 5, 4, and 3 easily from its interface without installing any additional package. Hence, Eclipse for Java, supports seamless integration with JUnit, making it easy to run tests and analyze results.
In this article, we see the steps needed for using JUnit5 in Eclipse to test Java codes.
1. Need Eclipse installed
To follow this tutorial, you must have Eclipse IDE installed on your Windows or Ubuntu Linux system. If you don’t have Eclipse, can download the latest version of Eclipse from the official website. Whereas, Ubuntu users can see our article on how to install Eclipse IDE in Linux.
While installing the Eclipse JAVA IDE, it will also install the JRE/JDK as well.
2: Open Eclipse IDE on Windows or Ubuntu
Yes, ofcourse to use JUnit we first need to open Eclipse IDE either by clicking on its shortcut or using the appropriate method based on your operating system.
3: Create or Open a Java Project
Now, to test our code using JUnit, we need to either open our existing Java project or create a new one. If you’re starting a new project, follow these steps:
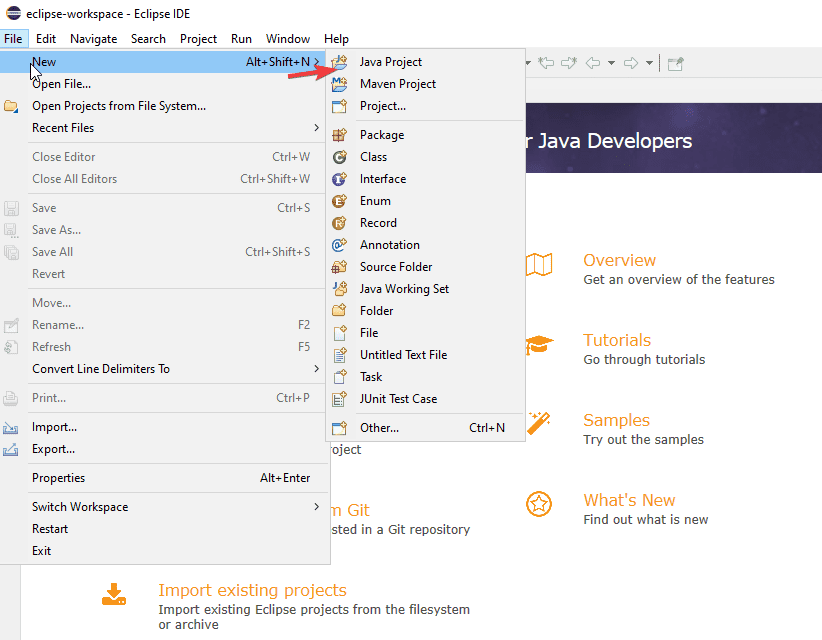
- Click on “File” from the menu bar.
- Choose “New” and then “Java Project.”
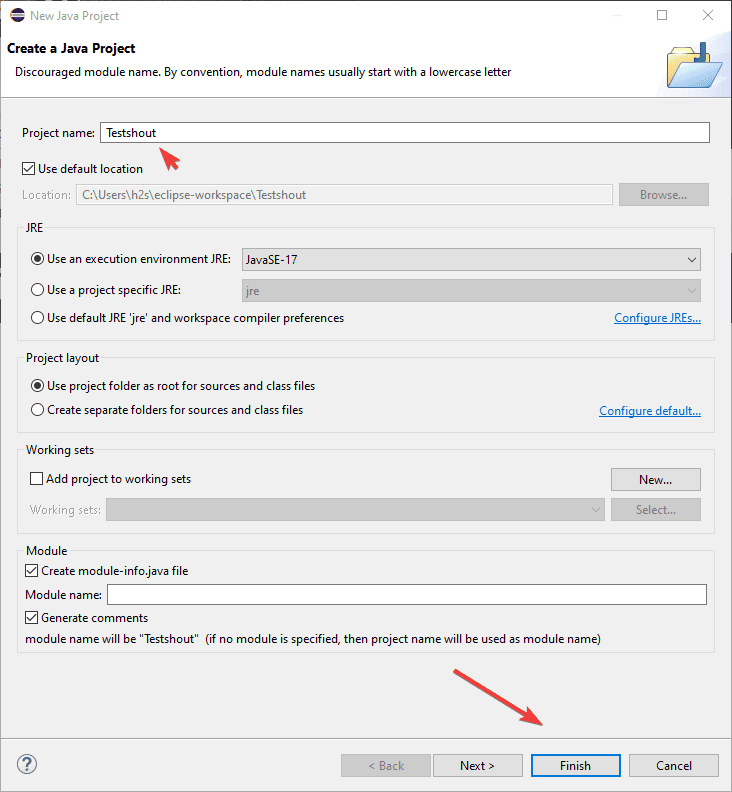
- Enter a project name and choose the appropriate JDK from the “Project SDK” dropdown.
- Click “Finish” to create the project.
4: Create a JUnit Test Case
Once you have created your Java project or opened the existing one in Eclipse, you can start writing test cases.
Follow these steps to create a simple JUnit test case:
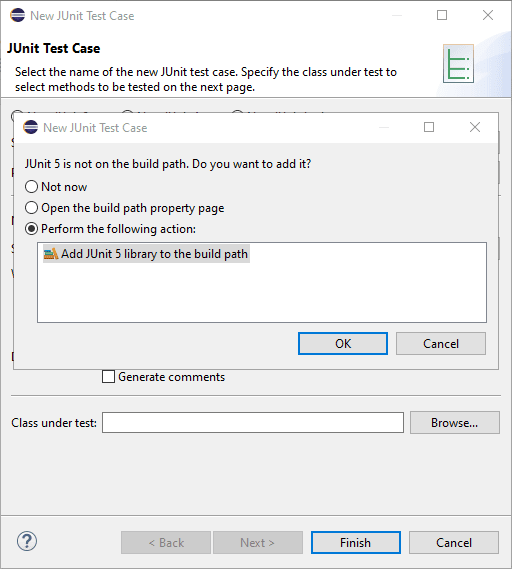
Click on the icon given to add the “New” icon and then click on “JUnit Test Case.”

In the “New JUnit Test Case” dialog. The Wizard will ask you do you want to add JUnit 5 library to your build path. Select it and press the OK button.
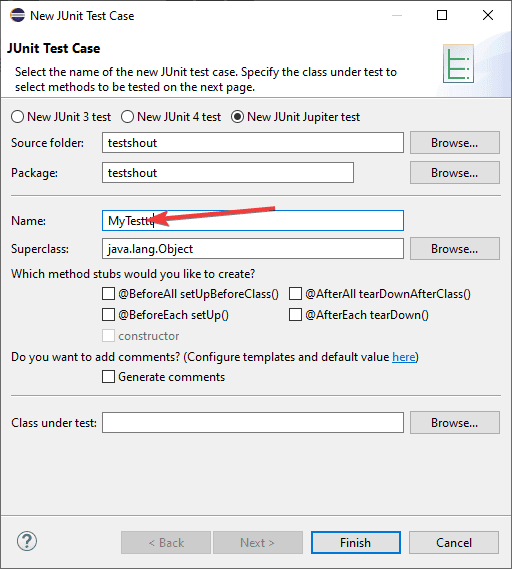
After that, give some “name” to your test case and choose the methods you want to test. Here we are giving it – MyTest
Click “Finish” to create the test case.
5: Write and Run Tests
In the newly created JUnit test case, you can write test methods to test the functionality of the corresponding Java class.
Here’s a simple example:
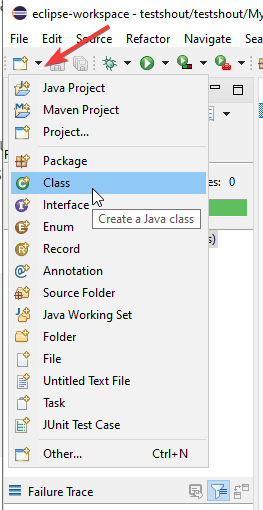
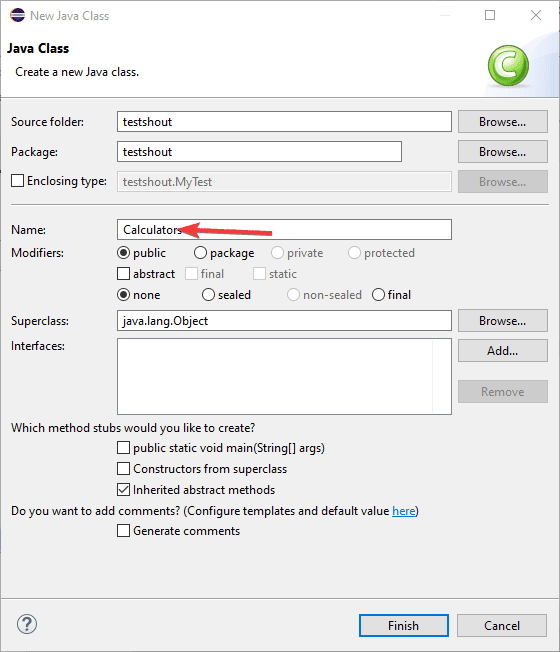
To show you how to write and run JUnit tests, let’s create a simple class to test our code. In your Java project, click on the New icon and select “Class.” Name the class “Calculator” and hit the Finish button.
After that add the following code:
Note: Don’t change or delete “package” at the beginning of the code as it represents the package of your Java project. Which is basically a mechanism to encapsulate a group of classes, sub-packages, and interfaces.
public class Calculator {
    public int add(int a, int b) {
        return a + b;
    }
}
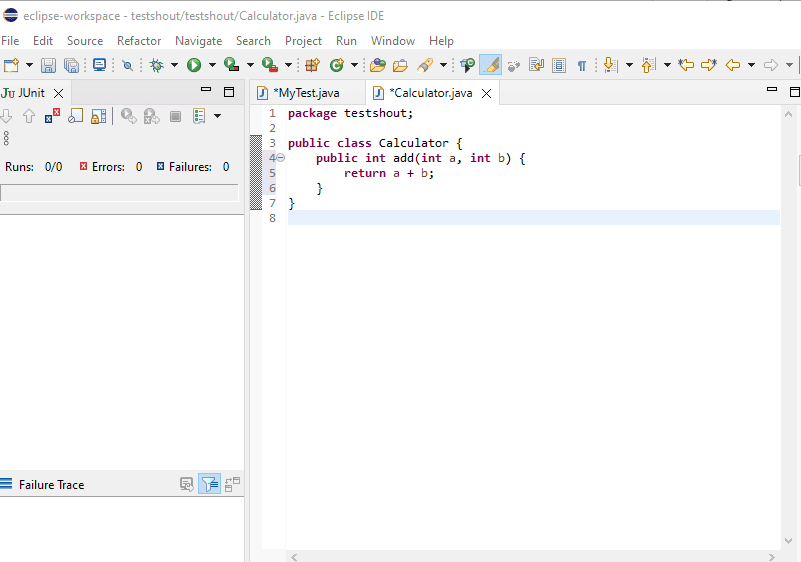
In this example, we assume that there is a class named “Calculator” with an “add” method that we want to test.
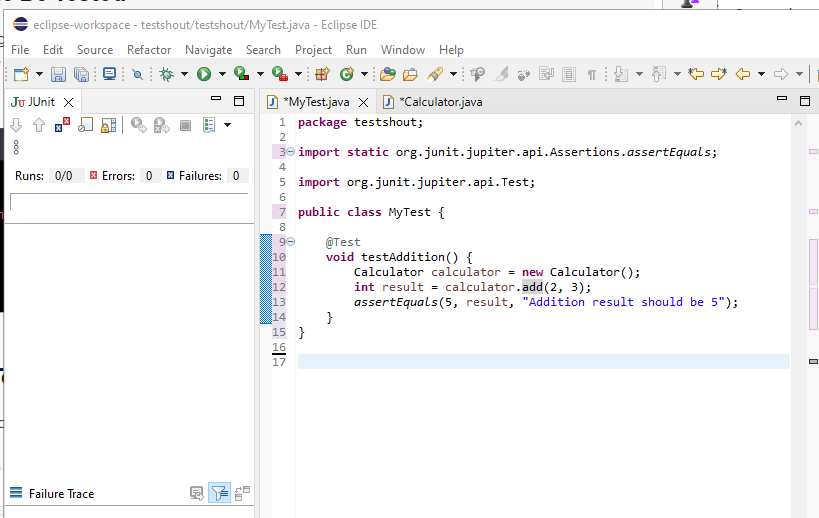
Now go to your JUnit Test case to test the add method of the Calculator class. In our case, the JUnit Test case name is – MyTest.
Well, to make things easy Eclipse will automatically create the skeleton of the test method. You just need to complete the test method with assertions to verify the correctness of the add method.
import static org.junit.jupiter.api.Assertions.assertEquals;

import org.junit.jupiter.api.Test;

public class MyTest {

    @Test
    void testAddition() {
        Calculator calculator = new Calculator();
        int result = calculator.add(2, 3);
        assertEquals(5, result, "Addition result should be 5");
    }
}
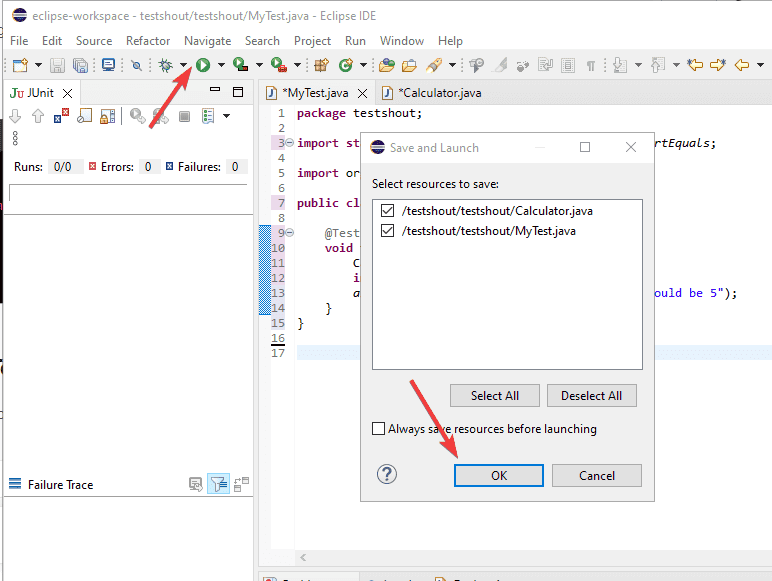
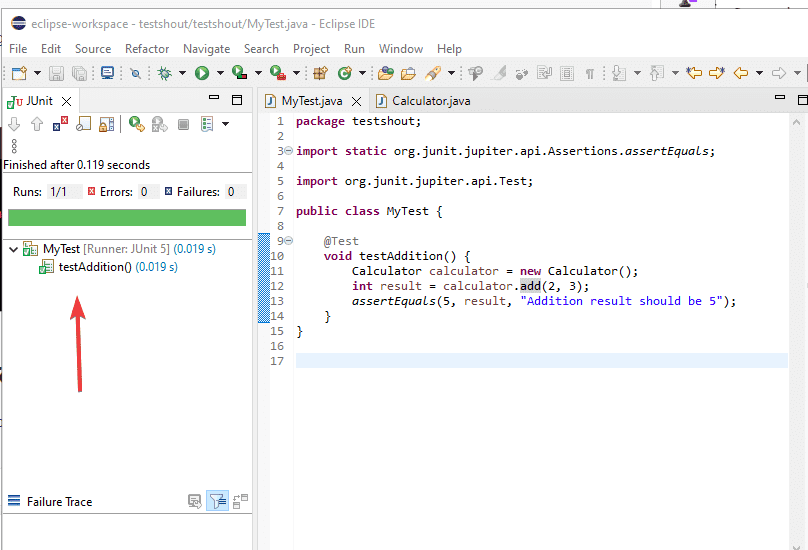
To run the tests, either right-click on the test case file coding area to select “Run As” or just click the green color play icon given in the menu bar. Eclipse will execute the tests and display the results in the JUnit view.
If your code passes the test you will see green color ticks in the test result. Otherwise, the errors with solutions to solve them.
In this way, we can add and use Junit 5 in Eclipse either running on Windows or Linux. It gives Java developers a powerful but straightforward way to not only write but even test their Java codes. We have not only learned the steps to integrate JUnit in Eclipse IDE but even how to create a JUnit test case, write test methods with assertions, and run the tests.
Other Articles:


