MongoDB is an open-source NoSQL Database solution also available in a paid edition for enterprises. It is implemented in the C ++ programming language and available for the Windows, Mac OS X, and Linux operating systems. Both 32-bit and 64-bit systems are supported.
It is also one of the best open source solutions designed for high performance, large amounts of data, high flexibility, and easy scalability.
Here we learn the command to install MongoDB on Rocky Linux including other similar OS. The steps given here are applicable for-
- Rocky Linux 8
- AlmaLinux 8
- RHEL / CentOS 8/7
Note– If you have login the server or desktop with the root user then you don’t need to use the sudo with every command given below.
Add MongoDB repository on Rocky Linux 8
Instead of adding the repo link and GPG key of MongoDB in the default official repo file of the system, let’s create a separate one.
sudo nano /etc/yum.repos.d/mongodb-org-4.4.repo
Now, copy the below-given lines that include necessary details to add MongoDB on Rocky and other similar RedHat-based Linux such as CentOS and AlmaLinux.
[mongodb-org-4.4]
name=MongoDB Repository
baseurl=https://repo.mongodb.org/yum/redhat/$releasever/mongodb-org/4.4/x86_64/
gpgcheck=1
enabled=1
gpgkey=https://www.mongodb.org/static/pgp/server-4.4.asc
To save the file press Ctrl+X, type Y, and then hit the Enter key.
Run system update
To rebuild the system repository cache, simply run the Yum or DNF update command-
sudo dnf update
Install MongoDB on Rocky or AlmaLinux
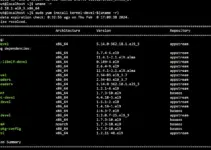
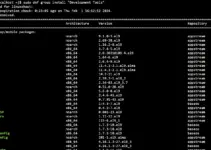
Everything is done, we have successfully added the official repo MongoDB and that is the only thing we require to install this NoSQL Database solution on our RHEL based Linux. Now, run the installation command to fetch the package and install it on the system.
sudo dnf install mongodb-org

Enable and Start Service
To make sure the MongoDB Database service starts automatically with the system boot, enable its service and also start the same.
sudo systemctl start mongod
sudo systemctl enable mongod
Note- If you get this error-
Failed to start mongod.service: Unit mongod.service not found.
Then, reload the daemon.
sudo systemctl daemon-reload
To check the status we can use-
sudo systemctl status mongod
To exit- ctrl+c.
Secure MongoDB
By default after the installation, there is no security, I mean the Database will not ask you to enter any password to connect. Without authentication, anybody having access to the server can create, edit or delete databases. However, we can change that and can set username and password.
Connect to MongoDB, by typing-
mongo
In the below block of code Replace – myUser with your system user that you want to use and copy-paste it to mongo CLI and hit the Enter key. To add the user as Admin, it will ask for the user password.
use admin
db.createUser(
{
user: "myUser",
pwd: passwordPrompt(), // or cleartext password
roles: [ { role: "userAdminAnyDatabase", db: "admin" }, "readWriteAnyDatabase" ]
}
)

Edit MongoDB configuration, file and enable the Authentication in it.
sudo nano /etc/mongod.conf
There find the #security: text and delete the # given in front of it. And add the authentication text after that, it should look like this
security:
authorization: enabled
Save and exit the file.
Reload MongoDB service
sudo systemctl restart mongod
Now, to connect, the clients need to authenticate themselves first.
To connect the MongoDB as or any other user, you can use the following syntax:
mongo --port 27017 --authenticationDatabase "admin" -u "your-user" -p
To know more about its security refer to the official documentation.
Other Guides-
- Install KDE Plasma Desktop on Rocky Linux 8
- How to create Rocky Linux 8 bootable USB drive
- How to install and configure VNC Server on CentOS 8