Oracle Linux is an enterprise Linux server operating system built on the same code used by the RedHat Enterprise Linux. The core difference is the branding and touches that Oracle has given to improve the performance of Oracle Linux. It is free to download and distribute.
In this article, we simply see the way to install Oracle Linux on VirtualBox for testing purposes. The process is the same for Windows, Linux, FreeBSD, and MacOS.
How to install Oracle Linux 7 on VirtualBox (Windows/MacOS/Linux)
Step 1: Download the Oracle Linux ISO
To get the Oracle Linux ISO file from the official website page which is Oracle cloud software delivery, see this article: Download Oracle officially. However, if you want to download it directly, then use this community page: https://community.oracle.com/
Step 2: Download VirtualBox
If you already have the Oracle VirtualBox on your PC or laptop, skip this step. Otherwise, go to virtualbox.org and download the VirtualBox. The Ubuntu Linux users can see this tutorial: VirtualBox installation on Ubuntu
Step 3: Oracle VM Virtualbox setup
Run the Virtual Box and click on the New button. after that give some to your machine to identify it later but easily on VirtualBox. For example, we have given “Oracle 7″ you can given whatever you would like. After this, from the ISO image drop-down box click on the ‘Other‘ option and navigate to the Oracle Linux image you have downloaded.
In the Type drop box select Linux, and then check the box given for the “Skip unattended installation” future because don’t want to use that. Finally, click on the “Next” button.

Step 4: Set the RAM
Assign the amount of RAM you want to give to your Oracle Virtual machine. The 2GB is recommended for the proper functioning of an Oracle server with a GUI interface. If you install the minimal version, you can assign a lower amount than this. You can also increase or decrease the assigning of CPU cores as per the requirement.

Step 5: Create a virtual hard disk for Oracle Linux
The next step is to allocate an amount of space for the Oracle server installation. Select the option ‘Create a virtual hard disk now’.
The default file size for storage is 20Gb, use the slider to set the disk size as per your requirements, and click on the Next button.

Step 6: Start the Oracle Linux virtual machine
Now, on the left side, you will see the recently created Oracle virtual machine by you. Click on that and then the green color START button given in the menu of Virtualbox.
Step 7: Oracle Installation
The boot screen of this Oracle server will appear. From the keyboard, use the arrow keys and select the first option “Install Oracle Linux 7.6” Note: The version could be different depending on what you have downloaded.

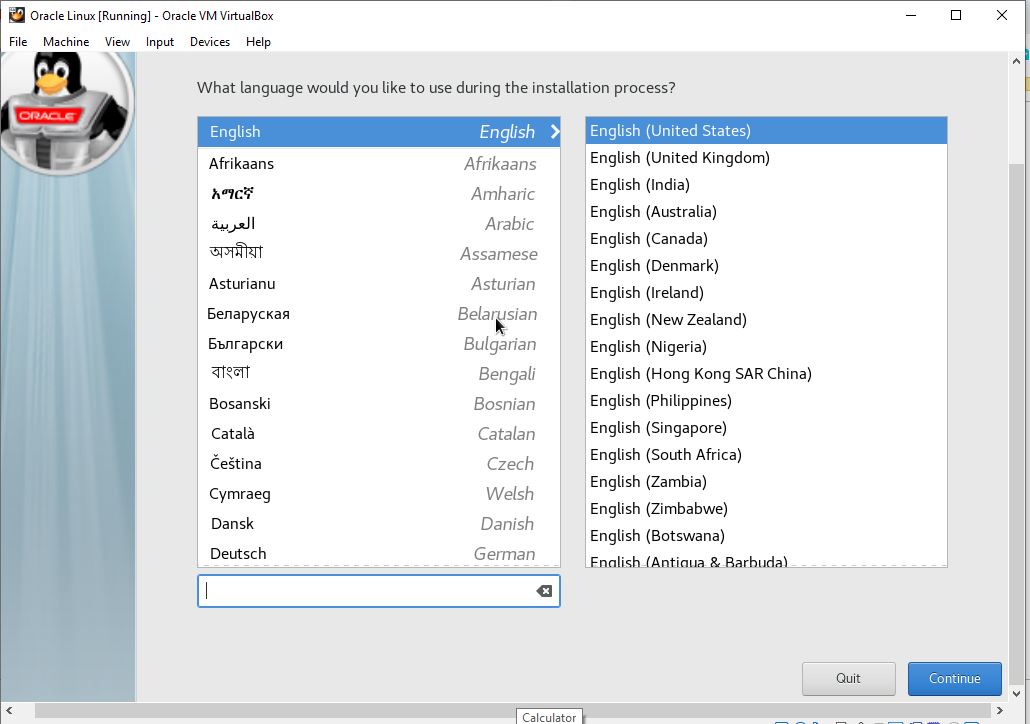
Step 8: Select the Language
The first screen that appears is to set the language for your Oracle server operating system. By default it is English but you can change it. Once you defined your favourite language click on the Continue button.
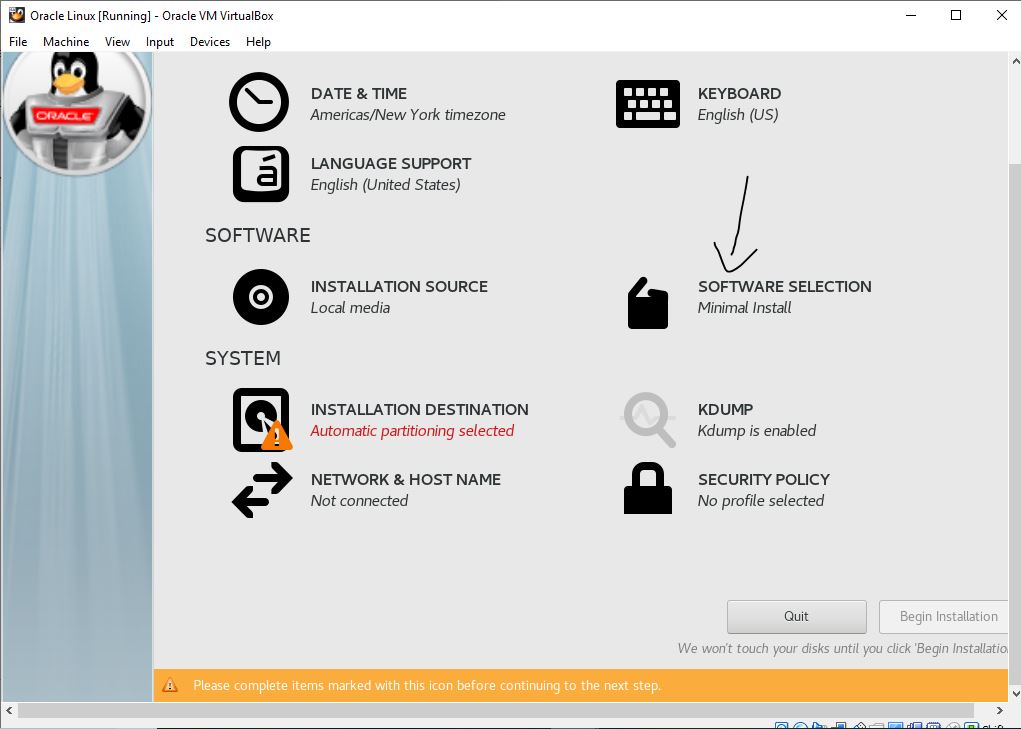
Step 9: Oracle Linux Server GUI
By default, the Oracle server is set to Minimal installation mode which means no Graphical user interface. If you want to install the GUI then click on the Software Selection option.
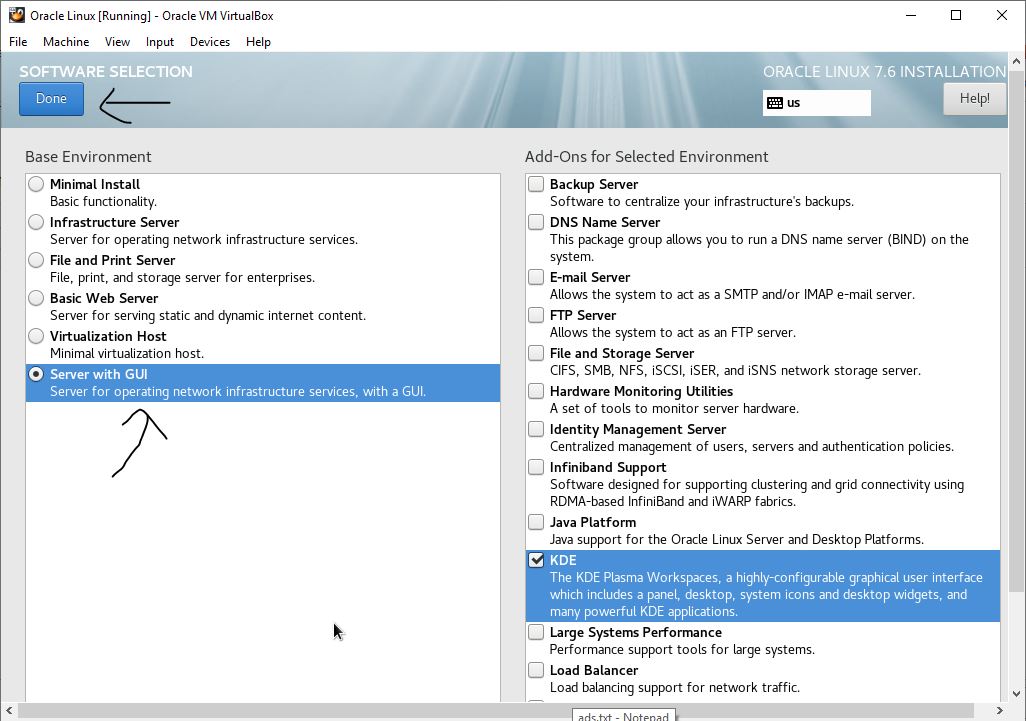
Step 10: Software Selection
The Oracle server offers multiple base environments such as Minimal Install, Infrastructure, File and print server, Basic web server, Virtualization Host, and Server with GUI. As per the server environment, the Add-Ons are also listed on the right side.
Select the Server with GUI and from Add-Ons for Selected Environment – choose any other server software you want to install.
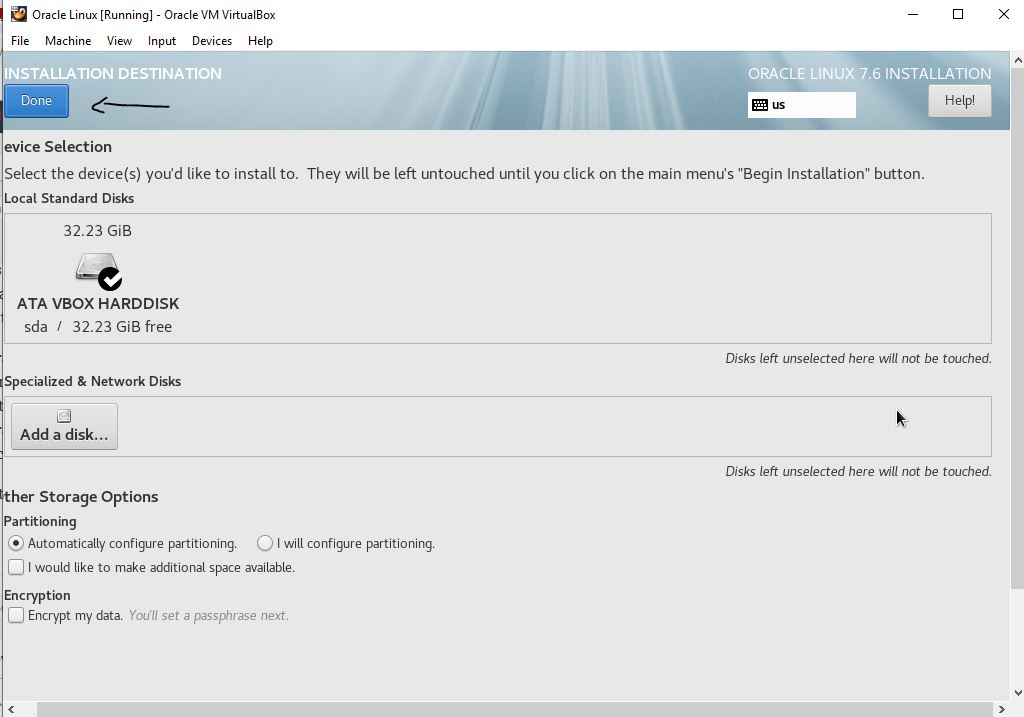
Step 11: Installation Destination
Click on the Installation Destination option to set the partition.
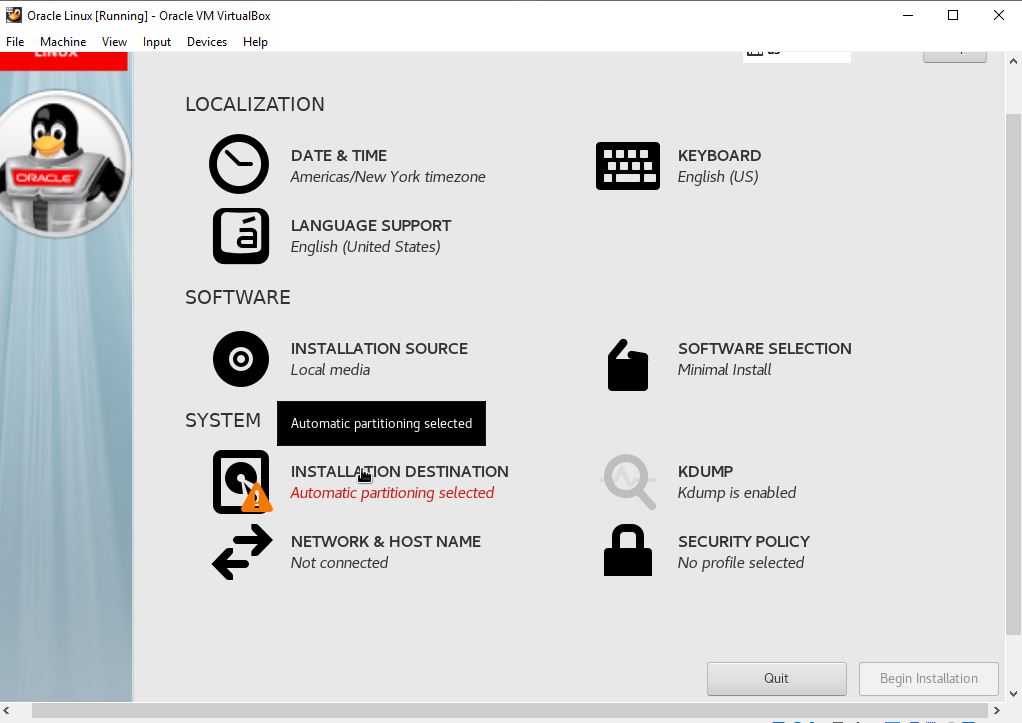
If you want to perform some custom portioning for installation then select “I will configure the partitioning” Otherwise just leave the default option and click the DONE button.
Now click on the Network & Hostname option selection and simply use the toggle button to turn ON for network configuration to get the internet connection.
After all this click on the Begin Installation button.
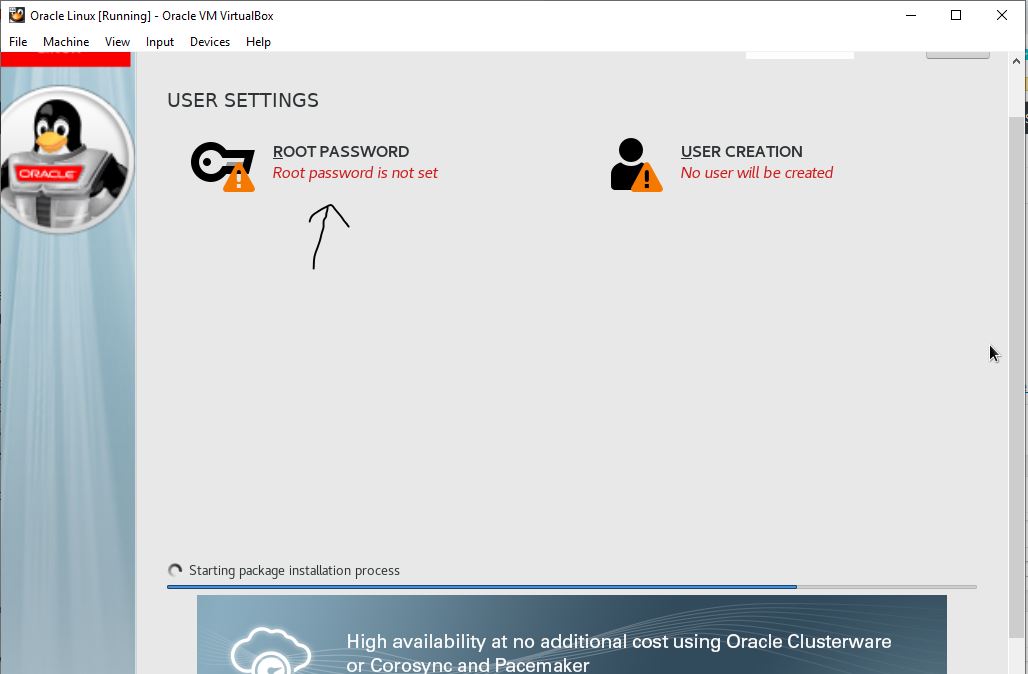
Step 12: Set root Password and User
On the Installation summary screen while the installer installs the Oracle Linux server, let’s set the root password and standard user for Oracle Linux.
To set the root password click on the Root password option. In this same way for the user, select the User creation.
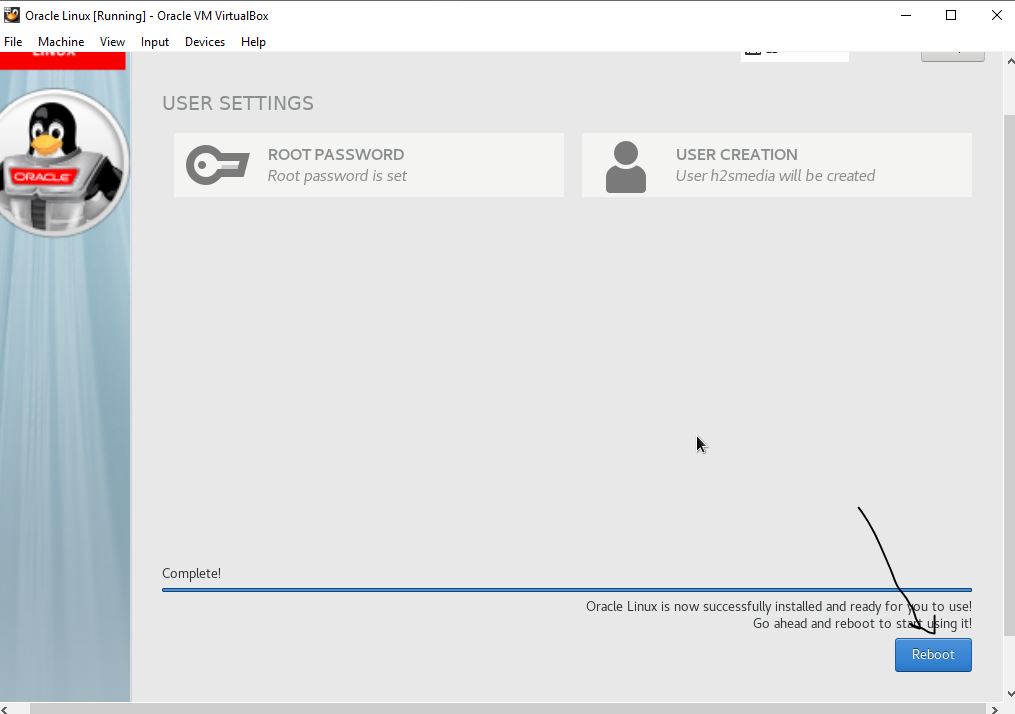
Enter the root password two times and then click on the Done button.

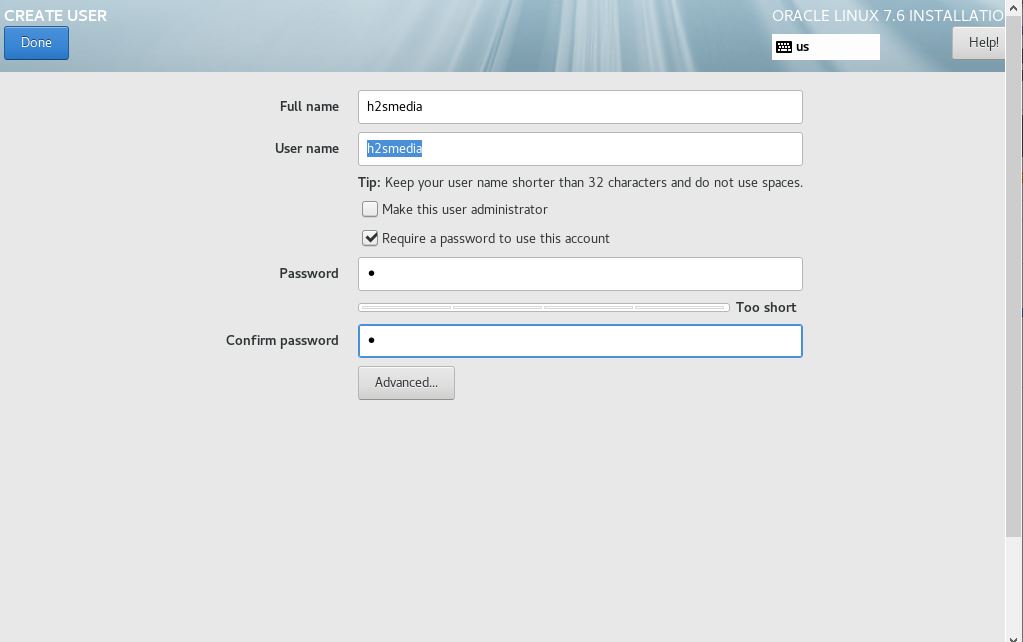
Once the root password setup is done. Go to the User creation and type the full name of the user you want to create on the Oracle server plus the username and password you want to assign to that. Finally, click on the Done button.
Step 13: Reboot
Finally, after the installation is completed we have to click the Reboot button. But before clicking that go to the Devices option in the Menu and remove/unmount the OracleLinux ISO file.
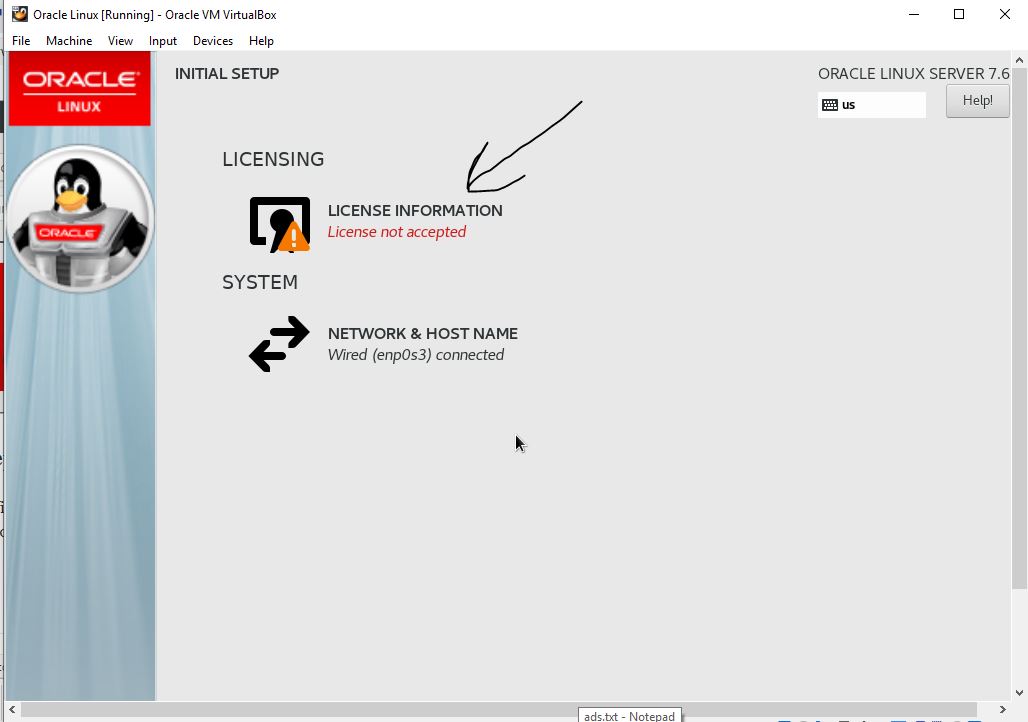
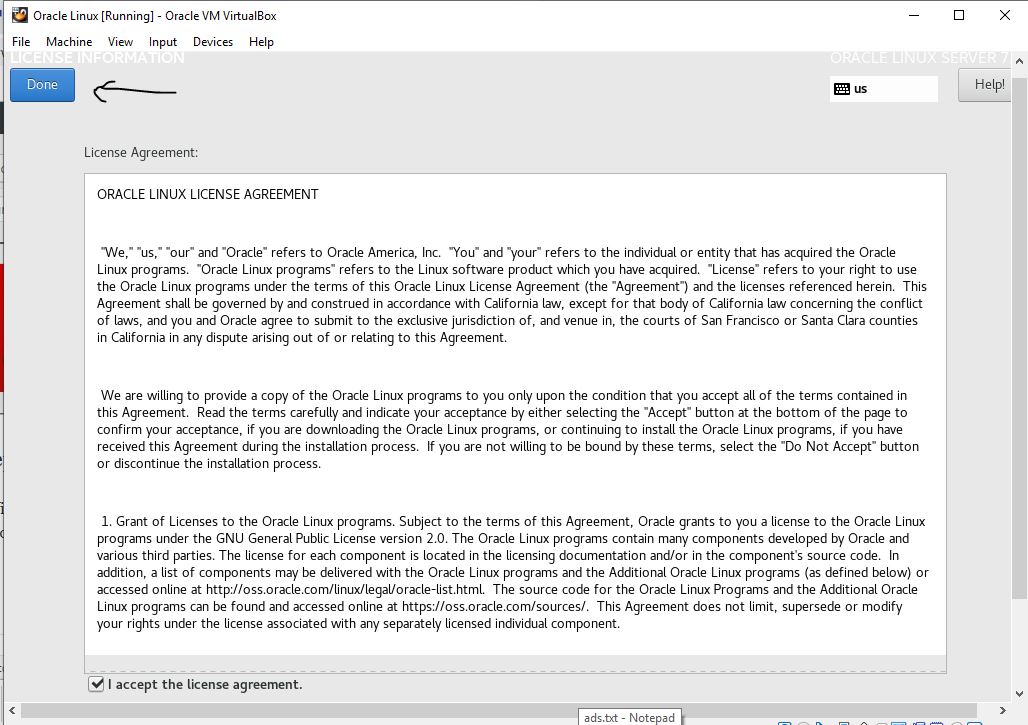
Step 14: Accept the license agreement
The initial step after rebooting is to accept the license to use the Oracle server. Click on the License information and accept the agreement.
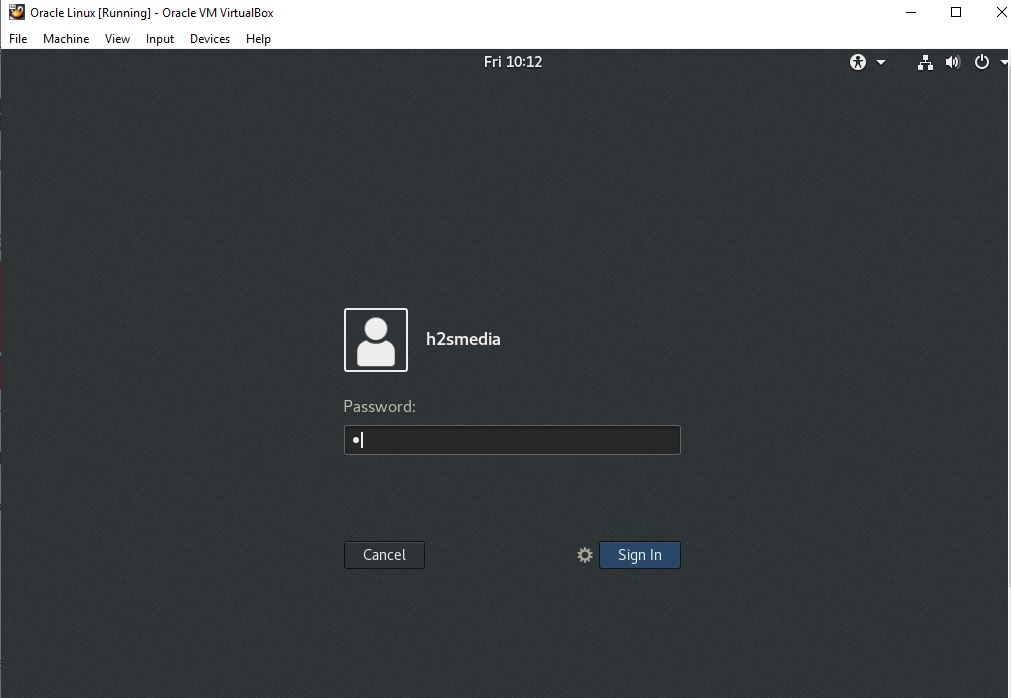
Finally, the Oracle Linux server is successfully installed on VirtualBox. If you want to install it on a real machine, still the steps mentioned here for installation will be the same.

Other useful Tutorials
- Best Free Virtualbox Alternative for Linux
- How to install Bliss os X86 on PC and VirtualBox
- How to use Virtualbox drag and drop from Windows 10 to Ubuntu 18 VM
- Install pfSense on Virtualbox or Vmware player – tutorial
- Install Android VM Image on Virtualbox or Vmware
- Install Portable Virtualbox on USB to Run Virtual Machines Anywhere
Related Posts
How to enable Virtualbox nested VTX/Amd-V on Windows 10/11 or Linux
How to install Winget package manager in Windows 2022 Server
How to View Listening Ports Using Netstat
How to Install Pygame Zero on Windows 11
Single Command to install Android studio on Windows 11 or 10
How to Install DoXygen in Windows 11 or 10