Virtualmin is an Open Source web hosting and cloud control panel available to install on Linux with an automated script. Here we let your know how to install Virtualmin & Webmin on Ubuntu 20.04/18.04 or Debian 9/10 Server
The “VirtualMin” program has proven itself to be able to manage a server online as simply as possible. It allows access to the server via an SSL-encrypted HTTP line (i.e. via a standard browser) and provides a clear user interface. (Almost) all settings and options of the server can be managed and controlled on this. Relatively little technical knowledge is required
Like Webmin, Virtualmin is free, although it has a paid version called Virtualmin PRO that offers specialized support and includes more tools than the normal version.
When you install it, you will be able to manage your domain & website easily. Where Webmin which is a frontend server management tool – will be in charge of providing you with the tools to manage pure server issues; the Virtualmin is an advanced front end virtual host management tool and will be in charge of controlling all the part of emails, web pages, user spaces, etc.
WebMin / VirtualMin Installation on Ubuntu 20.04 or Debian Server
1. Run system update command
First, make sure all the existing packages on your system are up to date. Also, I recommend using a fresh server without any previous installation of any other hosting platform or software.
sudo apt update
2. Download Virtualmin Script
Now, let’s download the script that will atomically install both Webmin and Virtualmin on our Ubuntu 20.04 or Debian server.
sudo apt install wget
wget wget http://software.virtualmin.com/gpl/scripts/install.sh
3. Set Hostname- fully qualified domain
The fully qualified domain which you want to use and managed by Virtualmin has to be set as the hostname for your server where you are planning to install Virtualmin. It could be a subdomain as well. For example- we want to use demo.how2shout.com and managed by Virtualmin. Thus, we set our system hostname to this.
sudo hostnamectl set-hostname demo.how2shout.com
Replace – demo.how2shout.com with your domain or subdomain. Also, make sure the server IP address where you are installing Virtualmin, the A record of Domain is pointed to it via your DNS, usually available from where you have bought your Domain name or with your domain registrar.
4. Change Script permission to make it executable
As we already have the Virtualmin or Webmin installation script on our Ubuntu 20.04 LTS server, let’s change to permission so that we can execute it on the system using sudo rights for the installation of various components.
chmod a+x install.sh
5. Run Webmin & Virtualmin installation script on Ubuntu 20.4
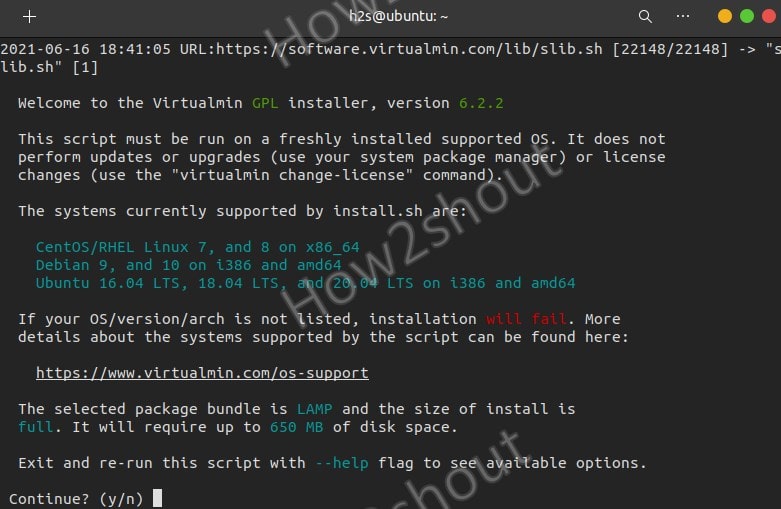
If you are using root user, then you don’t need to use sudo with the following command, however under standard user run it with sudo rights, this will automate the installation process. Everything will be set up from here without having input from you.
sudo ./install.sh
Note: If your domain which is set as hostname couldn’t resolve the pointed Ip-address, then the setup perhaps asks you to enter the domain again manually.
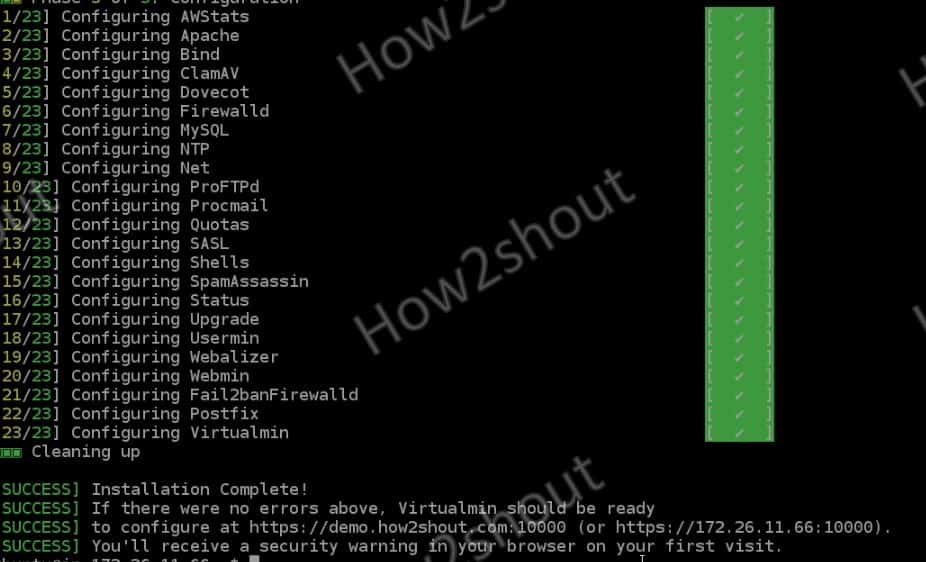
Installation completed.
6. Firewall for Virtualmin on Ubuntu 20.04 or Debian
If you are using a cloud platforms such as Google, Amazon web server, Digital Ocean, or any other, then first you have to open Virtualmin port “10000” in their firewall. However, those who are using Ubuntu’s inbuilt firewall, can use the command:
sudo ufw allow 10000
7. Access Webmin or Virtual Web Interface and log in
Now, its time to access the graphical user interface of the Webmin, just open your browser that can access your server IP address and point to its Ip-address or fully qualified domain you set as the hostname for Virtualmin at port 10000 example-
https://your-server-ip-address:10000

https://your-domain.com:10000
Default Virtualmin / Webmin username and password
As you see the login page, enter your server’s root username and its password. Example username– root password– the one you have set for the root user on your server.
8. Dashboard
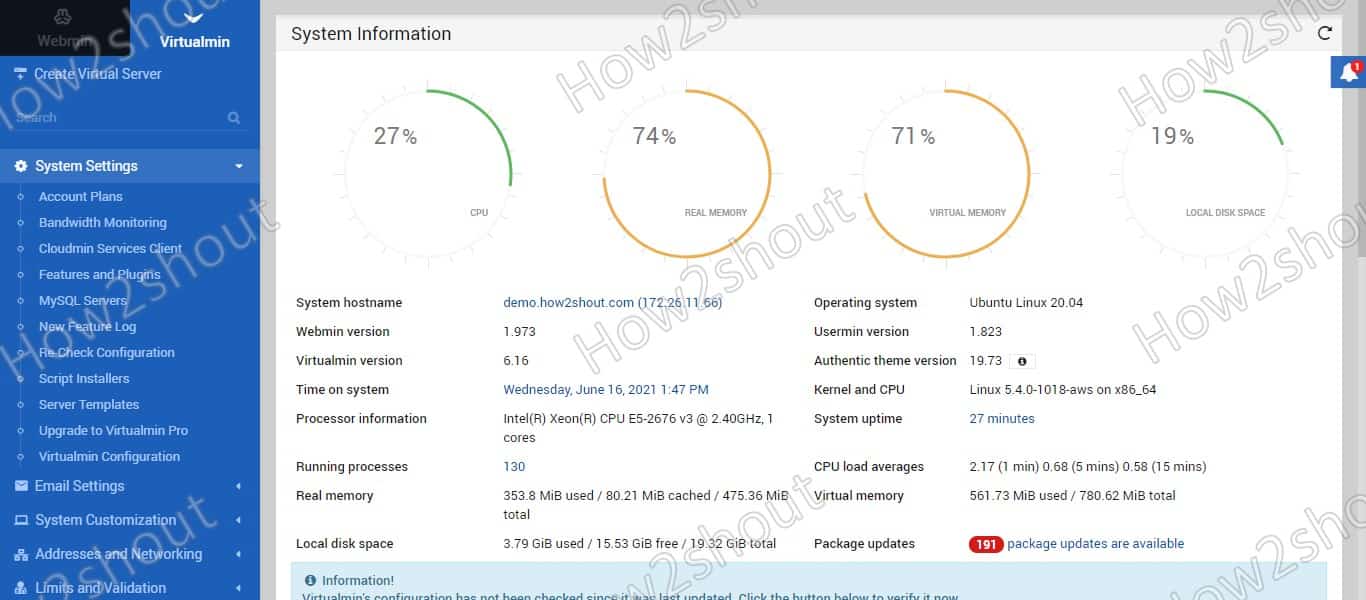
Finally, you will have the Dashboard from where you can access the various settings and options required to start hosting websites.
9. Post-Installation of Virtualmin Server
Step 1: This post-installation wizard allows you to configure Virtualmin optimally for your system. You can make selections depending on whether you want to host websites, email, or databases, and based on your system’s memory and CPU power.
To continue, click the Next button below. To skip it and use the default settings, click Cancel.
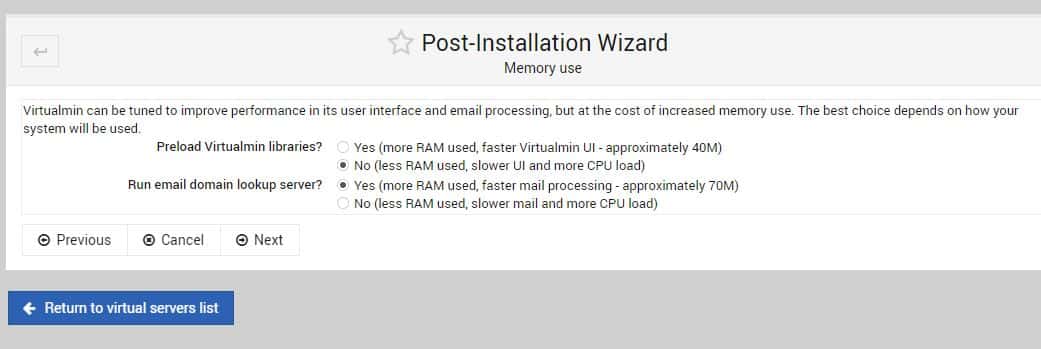
Step 2: Virtualmin can be tuned to improve performance in its user interface and email processing but at the cost of increased memory use. The best choice depends on how your system will be used. Thus, as per your need select the options or leave the default as it is.
Step 3: Enable virus scanning with ClamAV: If your system is going to host domains that will receive a large amount of email, scanning incoming messages for viruses can generate a high CPU load. Because scanning is done using the ClamAV scanning server clamd, it will consume RAM even when not processing email. If your system will not be hosting email, virus scanning can be disabled. Or let it be on-demand scanning
Step 4: Run SpamAssassin server filter? If your system is going to host domains that will receive a large amount of email, filtering incoming messages for spam can generate a significant CPU load. This is due to CPU use by the SpamAssassin mail filter when it is started, which can be avoided by running the SpamAssassin filter server spamd in the background. This consumes RAM, but reduces CPU load and makes mail processing faster.
Step 5: Virtualmin supports both the MySQL and PostgreSQL database servers, but you might want to run only one (or neither) on your system. Each consumes RAM when running, even if they are not being used.
Depending on the websites and applications you plan to host, running MySQL only may be enough, as most web applications do not support or require PostgreSQL. If your system will only be used for mail or DNS hosting, there is no need to run either.
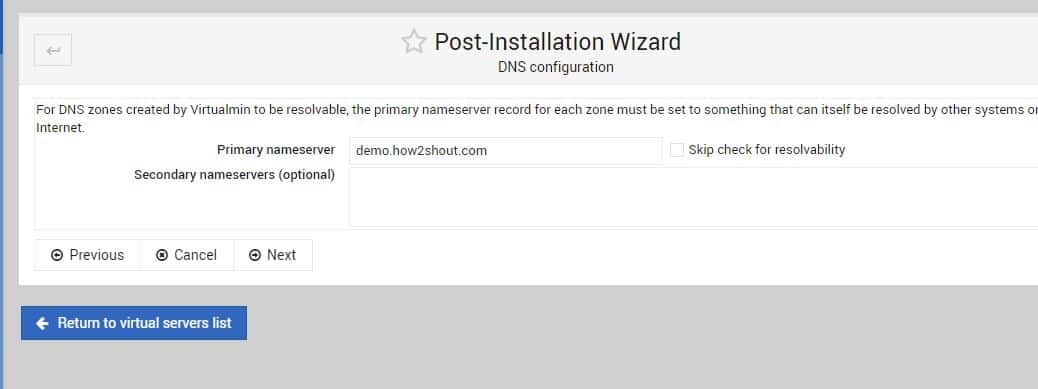
Step 6: For DNS zones created by Virtualmin to be resolvable, the primary nameserver record for each zone must be set to something that can itself be resolved by other systems on the Internet. Just hit the Next button and Virtualmin will automatically set it after ensuring the availability of the same.
Step 7: Virtualmin gives you the option of storing plain-text passwords for virtual servers and mailboxes or storing only one-way encrypted (hashed) passwords. Plain text passwords are more convenient, but less secure if your system is compromised.
Remember: when hashed passwords are used, password recovery for virtual servers will no longer be possible. In addition, the MySQL password for new servers will be different from the administration password and will be randomly generated.
Step 9: Virtualmin can create a default virtual server that will serve web requests to your system that don’t match any other domain. It can also be used to request a Let’s Encrypt SSL certificate for use by Virtualmin’s own UI.
10. Upload files for the website
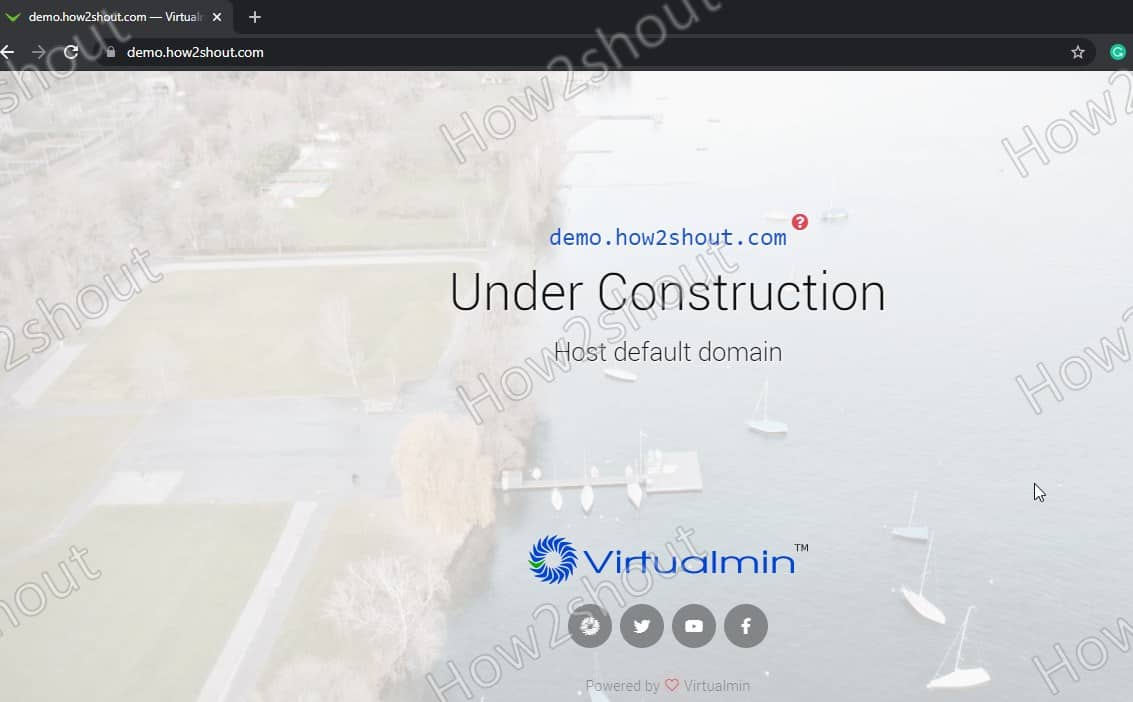
By default, if you access the domain set on Virtualmin, the demo HTML page will appear saying “Under construction”.
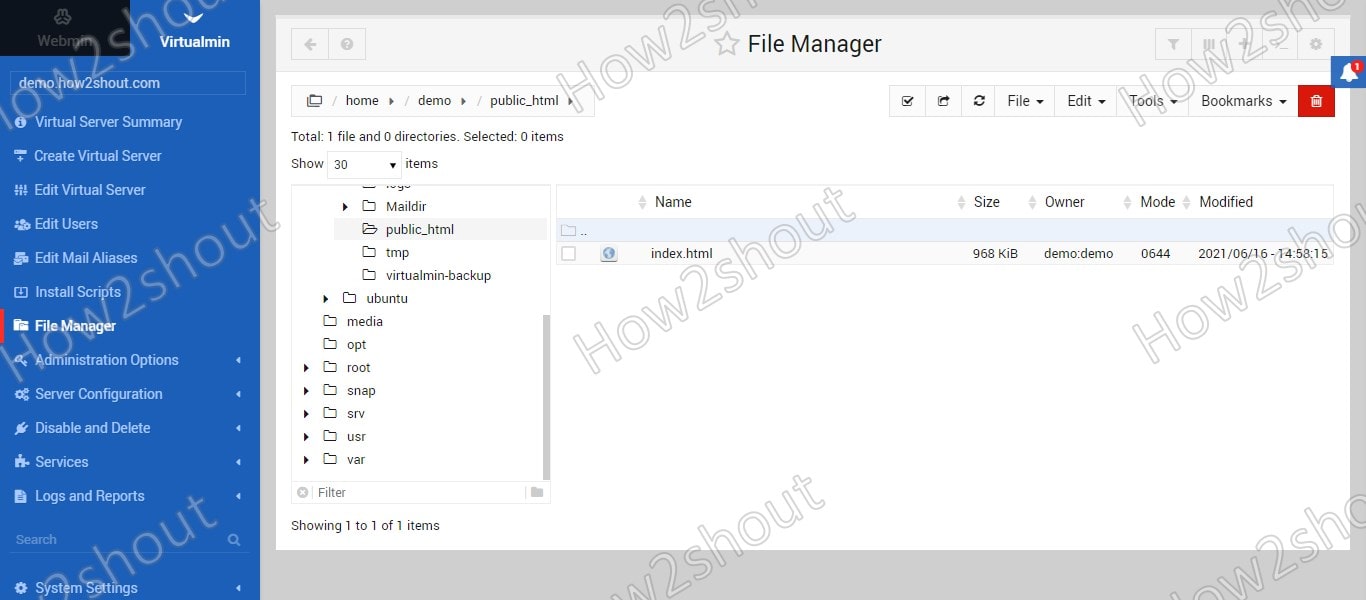
Now, if you want to install any CMS such as WordPress, click on the Filemanager, under Public_html you will find the index.html file. Delete it and upload the WordPress file there by clicking on the File menu and corresponding upload option. Once that is done. Create a database using Webmin. After that refresh, your domain URL showing the Under construction page, and this time you will see the WordPress setup page, furnish the required details.
Ending thoughts:
Although the WHM Cpanel users may find it a little bit tricky to use Webmin and Virtualmin, however, if you don’t want to pay for Cpanel, then this one is a nice option. Nevertheless, Virtualmin is not the only one here, there are much better alternatives available- See our list- Webmin or Virtualmin fee & open source alternatives
Other Articles:
- 6 Best free Cloud hosting Control Panels for Linux Servers in 2021
- What is the DirectAdmin web hosting panel?
- How to install DirectAdmin on AlmaLinux 8
- How to install WHM Cpanel on AlmaLinux 8








Your article was very helpful for me because I am also using Virtualmin for my website. Thank you for this helpful guide.