Note: Upgrading Ubuntu 16.04 LTS to 20.04 LTS can be done by first updating it to Ubuntu 18.04 LTS, thus, we recommend you to backup your data before following the below tutorial and its commands. We will not be responsible for any loss of data…
Recently, Canonical’s developers have announced that Ubuntu 16.04 (Xenial Xerus) will receive ESM (Extended Security Maintenance) support from April 30, 2021. Thus, this Long term supported Linux distro is now on the verge of losing its regular maintenance updates with admission to the ESM program.
If you don’t know what is ESM? It is a period of time offered by Canonical for its Ubuntu LTS systems that have expired the regular LTS support period of 5 years. Companies will continue to receive security updates for a fee. Private users can get ESM support for three instances free of charge. This means the users who still don’t want to upgrade their Ubuntu 16.04 LTS to either 18.04 or 20.04 LTS can continuously use it while having a security update till 2024-04. The last version of Xenial Xerus is Ubuntu 16.04.7.
Upgrade Ubuntu 16.04 LTS to 20.04 LTS Server or Desktop
Well, yes, Canonical continues to offer security updates with ESM, we recommend switching to the current LTS version, i.e Ubuntu 20.04 LTS. For that, either you can perform a clean installation and migrate data from the existing system, however, if you cannot, then upgrading is the best option.
Let’s see how to do that…
1. Run system update & upgrade
The first and most important thing before upgrading the distro is the updating of existing packages to their latest state.
sudo apt-get update
After the above command, run upgrade for installed packages-
sudo apt-get upgrade
reboot
2. Check the available latest version
Now, we run a command to check what latest LTS version is available to install for Ubuntu 16.04. Well, it is 18.04 LTS.
sudo do-release-upgrade -c
3. Upgrade 16.04 to 18.04 LTS
Once you confirmed which version is available to upgrade, let’s run the distro upgrade command that is-
sudo do-release-upgrade
4. Reboot
It will take some time to download all the required packages that help us to migrate our Ubuntu 16.04 to the nearest possible LTS release i.e 18.04. Once that is done, simply reboot your system to make the changes into effect.
5. Check your current OS-version
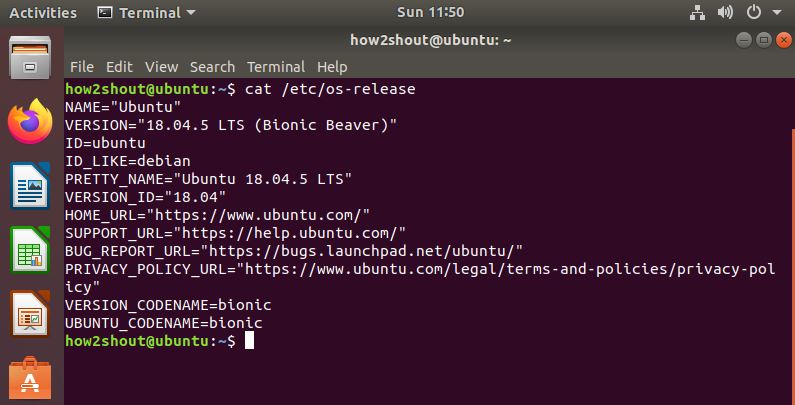
After restarting the system, let’s check whether we have successfully upgraded to Ubuntu 18.04 or not. For that run:
cat /etc/os-release
6. Upgrade Ubuntu 16.04 which is now 18.04 to Ubuntu 20.04 LTS
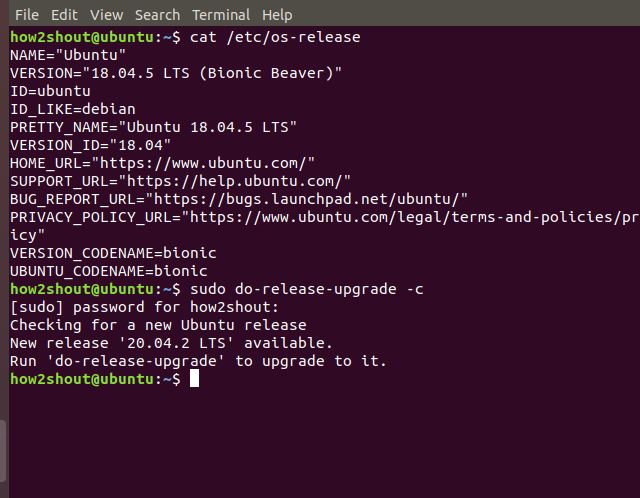
Now, we have upgraded to the nearest Long Term Supported version successfully from here we go further and first check the available distro upgrade for our current OS version.
sudo do-release-upgrade -c
This time you will see, the latest LTS version is available to install for your system is Ubuntu 20.04 LTS, thus, simply run:
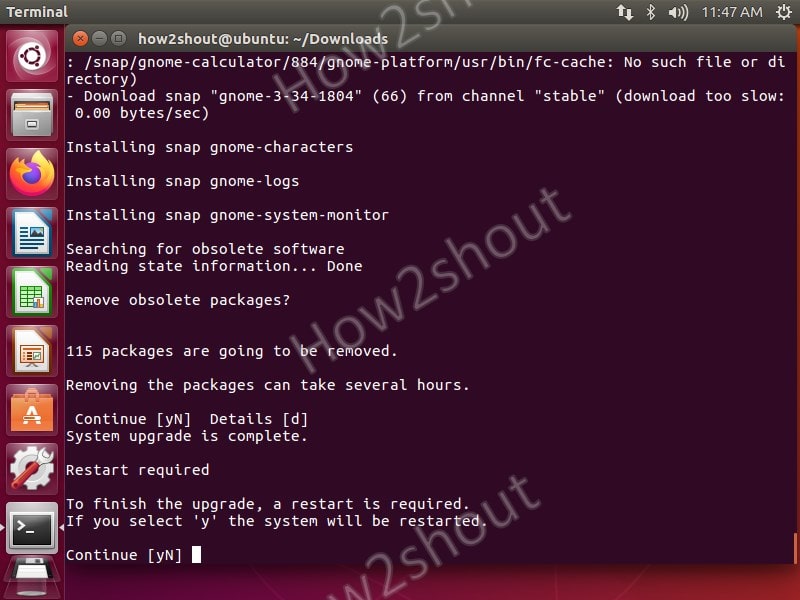
sudo do-release-upgrade
Give your consent by typing y, when it asks for… sit back and relax until the system hasn’t done the process…
7. Restart and check the available OS version
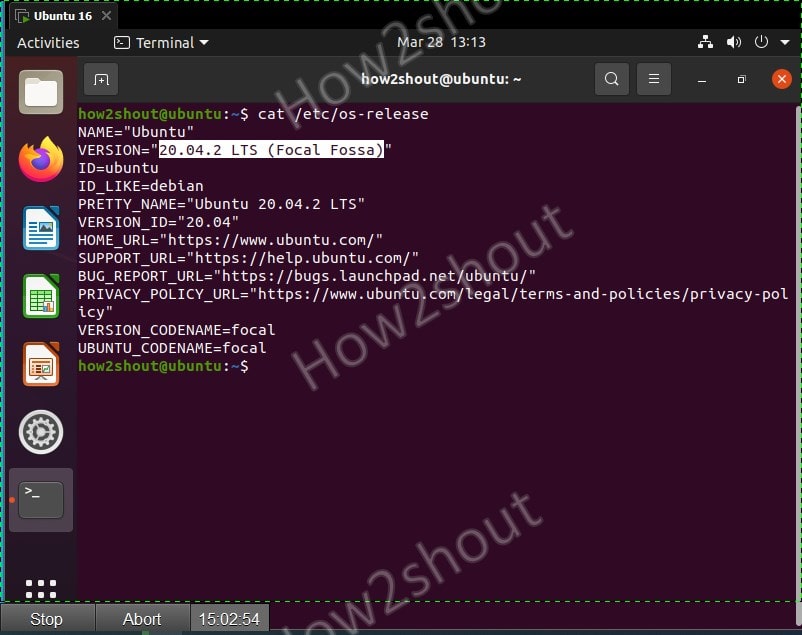
If everything has been done correctly, then the system will soon ask you to reboot it, so that it can apply changes. After that run command to check the current version of your Ubuntu OS.
cat /etc/os-release
Finally, your whole Ubuntu 16.04 Linux has been migrated to the latest Ubuntu 20.04 LTS without performing any fresh installation. However, we didn’t face any problem while performing this tutorial, still, we recommend taking backup of your existing data and crucial application, in case something went wrong…


